
Are you ready to take your musical creativity to the next level? If you’ve ever dreamed of customizing your own J-Bass electronics, you’re in the right place.
Imagine the satisfaction of shaping your bass guitar’s sound exactly how you want it. In this guide, you’ll discover the step-by-step process to build J-Bass electronics by yourself, even if you’re not a tech wizard. You’ll learn the secrets to creating a sound that’s uniquely yours and why it’s easier than you might think.
Dive in and find out how you can transform your playing experience while adding a personal touch to your instrument. Are you excited to get started? Let’s unlock the full potential of your bass guitar together.
Tools And Materials Needed
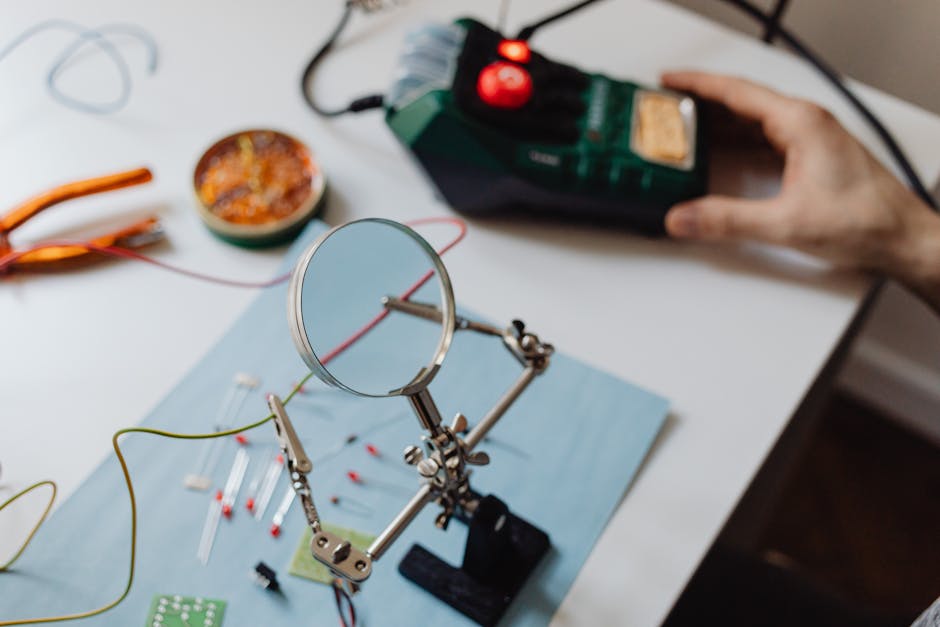
Before you dive into building your own J-Bass electronics, gathering the right tools and materials is crucial. Having everything organized not only saves time but also reduces frustration during the assembly process. Are you ready to see what you need to get started on your DIY project?
Essential Tools
- Soldering Iron:A reliable soldering iron with a fine tip makes connecting components easier and cleaner.
- Wire Cutters and Strippers:These tools help you trim wires to the right length and remove insulation without damaging the wire.
- Multimeter:This device is invaluable for checking continuity, voltage, and resistance during and after assembly.
- Screwdrivers:Small Phillips and flathead screwdrivers are needed for mounting parts and adjusting screws.
- Helping Hands or Third Hand Tool:Holding tiny components steady while soldering can be tricky—this tool makes it much easier.
Required Electronic Components
- Single-Coil Pickups:Typical for J-Bass style sound, usually two pickups are needed.
- Volume and Tone Pots:Usually 250k or 500k potentiometers control your sound levels and tone shaping.
- Output Jack:A standard 1/4 inch mono jack to connect your bass to an amplifier.
- Capacitors:Commonly a 0.047µF or 0.022µF capacitor for tone control filtering.
- Wiring:Shielded wire or cloth-covered wire works best to reduce noise.
- Switches (optional):If you want to add pickup selectors or coil splits.
Additional Supplies
- Heat Shrink Tubing:Protect soldered connections and prevent shorts.
- Electrical Tape:Useful for extra insulation and securing wires.
- Flux:Applying flux before soldering improves joint quality and reduces cold joints.
- Cleaning Supplies:Isopropyl alcohol and a small brush help clean flux residue after soldering.
- Work Mat or Surface:A non-slip, heat-resistant mat keeps your workspace organized and safe.
I remember starting my first J-Bass electronics build without a multimeter, and it cost me hours troubleshooting simple wiring mistakes. Having these tools ready upfront can save you from similar headaches. What part of the build are you most excited to tackle first?
Preparing The Bass Body
Preparing the bass body is a crucial part of building J-Bass electronics yourself. This stage ensures your instrument is ready to house new components securely and function correctly. Paying close attention here will save you headaches later on and improve the overall sound and playability of your bass.
Removing Old Electronics
Start by carefully taking out the existing electronics. Use a soldering iron to desolder wires from pickups, pots, and switches. Keep track of each connection by taking pictures or notes; this helps avoid confusion during reassembly.
Handle the components gently to avoid damaging the wood or cavities. If you find corrosion or rust on metal parts, clean or replace them before moving forward. Removing old electronics is more than just pulling parts out—it’s about preparing a clean slate.
Cleaning The Cavity
Once the old parts are removed, focus on cleaning the cavity inside the bass body. Dust, dirt, and leftover solder can cause poor connections or unwanted noise. Use a soft brush or compressed air to clear out all debris thoroughly.
If you notice any sticky residue or grime, wipe it down with a slightly damp cloth and mild cleaner. Avoid soaking the wood; moisture can damage your bass. A clean cavity ensures smoother installation and better electrical performance.
Checking Wiring Channels
Next, inspect the wiring channels that run beneath the pickguard or body. These channels guide and protect your wires, so they need to be clear and wide enough for smooth wire placement. Blockages or tight spots can pinch wires, leading to shorts or breakage.
Use a small tool like a pick or a plastic stick to clear any obstructions. If the channels seem too narrow, carefully widen them with a fine file or sandpaper. Ensuring proper wiring paths will make your wiring job easier and more reliable.
Wiring Diagram Basics
Understanding the basics of wiring diagrams is key to building your J-Bass electronics. A clear wiring plan helps avoid mistakes and ensures good sound quality. Wiring diagrams show how pickups, controls, and output jacks connect. Each component has specific wires to join for proper function. Simple diagrams make DIY projects easier and more enjoyable.
Focus on each part separately before combining them. This approach helps you learn the role of pickups, volume and tone controls, and output jack connections. Knowing wiring basics saves time and frustration during assembly.
Pickup Wiring
Pickups capture string vibrations and turn them into electrical signals. Each pickup has two wires: hot and ground. The hot wire carries the signal to the controls. The ground wire connects to the circuit’s common ground to reduce noise.
Use shielded wire for better noise protection. Solder the hot wire to the volume pot’s input lug. Connect the ground wire to the pot casing or a common ground point. Keep wires neat and avoid crossing signal wires to prevent hum.
Volume And Tone Controls
Volume controls adjust the output signal level. Tone controls modify the sound’s brightness or warmth. Both use potentiometers (pots) with three lugs.
- Connect the input lug to the pickup’s hot wire.
- Attach the output lug to the next stage, usually the output jack.
- Link the middle lug to the circuit’s capacitor or ground.
Capacitors in tone circuits filter high frequencies. Use the correct capacitor value for the desired tone effect. Secure all solder joints to avoid loose connections.
Output Jack Connections
The output jack sends the signal to your amplifier or pedal. It has two terminals: tip (signal) and sleeve (ground).
- Solder the wire from the volume pot’s output lug to the tip terminal.
- Connect the ground wire from the common ground point to the sleeve terminal.
Check connections with a multimeter before final assembly. Proper wiring here ensures clear and strong sound output. Use strain relief to protect wires from bending or breaking.
Soldering Tips And Techniques
Soldering is a key skill for building J-Bass electronics. Good soldering ensures solid electrical connections and prevents future issues. This section covers essential tips and techniques to help you solder like a pro.
Choosing The Right Solder
Select solder that melts easily and flows well. A 60/40 tin-lead solder is common and reliable. Lead-free solder is safer but may need higher temperatures. Thin solder wire, about 0.6mm to 1mm, works best for electronic parts. Avoid solder with flux cores that leave heavy residue. Rosin-core solder cleans easily and improves connection quality.
Soldering Safety
Work in a well-ventilated area to avoid inhaling fumes. Use a soldering iron stand to prevent burns and accidents. Always wear safety glasses to protect your eyes. Keep flammable materials away from your workspace. Unplug the soldering iron when not in use. Wash your hands after handling solder, especially lead-based types.
Common Mistakes To Avoid
- Applying too much solder can cause shorts between connections.
- Not heating the joint enough leads to weak, cold solder joints.
- Touching the soldering tip to the solder directly without heating the parts first.
- Moving parts before the solder cools causes cracked joints.
- Using a dirty soldering tip reduces heat transfer and solder flow.
Clean the tip regularly with a damp sponge or brass cleaner. Heat the wire and pad together, then apply solder for a strong joint. Practice on spare wires to improve your technique.
Assembling The Circuit
Assembling the J-Bass electronics circuit is a key part of the DIY process. It brings all the components together to create the bass’s unique sound. Careful wiring and solid connections ensure your instrument will perform well and last long.
Focus on clean, organized wiring. Avoid tangled wires and loose connections. Follow the schematic closely to match each component correctly. Take your time and double-check each step.
Wiring The Pickups
Start by soldering the pickup wires to the correct points on the control plate. Usually, the hot wire connects to the volume pot’s input lug. The ground wire must attach to a common grounding point, often the back of a pot.
Use heat shrink tubing or electrical tape to insulate exposed wires. This prevents shorts and noise. Keep pickup wires neat and separate from other cables to reduce interference.
Connecting Pots And Capacitors
Volume and tone pots control the bass’s sound. Connect the pots according to the wiring diagram. Attach capacitors to the tone pot for proper frequency filtering.
Solder each connection firmly, avoiding cold joints. Check that the capacitor leads are oriented correctly if polarity matters. Secure components to the control plate with screws or nuts for stability.
Securing The Output Jack
The output jack sends the bass signal to your amp. Connect the hot wire from the volume pot to the jack’s tip terminal. Attach the ground wire to the jack’s sleeve terminal.
Mount the output jack firmly to the bass body. Loose jacks can cause crackling sounds or signal loss. Test the jack connection with a multimeter before final assembly.
Testing The Electronics
Testing the electronics in your DIY J-Bass is a crucial step before closing up the body. It ensures every wire, pot, and pickup works perfectly, saving you hours of frustration later. You want to catch any issues early, so your bass sounds great and plays smoothly from day one.
Using A Multimeter
A multimeter is your best friend when checking electronics. Set it to measure resistance (ohms) to check pickups and pots. Touch the probes to the terminals and watch the reading—do the values match the expected specs of your components?
For example, a typical J-Bass pickup usually reads between 7k and 10k ohms. If you get a reading close to zero or infinity, it indicates a short or broken wire. This simple tool helps you verify each part works before you solder everything together.
Checking Continuity
Continuity testing confirms that electrical paths are complete and unbroken. Use the multimeter’s continuity mode, which beeps when the circuit is closed. Check all your connections, including grounds, switches, and output jack wiring.
Are any wires loose or touching where they shouldn’t? Continuity testing quickly reveals shorts or open circuits that cause hum or no sound at all. It’s a quick way to double-check your solder joints and wiring harness before assembly.
Troubleshooting Common Issues
If the electronics don’t work as expected, start by isolating the problem. Does the volume pot control output? Does the tone knob affect the sound? Try swapping pickups or bypassing controls to narrow down the faulty part.
Sometimes, cold solder joints cause intermittent issues. Reflow any suspicious solder points with a hot iron. Also, watch out for shielding problems—poor grounding can create annoying noise or hum.
Have you ever found a tiny wire touching the wrong lug and spent hours wondering why your bass was silent? Testing thoroughly saves you that headache. Be patient and systematic—your ears will thank you once everything clicks perfectly.
Final Installation
The final installation stage brings all your hard work together. This step ensures your J-Bass electronics fit perfectly and work as expected. Careful handling and precise placement are key here. Follow each part closely for a smooth finish.
Mounting The Electronics
Place the pre-wired electronics into the control cavity gently. Align the pots and switches with their holes on the pickguard. Secure each component using the correct screws. Avoid over-tightening to prevent damage. Check that wires are not pinched or stretched.
Reassembling The Bass
Set the pickguard back onto the bass body carefully. Make sure all holes line up perfectly. Screw the pickguard firmly but softly. Reattach the strings and tune the bass. Ensure the neck and body fit without gaps or pressure.
Final Sound Check
Plug your bass into an amplifier. Test all controls for smooth operation. Listen for clear, strong sound without hum or crackle. Adjust the volume and tone knobs. Play a few notes to confirm the electronics work well.
Upgrading And Customizing
Upgrading and customizing your J-Bass electronics can transform your instrument from basic to truly personal. This process lets you tailor the sound and feel to fit your style perfectly. You’ll find that even small changes in pickups or controls can make a huge difference in tone and playability.
Choosing Different Pickups
Your pickups shape the core of your bass’s sound. Swapping out the stock pickups for higher-quality or specialty types can give you brighter highs, deeper lows, or a more vintage vibe.
Consider pickups with different magnet types like Alnico or ceramic. Each offers distinct tonal characteristics, so think about what suits your music style best. Have you tried a set of single-coil pickups versus humbuckers? The difference in noise and warmth can change your playing experience entirely.
Adding Active Electronics
Active electronics add power and flexibility to your bass. They include onboard preamps and sometimes EQ circuits that boost your signal and shape your tone more precisely.
If you want more control over your sound, adding active electronics is a smart move. You can boost or cut frequencies on the fly, which is great for adapting to different venues or jam sessions. Think about how many bands you’ve played with—wouldn’t it be useful to dial in your tone quickly without adjusting amps?
Customizing Tone Controls
Standard tone controls can feel limited. Customizing them lets you experiment with different capacitor values or add extra knobs for midrange boost or bass cut.
Changing your tone control setup can unlock sounds you didn’t think were possible. For example, swapping a 0.047 µF capacitor for a 0.022 µF can brighten your sound noticeably. What if you could fine-tune your mids instead of relying solely on bass and treble? Adding a midrange control can open new sonic doors.
Frequently Asked Questions
What Materials Are Needed For J-bass Electronics Diy?
You need potentiometers, capacitors, output jack, wiring, and a pre-wired pickup. Also, gather soldering tools and a multimeter for testing connections.
How Do I Wire J-bass Pickups Correctly?
Connect pickups to volume pots first, then to the tone pot. Finally, wire the output jack following the schematic carefully for proper signal flow.
Can I Use Any Potentiometer Values In J-bass Electronics?
Typically, use 250k or 500k pots for J-Bass. These values affect tone and output; 250k is standard for a warmer sound.
How Do I Troubleshoot Wiring Issues In J-bass Diy?
Check all solder joints for cold solder or breaks. Use a multimeter to test continuity and verify correct wiring against the schematic.
Conclusion
Building J-Bass electronics yourself saves money and teaches valuable skills. Step by step, you control the sound and quality. It feels great to play an instrument you built. Take your time and enjoy the process. Small mistakes happen, but they help you learn.
Soon, your bass will have a unique voice. Stay patient and keep practicing your wiring skills. This project brings satisfaction beyond buying parts ready-made. Your J-Bass will sound just the way you want. Give it a try—you might surprise yourself.


