
Are you tired of guessing whether your electronic components are working or not? Imagine having the power to quickly and accurately check resistors, capacitors, diodes, and more—all with one simple tool.
Testing your components with a multimeter not only saves you time and money but also boosts your confidence in every project you tackle. In this guide, you’ll discover easy, step-by-step methods to test different electronic parts like a pro. Keep reading, and you’ll never be left wondering if your components are good or faulty again.

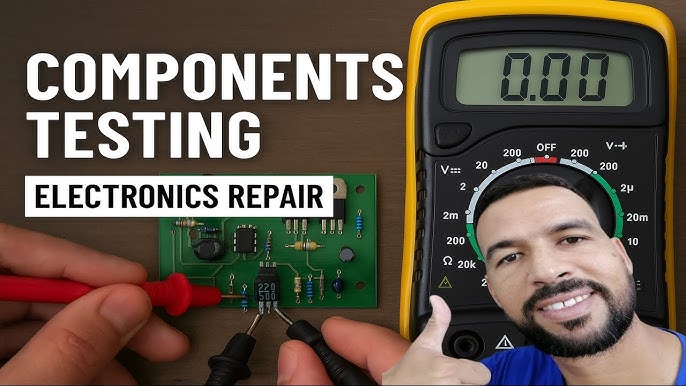
Credit: www.youtube.com
Choosing The Right Multimeter
Choosing the right multimeter is a crucial first step before testing any electronic components. The tool you pick will directly affect how easy and accurate your measurements are. With so many types available, it’s important to know what features matter most for your specific needs.
Understanding Your Measurement Needs
Think about the components you will test most often. Are you working with simple circuits or complex electronics? This will determine whether you need a basic multimeter or one with advanced functions like frequency or capacitance measurement.
For example, if you’re testing resistors and batteries regularly, a basic multimeter with voltage, current, and resistance settings might be enough. But if you plan to work on microcontrollers or sensitive devices, look for a model with higher accuracy and more features.
Digital Vs. Analog Multimeters
Digital multimeters (DMMs) are more common today because they are easier to read and often more accurate. They display numeric readings, which reduce the chance of human error.
Analog multimeters use a needle to show measurements and can be better for observing trends or fluctuations in signals. However, they are less precise and harder to interpret for beginners. Which type do you feel comfortable using?
Key Features To Look For
- Auto-ranging:Automatically selects the correct measurement range, saving time and avoiding mistakes.
- Display quality:A clear, backlit display helps you see readings in low light or tight spaces.
- Durability:A rugged build and protective casing are important if you work in tough environments.
- Safety ratings:Check for CAT ratings that match your work environment to prevent accidents.
I once bought a cheap multimeter without auto-ranging. It slowed me down because I had to manually switch ranges, often guessing incorrectly. Investing in a multimeter with this feature made testing much faster and less frustrating.
Safety Precautions
Testing electronic components with a multimeter requires careful attention to safety. Electrical devices and circuits can pose risks like shocks or damage. Taking proper precautions protects you and your equipment.
Understanding safety rules helps avoid accidents and errors. Always prepare your workspace and tools before starting tests. Follow simple safety steps to create a secure testing environment.
Use Proper Protective Gear
Wear insulated gloves to avoid electric shocks. Safety glasses protect your eyes from sparks or debris. Avoid loose clothing that can catch on components.
Check The Multimeter Condition
Inspect the multimeter and probes for damage before use. Cracked cases or frayed wires can cause electric shock. Replace faulty parts immediately to stay safe.
Turn Off Power Before Testing
Always switch off the circuit or device before connecting the multimeter. Testing live circuits increases the risk of injury and damage. Use the correct setting on your multimeter for the measurement.
Avoid Measuring High Voltage Without Experience
High voltage circuits can be dangerous for beginners. Only test high voltage if you know proper safety methods. Use a multimeter rated for the voltage level you measure.
Work In A Clean, Dry Area
Keep your workspace free from clutter to prevent accidents. Avoid testing components in wet or damp places. Moisture increases the risk of electric shock.
Follow Manufacturer Instructions
Read the multimeter manual carefully before use. Follow all guidelines for safe operation and maintenance. Proper use extends tool life and keeps you safe.
Testing Resistors
Testing resistors with a multimeter helps check if they work correctly. Resistors control the flow of electric current in circuits. Measuring their resistance ensures they match their rated values. Faulty resistors can cause devices to fail or behave oddly. A multimeter makes testing simple and accurate.
Measuring Resistance
Start by turning off power to the circuit. Remove the resistor from the circuit if possible. Set the multimeter to the resistance (ohms) setting. Connect the multimeter probes to each end of the resistor. Read the value shown on the display.
Compare this reading to the resistor’s color bands or label. Small differences are normal due to tolerance. Large differences indicate a problem. Keep probes steady for an accurate reading. Note that the resistor must be cool and dry.
Identifying Faulty Resistors
A resistor is faulty if the reading is very high or zero. Infinite resistance means the resistor is broken open. Zero or very low resistance means it is shorted. Both faults disrupt the circuit’s function. Visual signs include burn marks or discoloration.
Replace any resistor that does not meet its expected resistance. Always test resistors before assuming other parts are faulty. This saves time and prevents unnecessary repairs. Use your multimeter to quickly find problems in circuits.
Testing Capacitors
Testing capacitors with a multimeter is a crucial skill for anyone working with electronics. Capacitors can fail in subtle ways that affect your circuit’s performance, so knowing how to test them accurately saves time and frustration. Let’s look at practical ways to check if your capacitors are working properly.
Checking Capacitance
Start by setting your multimeter to the capacitance testing mode if it has one. This mode measures how much electric charge the capacitor can store, which is its main function.
Connect the multimeter leads to the capacitor terminals—polarity matters for electrolytic capacitors, so match positive to positive and negative to negative. The reading should be close to the value printed on the capacitor.
If the reading is significantly lower or higher, the capacitor may be faulty. I once found a capacitor labeled 100µF showing only 50µF on my meter—replacing it fixed my circuit instantly.
Detecting Leaky Capacitors
Leaky capacitors allow current to pass through when they shouldn’t, causing voltage drops or circuit instability. To detect leakage, switch your multimeter to the resistance (ohm) mode.
Place the leads on the capacitor terminals and observe the reading. A good capacitor usually shows a high resistance that gradually increases as it charges from the meter’s battery.
If the resistance stays low or fluctuates wildly, the capacitor is leaking current and needs replacement. Have you ever struggled with a circuit that randomly resets? A leaky capacitor might be the silent culprit.
Testing Diodes
Testing diodes with a multimeter helps confirm their proper function. Diodes allow current flow in one direction only. A multimeter can check this by measuring voltage and resistance. Knowing how to test diodes avoids circuit issues and saves time.
Checking Forward Voltage
Set your multimeter to the diode testing mode. Connect the positive probe to the diode’s anode. Connect the negative probe to the cathode. The multimeter shows the forward voltage drop. A good silicon diode usually reads about 0.6 to 0.7 volts. If the reading is much higher or shows no value, the diode may be faulty.
Identifying Reverse Bias
Reverse the probes: positive to the cathode, negative to the anode. The multimeter should display no conduction, often shown as “OL” or a very high resistance. This means the diode blocks current in the reverse direction. If it shows a low reading, the diode is damaged and leaking current both ways.
Testing Transistors
Testing transistors with a multimeter is a vital skill for electronics troubleshooting. Transistors control current flow in circuits and can fail over time. Using a multimeter helps identify faulty transistors quickly. This section explains how to test transistors and understand their key properties.
Determining Npn And Pnp Types
Transistors come in two main types: NPN and PNP. Identifying the type is crucial before testing. Use the multimeter’s diode mode for this task.
- Place the positive lead on the transistor’s base pin.
- Touch the negative lead to the emitter and then the collector.
- If the multimeter shows a voltage drop (around 0.6 to 0.7V), the transistor is NPN.
- Reverse the leads and repeat the test.
- If the voltage drop appears with reversed leads, the transistor is PNP.
This simple test helps avoid confusion when measuring transistor parameters.
Checking Transistor Gain
Transistor gain, or hFE, measures how well the transistor amplifies current. Many multimeters have a special socket for this test.
- Insert the transistor’s leads into the correct hFE socket on the multimeter.
- Set the multimeter to the hFE measurement mode.
- Read the displayed gain value on the screen.
A typical gain value ranges from 20 to 300. A very low or zero reading often indicates a damaged transistor.
Testing Inductors
Testing inductors is a key part of troubleshooting electronic circuits. Inductors store energy in a magnetic field when current flows through them. Over time, they can develop faults like shorts or open circuits. Using a multimeter helps identify these issues and ensures the inductor works correctly.
Measuring Inductance
Some advanced multimeters have an inductance measurement function. This tool shows how much inductance the coil has in henrys (H). First, set the multimeter to the inductance mode. Connect the test leads to the inductor terminals. The reading should match the inductor’s rated value. A very low or zero reading can mean a damaged coil. If your multimeter lacks this feature, use an LCR meter instead.
Identifying Shorted Inductors
Shorted inductors cause circuit problems by allowing too much current. To check for shorts, set the multimeter to resistance (ohms) mode. Place the test leads on the inductor terminals. A reading near zero ohms means the coil is shorted. A good inductor usually shows some resistance but not zero. If the multimeter shows infinite resistance, the coil is open or broken. This simple test quickly finds faulty inductors.

Credit: www.youtube.com
Testing Integrated Circuits
Testing integrated circuits (ICs) with a multimeter can seem tricky at first. These tiny chips handle complex tasks, so verifying their condition is important before moving forward with any project. By checking basic connections and functionality, you can save time and avoid costly replacements.
Basic Continuity Checks
Start by examining the IC pins for continuity. Use your multimeter’s continuity mode to check if each pin connects properly to the circuit or to adjacent pins as expected.
Look out for unexpected shorts between pins that shouldn’t be connected. This can indicate internal damage or soldering issues. Also, verify that pins meant to connect to ground or power rails show proper continuity.
Keep in mind that continuity checks won’t tell you if the IC works perfectly, but they help spot obvious faults fast. Have you noticed how a simple continuity test often saves hours of troubleshooting?
Testing Ic Functionality
Assessing the actual function of an IC is more complex but still doable with a multimeter and a good datasheet. Identify key pins like power, ground, input, and output.
Measure the voltage at power pins to ensure the IC is powered correctly. Check the input pins for the proper signals, then look for corresponding changes at the output pins.
If the output doesn’t respond as expected, the IC may be faulty or the surrounding components might be causing issues. Testing ICs this way requires patience and careful observation, but it can reveal much about the chip’s health without expensive equipment.
Troubleshooting Common Issues
Troubleshooting issues while testing electronic components with a multimeter can be challenging. Many beginners face confusion interpreting readings or getting unstable results. Understanding common problems helps solve them quickly.
This section explains how to read multimeter values correctly and manage inconsistent measurements. These tips improve accuracy and confidence during testing.
Interpreting Multimeter Readings
Multimeter readings show voltage, current, or resistance values. Knowing what each number means is important. Different components have expected ranges. For example, a resistor shows resistance in ohms, while a diode shows voltage drop.
Look at the unit displayed next to the number. V means volts, A means amps, and Ω means ohms. Check the multimeter mode matches the component you test. A wrong mode gives wrong results.
Compare the reading to the component’s datasheet or standard values. If a reading is zero or very high, the component might be faulty or disconnected. Use your knowledge of circuits to decide.
Handling Inconsistent Measurements
Inconsistent readings occur due to loose connections or weak batteries. Check the test leads and probes for damage or dirt. Clean or replace them if needed.
Hold the probes steadily on the component terminals. Moving probes cause unstable values. Avoid touching metal parts with your fingers to prevent interference.
Set the multimeter to the correct range for the expected value. Automatic range mode helps but can sometimes be slow or jumpy. Manually selecting a range gives faster, stable readings.
Test the multimeter on a known good component or battery to check if it works properly. Replace the multimeter battery if readings become weak or erratic.

Credit: www.youtube.com
Frequently Asked Questions
How Do I Test A Resistor With A Multimeter?
To test a resistor, set the multimeter to the resistance mode (Ω). Connect the probes to both ends of the resistor. The reading should match the resistor’s value within its tolerance range, indicating it is functional.
Can I Test Capacitors Using A Multimeter?
Yes, set the multimeter to capacitance mode if available. Connect the probes to the capacitor terminals. A correct reading shows the capacitor’s capacitance value. If the reading is zero or infinite, the capacitor may be faulty.
How To Check A Diode Using A Multimeter?
Set the multimeter to diode mode. Place the red probe on the anode and black on the cathode. A forward voltage drop between 0. 5V to 0. 8V indicates a good diode. Reverse the probes; it should show no conduction.
What Is The Best Multimeter Setting For Testing Transistors?
Use the diode test mode to check transistors. Test the base-emitter and base-collector junctions like diodes. A good transistor shows a voltage drop in one direction and open circuit in the other.
Conclusion
Testing electronic components with a multimeter is simple and useful. You can check resistors, capacitors, diodes, and more. Always turn off power before testing to stay safe. Use the right multimeter settings for each component. Practice helps you get faster and more confident.
This skill saves time and money during repairs. Keep your multimeter handy for quick checks anytime. Understanding these basics makes electronics easier to handle. Try testing different parts today and see the difference.


