
If you want your electronic projects to work perfectly, learning how to properly solder electronic components is a must. Soldering might seem tricky at first, but with the right steps, you can create strong, reliable connections every time.
Imagine avoiding frustrating mistakes that waste your parts and time. This guide will walk you through simple, clear instructions that make soldering easy, even if you’re a beginner. Ready to master a skill that brings your circuits to life? Keep reading, and you’ll gain the confidence to solder like a pro.

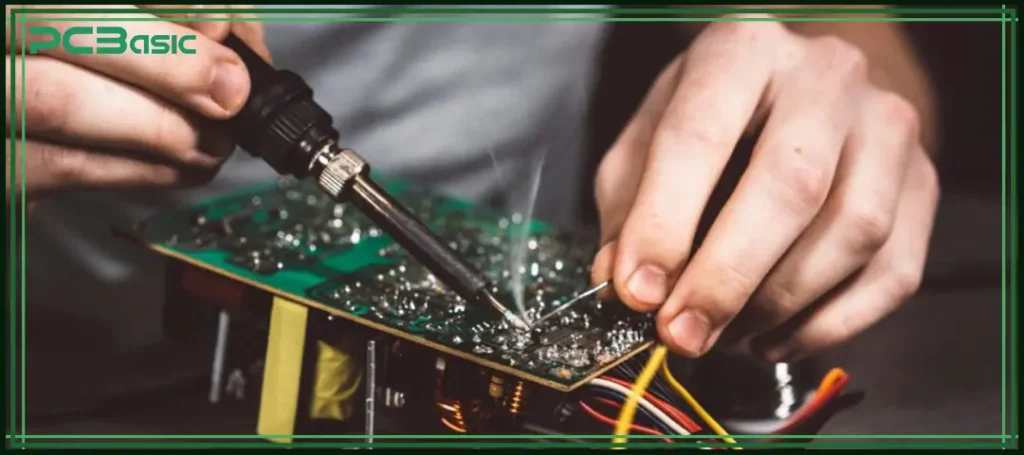
Credit: www.viasion.com
Essential Tools For Soldering
Having the right tools at hand makes soldering electronic components much easier and more precise. Without essential equipment, you might struggle to create clean, reliable connections. Let’s look at the core tools you need to get your soldering projects done right.
Soldering Iron Types
Your choice of soldering iron affects both comfort and quality. A basic fixed-temperature iron works well for beginners, but a temperature-controlled soldering station gives you more precision.
Consider a soldering iron with adjustable wattage between 20W and 60W for most electronics work. A fine tip helps when working with small components, while a broader tip suits heavier wires.
Solder Wire Options
Not all solder wire is created equal. Lead-free solder is safer for health and environment, but some find it harder to work with than traditional leaded solder. Pick solder with a flux core—this cleans the joint as you solder, improving adhesion.
Diameter matters too: 0.6mm to 0.8mm is ideal for most circuit board work. Too thick, and you risk making blobs; too thin, and feeding solder becomes tedious.
Desoldering Tools
Fixing mistakes is part of soldering, so desoldering tools are a must. A solder sucker or pump quickly removes molten solder, letting you free a component without damage.
Desoldering braid (wick) is another handy option. It soaks up excess solder from tight spots. You’ll find these tools save time and frustration during repairs or adjustments.
Safety Equipment
Protecting yourself is often overlooked but crucial. Always wear safety glasses to shield your eyes from splashes or fumes. Good ventilation prevents inhaling harmful smoke from melting flux and solder.
A fume extractor or even a small fan directing fumes away from your face can make a big difference in comfort. Don’t forget heat-resistant gloves if you’re new and worried about burns.

Credit: www.viasion.com
Preparing For Soldering
Proper preparation sets the stage for successful soldering. Taking time to prepare makes solder joints strong and neat. It also helps avoid mistakes and damage to parts. This section covers key steps before touching the soldering iron.
Workspace Setup
Choose a clean, well-lit area to work in. Keep your workspace free of clutter. Use a heat-resistant mat or surface to protect your table. Have good ventilation to avoid fumes from solder and flux. Arrange tools like soldering iron, solder wire, and tweezers within easy reach. A small fan or fume extractor can improve air flow. Safety glasses protect your eyes from solder splashes. Organize parts and components in small containers to avoid mix-ups.
Component Preparation
Check each electronic part for damage before soldering. Remove any dirt or grease with isopropyl alcohol and a cloth. Bend component leads carefully to fit the circuit board holes. Trim excess lead length with wire cutters for a clean fit. Identify the polarity of components like diodes and capacitors. Place each part in the correct orientation on the board. Secure parts gently with tape or a holder to prevent movement during soldering.
Pre-tinning Wires
Pre-tinning means coating wires with solder before joining. Strip about 1/4 inch of insulation from wire ends. Twist wire strands tightly to avoid fraying. Heat the wire tip with the soldering iron briefly. Apply solder to the heated wire until it is shiny and coated. Pre-tinned wires make better electrical contact and easier soldering. Avoid overheating wires to prevent damage or weak joints. Let wires cool naturally before connecting to components.
Basic Soldering Techniques
Mastering the basics of soldering is essential for anyone working with electronics. These fundamental techniques ensure your connections are strong, reliable, and long-lasting. Let’s dive into how you can achieve perfect solder joints, avoid common pitfalls, and manage heat effectively during soldering.
Creating A Good Solder Joint
A good solder joint looks smooth and shiny, not dull or grainy. Start by cleaning the component leads and the PCB pads to remove any dirt or oxidation. Heat the joint by placing the soldering iron tip on both the lead and the pad simultaneously, then apply solder to the heated area—not directly to the iron.
Make sure the solder flows evenly around the joint, covering it completely without blobs or gaps. A proper joint should have a concave shape, like a small volcano, ensuring strong electrical and mechanical connection. Ask yourself: does the joint look uniform and solid, or is it uneven and fragile?
Avoiding Cold Joints
Cold joints occur when the solder doesn’t melt properly or the parts move while cooling. These joints look rough, cracked, or have a frosty appearance and often cause intermittent or failed connections. To prevent this, maintain steady heat and avoid moving the components until the solder has fully cooled.
Keep your soldering iron clean and at the right temperature, typically between 350°C and 400°C, depending on the solder type. If you notice a cold joint, reheat it and add a little fresh solder to fix the issue. Think about whether your joints feel secure when gently tested or if they easily break—this can signal a cold joint problem.
Heat Management
Too much heat can damage sensitive components or lift PCB pads, while too little heat leads to poor solder flow. Use a soldering iron with adjustable temperature control to match your specific task. Components like transistors or ICs often require careful heat application to avoid damage.
Limit your soldering time on each joint to just a few seconds, and use heat sinks or alligator clips on leads to protect delicate parts. Consider your soldering setup: is your iron tip the right size for the job? Too large a tip can apply excessive heat, while too small can make heating inefficient.
Advanced Soldering Methods
Advanced soldering methods help create strong, reliable connections in electronics. These techniques work well for complex circuits and small parts. They improve efficiency and quality in electronics assembly. Understanding these methods is key for precise, clean solder joints.
Surface Mount Technology
Surface Mount Technology (SMT) places components directly on circuit board surfaces. It uses small parts called surface mount devices (SMDs). Soldering here requires precise heat control to avoid damaging parts. This method allows for compact, dense circuit designs. It is common in modern electronics like smartphones and laptops.
Through-hole Soldering
Through-Hole Soldering involves inserting component leads into holes on the board. Solder bonds the lead to the metal pad inside the hole. This method gives strong mechanical support to heavy components. It suits parts that need durability and stability. It is easier for beginners to learn and perform well.
Reflow Soldering
Reflow Soldering melts solder paste on boards using controlled heat. It is ideal for SMT components placed on pads before heating. The process ensures uniform solder joints by heating the entire board evenly. Machines called reflow ovens regulate temperature precisely. This method speeds up production and reduces errors in soldering.
Common Mistakes To Avoid
Soldering electronic components requires care and precision. Mistakes can damage parts or cause poor connections. Knowing common errors helps improve your soldering skills. Avoid these pitfalls to ensure strong, reliable joints.
Overheating Components
Applying too much heat can ruin sensitive parts. Excessive heat may melt plastic or damage chips. Use a temperature-controlled soldering iron. Heat each joint only long enough to melt the solder. Cool the component before moving to the next one.
Insufficient Solder
Using too little solder causes weak connections. The joint may look dry or incomplete. Apply enough solder to cover the pad and lead fully. Ensure the solder flows smoothly to create a shiny, solid joint. Avoid cold joints by heating both parts evenly.
Bridging Connections
Solder bridges happen when solder connects two points unintentionally. This causes short circuits and device failure. Keep soldering tips clean and use a fine tip for small parts. Work carefully to control solder flow. Use a solder wick or solder sucker to fix bridges.
Maintaining Your Soldering Equipment
Maintaining your soldering equipment ensures better performance and longer tool life. Clean, well-stored, and properly calibrated tools make soldering easier and more precise. Neglecting maintenance can cause poor joints and damage to components.
Cleaning Soldering Tips
Keep soldering tips clean to improve heat transfer. Use a damp sponge or brass wire cleaner regularly. Avoid using abrasive materials that can damage the tip.
Apply fresh solder to the tip after cleaning. This process is called “tinning” and protects the tip from oxidation. Replace tips that are worn out or corroded for the best results.
Soldering Iron Storage
Store your soldering iron safely to prevent damage and accidents. Use a proper stand that holds the iron securely when not in use. Avoid leaving the iron on surfaces that can burn or melt.
Turn off the soldering iron after work and unplug it. Let the tip cool down before storing it. Keep the iron in a dry place to prevent rust and corrosion.
Calibrating Temperature
Check the soldering iron temperature regularly for accuracy. Use a temperature meter or test with a known temperature-sensitive material. Adjust settings if your iron has a temperature control feature.
Correct temperature prevents overheating, which can damage components. Low temperature causes weak solder joints. Find the right balance for your specific tasks.
Safety Practices In Soldering
Soldering electronic components involves working with heat and chemicals. Following safety practices protects you from injuries and health risks. Proper handling and precautions keep your workspace safe and clean.
Handling Lead-based Solder
Lead-based solder contains toxic lead, which can harm your health. Always wash your hands after handling lead solder. Avoid eating or drinking near your soldering station. Use gloves to reduce skin contact with lead. Store lead solder in a secure place away from children.
Ventilation And Fume Extraction
Soldering produces fumes that can irritate your eyes and lungs. Work in a well-ventilated area to reduce fume buildup. Use a fume extractor or fan to pull fumes away from your face. Avoid breathing in smoke directly. Proper ventilation keeps the air clean and safe.
First Aid For Soldering Burns
Soldering irons get very hot and can cause burns quickly. If you burn your skin, cool the area under cold running water. Do not apply ice directly to the burn. Cover the burn with a clean, dry cloth. Seek medical help if the burn is severe or blisters form.

Credit: www.circuitrework.com
Frequently Asked Questions
What Tools Are Needed To Solder Electronic Components?
You need a soldering iron, solder wire, flux, tweezers, and a cleaning sponge. These tools ensure precise and clean solder joints.
How Do I Prevent Overheating Electronic Parts While Soldering?
Use a temperature-controlled soldering iron and work quickly. Avoid applying heat longer than necessary to protect components.
What Type Of Solder Is Best For Electronics?
Lead-free solder with a rosin core is ideal. It’s safer and creates strong, reliable electrical connections.
How Can I Tell If A Solder Joint Is Good?
A good joint looks shiny, smooth, and covers the pad fully. It should not be cracked or have excess solder.
Conclusion
Proper soldering keeps your electronic projects strong and lasting. Use the right tools and work carefully. Heat the joint briefly and apply solder smoothly. Avoid cold joints and extra solder blobs. Practice often to improve your technique. Clear connections mean better device performance.
Take your time and stay safe during soldering. Soon, your skills will grow with each project. Keep learning and enjoy building electronics!


