
Are you ready to bring your electronic projects to life? Learning how to solder electronic components on a PCB is a crucial skill that opens up endless possibilities.
Whether you’re fixing a gadget or building something new, mastering this technique saves you time and money. You’ll discover simple, step-by-step instructions that make soldering easy and stress-free. By the end, you’ll feel confident handling your own circuits like a pro.
Keep reading, and unlock the power to create and repair with precision!

Credit: www.anzer-usa.com
Essential Tools And Materials
Soldering electronic components on a PCB requires the right tools and materials. These essentials ensure clean, strong connections and protect your components. Choosing proper equipment makes the soldering process easier and safer.
Understanding the basics of each tool helps you work more confidently. This section explains the main tools needed for soldering, types of solder you can use, and other helpful equipment.
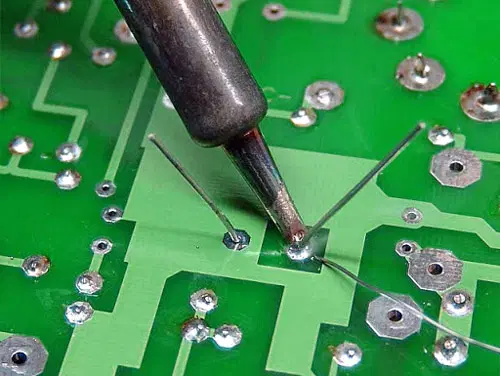
Soldering Iron Basics
A soldering iron heats solder to join components with the PCB. Select an iron with adjustable temperature for better control. A tip with a fine point works best for small electronics. Keep the tip clean with a wet sponge or brass wire cleaner. Use a soldering iron stand to avoid accidents and protect surfaces.
Types Of Solder
Solder is a metal alloy that melts to create electrical connections. Lead-free solder is common and safer for health and the environment. It often contains tin, copper, and silver. Rosin-core solder includes flux to help solder flow and stick well. Choose solder with a diameter of 0.7mm to 1mm for electronics work.
Additional Equipment
- Flux:Improves solder flow and prevents oxidation.
- Desoldering Pump or Wick:Removes excess solder or mistakes.
- PCB Holder or Helping Hands:Holds the board steady during soldering.
- Safety Glasses:Protect your eyes from splashes and fumes.
- Fume Extractor or Fan:Removes harmful smoke from soldering fumes.

Credit: www.viasion.com
Safety Precautions
Working with electronic components and soldering on a PCB can be rewarding, but it also involves risks. Taking safety precautions seriously protects you from burns, fumes, and accidents. Let’s look at how you can keep your workspace and yourself safe while soldering.
Protective Gear
Always wear safety glasses to shield your eyes from hot solder splashes. A pair of heat-resistant gloves can prevent burns, especially when handling the soldering iron or freshly soldered parts.
Avoid loose clothing or jewelry that might accidentally touch hot components or get caught in tools. Consider wearing a long-sleeve shirt to protect your arms from stray sparks or solder drips.
Ventilation Tips
Soldering releases fumes that can irritate your respiratory system. Work in a well-ventilated area or near a window to keep fresh air flowing.
Using a fume extractor or a small fan positioned to blow fumes away from your face helps reduce inhalation. Have you noticed how even a small fan can make soldering much more comfortable and safer?
Handling Hot Tools
Always place your soldering iron on a stable, heat-resistant stand when not in use. This prevents accidental contact with your skin or flammable surfaces.
Never touch the tip of the soldering iron or the heated solder directly. If you accidentally burn yourself, cool the area under running water immediately and seek medical advice if needed.
Keep your work area organized to avoid knocking over the soldering iron. Do you have a dedicated spot for your tools? It can save you from unexpected burns and messes.
Preparing The Pcb
Preparing the PCB is a crucial step before soldering electronic components. A clean and well-checked board ensures better connections and fewer errors. Taking time to prepare can save effort and parts later.
Cleaning The Board
Remove dust, grease, and fingerprints from the PCB surface. Use isopropyl alcohol and a lint-free cloth. Avoid water as it may cause damage. Clean pads and traces carefully to improve solder adhesion. A clean board prevents poor solder joints and shorts.
Inspecting For Damage
Look closely for cracks, lifted pads, or broken traces. Use a magnifying glass for detailed inspection. Damaged areas can cause circuit failure or weak connections. Repair any issues before placing components. A flawless board ensures reliable performance.
Positioning Components
Place components on the board according to the circuit diagram. Check orientation, especially for polarized parts like diodes and capacitors. Secure components gently to avoid bending leads. Proper placement saves time and reduces soldering mistakes.
Soldering Techniques
Soldering techniques vary based on the type of components and board design. Each technique ensures a strong electrical connection and mechanical support. Learning these methods helps build reliable electronic devices. Understanding the differences improves your soldering skills.
Through-hole Soldering
Through-hole soldering uses components with leads that go through the PCB holes. Heat the soldering iron, then touch the lead and pad simultaneously. Apply solder to the heated joint, not directly to the iron tip. Let the solder flow around the lead and pad smoothly. Avoid cold joints by allowing the solder to cool naturally. Trim excess leads after soldering to keep the board clean.
Surface Mount Soldering
Surface mount soldering attaches small components directly on PCB pads. Use a fine-tipped soldering iron or hot air tool for precision. Place the component carefully on the pads before heating. Heat the pad and component lead together, then add a small amount of solder. For tiny parts, flux helps solder flow better. Work quickly to avoid overheating and damaging components.
Desoldering Methods
Desoldering removes solder to replace or fix components. Use a solder sucker to quickly remove melted solder. A desoldering braid absorbs solder when heated and pressed on joints. Heat the joint evenly before applying the braid or sucker. Clean the area after desoldering to prepare for new soldering. Practice careful desoldering to avoid damaging the PCB pads.
Common Soldering Mistakes
Soldering electronic components on a PCB requires precision and care. Many beginners make common mistakes that affect the circuit’s performance. Knowing these errors helps avoid damage and faulty connections. Focus on clean, strong solder joints for a reliable build.
Cold Joints
Cold joints happen when solder does not melt properly. The connection looks dull or grainy instead of shiny. This weak joint can cause intermittent faults or no electrical contact. Ensure the soldering iron is hot enough and touch both the pad and component lead before applying solder.
Bridged Connections
Solder bridges occur when excess solder connects two or more adjacent pads. This creates a short circuit that can damage components or stop the circuit from working. Use a small amount of solder and keep the tip clean. Remove bridges with solder wick or a solder sucker carefully.
Overheating Components
Applying heat too long can damage delicate components. Overheated parts may crack or lose function. Work quickly and avoid holding the soldering iron on one spot for more than a few seconds. Use heat sinks or tweezers to protect sensitive leads during soldering.
Testing And Troubleshooting
Testing and troubleshooting are crucial after soldering electronic components on a PCB. They help you confirm that your work is solid and the circuit functions correctly. Skipping this step can leave hidden issues that cause bigger problems later.
Using A Multimeter
A multimeter is your best friend for testing electrical connections. Use it to check for continuity between soldered joints and to measure voltage or resistance. This helps verify if the component is properly connected or if there’s a break somewhere.
Set your multimeter to the continuity mode, then touch the probes to each side of the joint. If you hear a beep, the connection is good. No beep means the solder joint might be broken or cold.
Identifying Faulty Solder Joints
Faulty solder joints can cause your circuit to fail or behave unpredictably. Look for joints that are dull, cracked, or have blobs of solder instead of a smooth, shiny surface. These signs often mean the joint didn’t heat properly or the solder didn’t flow well.
Another tip is to gently wiggle the components while testing continuity. If the connection breaks under slight movement, the joint is likely faulty. Have you ever had a project that worked fine until you moved it slightly? That’s usually a bad solder joint.
Repairing Mistakes
Fixing a bad solder joint is easier than you might think. Heat the joint with your soldering iron until the solder melts, then add a small amount of fresh solder. This helps the solder flow better and creates a stronger connection.
If there’s excess solder causing shorts, use solder wick or a solder sucker to remove it carefully. Avoid using too much heat as it can damage the PCB or component. Patience is key—take your time to make clean, solid repairs.
Advanced Tips And Tricks
Advanced soldering requires more than just basic skills. Small improvements can make your work faster and cleaner. These tips help you handle heat, improve joint quality, and solder quickly without mistakes.
Efficient Heat Management
Control heat to protect sensitive components. Use a soldering iron with adjustable temperature settings. Keep the iron tip clean for better heat transfer. Avoid overheating by applying heat only as long as needed. Use heat sinks to protect delicate parts from damage. Proper heat management prevents lifting pads and burnt traces.
Using Flux For Better Joints
Flux removes oxidation and improves solder flow. Apply a small amount of flux before soldering. It helps create strong, shiny joints. Use rosin-based flux for most electronic work. Clean excess flux after soldering to avoid corrosion. Flux also makes soldering easier and reduces cold joints.
Speed Soldering Techniques
Speed up soldering without losing quality. Prepare all components and tools before starting. Use a soldering iron with a fine tip for precision. Heat the joint quickly and apply solder immediately. Avoid holding heat too long to protect the PCB. Practice improves speed while keeping clean and solid connections.
Maintaining Your Soldering Equipment
Maintaining your soldering equipment ensures better performance and longer tool life. Clean and well-kept tools create strong, reliable solder joints. Neglecting maintenance can cause poor connections and damage to your PCB.
Cleaning The Soldering Iron Tip
Keep the soldering iron tip clean to improve heat transfer. Use a damp sponge or brass wire cleaner to remove old solder and debris. Clean the tip often during soldering to avoid build-up.
Apply fresh solder to the tip after cleaning. This process, called tinning, protects the tip from rust. Replace the tip if it becomes worn or pitted.
Storing Equipment Properly
Store your soldering iron and accessories in a dry, safe place. Avoid areas with high humidity to prevent rust and corrosion. Use a soldering iron stand to hold the iron when not in use.
Keep solder wires and flux sealed to maintain their quality. Organize your tools to prevent damage and make them easy to find.
Regular Maintenance Checks
Inspect your soldering iron regularly for damage or wear. Check the power cord and plug for cracks or frays. Test the iron’s heating element to ensure it heats evenly.
Replace worn parts quickly to keep your equipment working well. Clean the soldering station and vents to prevent dust buildup. Regular care reduces repair costs and improves soldering quality.

Credit: www.anzer-usa.com
Frequently Asked Questions
What Tools Are Essential For Soldering Components On Pcb?
You need a soldering iron, solder wire, flux, tweezers, and a sponge. These tools ensure precise and clean solder joints on your PCB.
How To Prepare A Pcb Before Soldering Components?
Clean the PCB surface with isopropyl alcohol to remove dirt and oils. Proper preparation improves solder adhesion and prevents defects.
What Is The Correct Soldering Temperature For Pcb Components?
Set the soldering iron between 350°C and 370°C for most components. This range ensures efficient melting without damaging the board.
How To Avoid Cold Solder Joints On A Pcb?
Heat the pad and component lead evenly, then apply solder smoothly. Avoid moving parts until the solder cools to ensure a strong joint.
Conclusion
Soldering electronic components on a PCB is a useful skill. Practice helps improve your accuracy and speed. Always keep your workspace clean and organized. Use the right tools for best results. Take your time to avoid mistakes and damage. Safety matters—work in a well-ventilated area.
With patience, your soldering will become steady and neat. Enjoy creating your own electronic projects with confidence. Keep learning and trying new techniques to grow.


