
Have you ever faced a stubborn electronic device that just won’t work right? Sometimes, a simple fix like baking electronic components can bring them back to life.
It sounds strange, but this method can save you time and money before you rush to buy new parts. You’ll discover exactly how to bake your electronic components safely and effectively. Keep reading, and you might just learn a surprising trick that can make your gadgets work like new again.
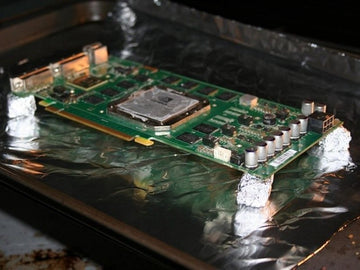
Credit: www.auspienterprises.com
Choosing The Right Components
Choosing the right components is key to successful baking of electronics. Not all parts react the same to heat. Some can handle high temperatures, while others may get damaged quickly.
Picking components that tolerate heat ensures your device works well after baking. It also reduces the risk of permanent damage. Understanding component materials and their heat ratings helps make better choices.
Identifying Heat-resistant Components
Look for components labeled as heat-resistant or with high-temperature ratings. Ceramic capacitors and certain resistors usually withstand heat better. Avoid components with plastic bodies or sensitive coatings.
Checking Manufacturer Specifications
Read datasheets carefully. They list maximum temperatures for soldering and reflow processes. Confirm the component’s temperature limit exceeds your baking temperature. This step prevents overheating and failure.
Considering Component Size And Shape
Small components heat faster and may be more vulnerable. Larger parts or those with metal cases often tolerate heat better. Choose shapes and sizes that allow even heat distribution.
Using Components Designed For Reflow Soldering
Components made for reflow soldering are ideal for baking. They are tested to survive the heat cycles used in manufacturing. These parts usually come with clear temperature guidelines.
Testing Components Before Final Use
Test a few components before baking the entire device. This helps catch any weak parts early. Use a small batch to check if they handle the heat without damage.
Preparing Your Workspace
Preparing your workspace is key before baking electronic components. A clean, organized area helps avoid mistakes and damage. Proper setup also supports safety and efficiency throughout the process. Take time to arrange tools and check safety needs carefully.
Organizing Tools
Gather all necessary tools before starting. Common items include a digital oven, anti-static mats, tweezers, and a timer. Arrange tools within easy reach to save time. Use trays or containers to keep small parts safe and sorted. Label items clearly to avoid confusion. Clear clutter to create a focused workspace.
Safety Measures
Electronic components are sensitive and require careful handling. Use an anti-static wrist strap to prevent static damage. Ensure good ventilation in the room to avoid heat buildup. Keep flammable materials far from the oven area. Wear heat-resistant gloves when handling hot parts. Always follow manufacturer guidelines for temperature and timing.
Setting Up The Baking Oven
Setting up the baking oven correctly is crucial for the safe and effective drying of electronic components. A well-prepared oven ensures moisture is removed without damaging sensitive parts. Let’s look at how to choose the right oven and set the temperature and timing for best results.
Selecting The Appropriate Oven
Not all ovens are suitable for baking electronic components. You need an oven that can maintain a consistent low temperature and avoid sudden spikes.
Consider these points when selecting your oven:
- Temperature range:It should go as low as 50°C and not exceed 150°C to prevent damage.
- Uniform heat distribution:Look for ovens with a fan or convection system to spread heat evenly.
- Size:Ensure the oven can comfortably fit your components without overcrowding.
- Safety features:Auto shut-off and alarms can save your parts from overheating.
I once used a regular kitchen oven for baking small PCBs, and uneven heating caused some solder joints to weaken. Investing in a small lab oven designed for electronics saved me from repeated mistakes.
Temperature And Timing Settings
Setting the right temperature and baking time is essential to avoid damaging your components. Too hot or too long can ruin parts; too cool or too short won’t remove moisture effectively.
Follow these guidelines:
- Typical temperature range:85°C to 125°C works well for most components.
- Baking duration:Usually 2 to 4 hours, depending on moisture levels and component sensitivity.
- Preheat the oven:Always bring the oven to the desired temperature before placing components inside.
Have you ever wondered why some components still fail after baking? It might be because the temperature was not steady or the timing was off. Using a reliable thermometer inside the oven can help you monitor and adjust settings precisely.

Credit: www.instructables.com
Pre-baking Checklist
Before baking electronic components, thorough preparation is essential. This ensures components do not get damaged during the baking process. The pre-baking checklist helps identify problems early and improves the success of moisture removal.
Inspecting Components
Begin by carefully examining each component. Look for visible signs of damage like cracks or corrosion. Check for bent pins or loose parts. Damaged components may fail after baking. Sort out those that need repair or replacement. Use a magnifying glass to see small flaws clearly.
Cleaning And Drying
Remove dust and dirt from the components before baking. Use a soft brush or compressed air to clean gently. Avoid using water or liquids that can cause more moisture. Make sure parts are completely dry before placing them in the oven. Moisture on the surface can cause damage during heating.
Baking Process
Baking electronic components removes moisture that can cause damage during soldering. The process uses controlled heat to dry out the parts safely. Proper baking improves reliability and prevents failures. Understanding the right steps helps protect your components.
Loading Components
Place the components on a clean, heat-resistant tray. Arrange them so air flows around each piece. Avoid stacking parts to ensure even heat exposure. Use anti-static mats or containers if needed. Check the oven temperature settings before loading.
Monitoring Progress
Keep an eye on the oven temperature throughout baking. Use a reliable thermometer to confirm accuracy. Set a timer for the recommended baking duration. Watch for any signs of overheating or discoloration. Allow components to cool slowly after baking for best results.
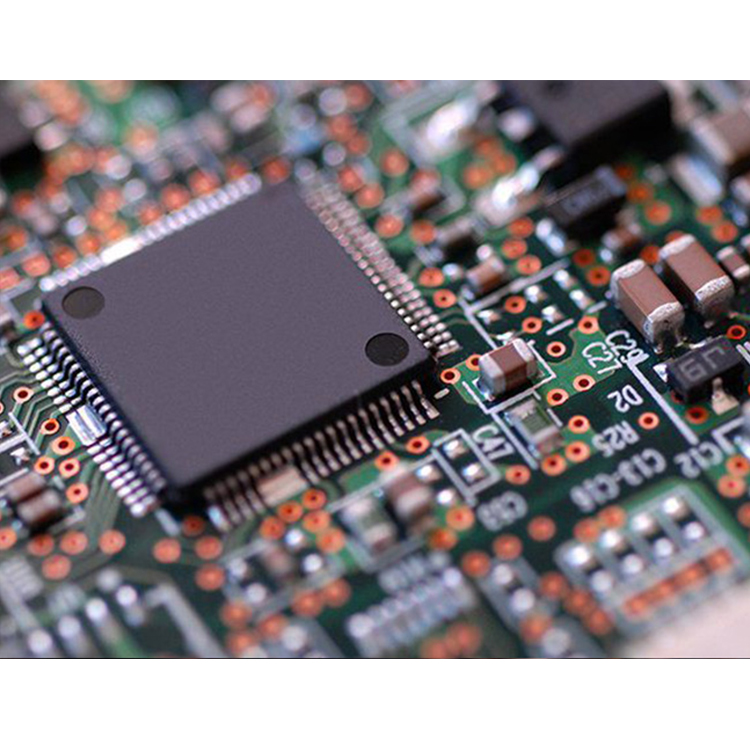
Credit: www.gms-industrial.com
Post-baking Procedures
Once the baking process is complete, your work isn’t done yet. The steps you take after baking can make a significant difference in the performance and longevity of your electronic components. Proper handling during the post-baking phase ensures that the components cool safely and that any potential issues are caught before assembly or use.
Cooling Down
Allow your components to cool down gradually at room temperature. Sudden temperature changes can cause thermal shock, which might damage delicate parts. Avoid placing them in a cold environment or directly under airflow from fans or air conditioners.
If you’ve baked multiple batches, cool them separately to prevent condensation buildup. Moisture can sneak back into components if they cool too quickly or are exposed to humid air. Using an anti-static, dry container during this phase can help maintain their dryness.
Final Inspection
Once cooled, inspect each component carefully. Look for any visible signs of damage such as cracks, discoloration, or warping. These can indicate overheating or moisture-related issues that might affect functionality.
Use a magnifying glass or microscope to check solder joints and tiny connectors. Even a small flaw can cause failure in your circuit. Testing with a multimeter can also confirm electrical integrity, giving you confidence before moving forward.
Common Mistakes To Avoid
Baking electronic components is a delicate process that can revive moisture-damaged parts and improve device performance. However, many people make mistakes that can cause permanent damage or reduce effectiveness. Understanding what to avoid helps you protect your investment and get the best results.
Using Incorrect Temperature Settings
Each component has a specific temperature range that it can safely tolerate. Baking at too high a temperature can melt solder joints or damage sensitive materials.
On the other hand, too low a temperature won’t effectively remove moisture. Always check the manufacturer’s recommended baking temperature before starting.
Ignoring Baking Time Recommendations
Overbaking can cause dryness and cracking, while underbaking won’t remove all moisture. It’s important to stick to the suggested baking duration.
Have you ever left components in the oven “just a bit longer” thinking it can’t hurt? That small decision might have weakened your parts.
Not Using A Proper Oven
Regular kitchen ovens often have uneven heat distribution and temperature fluctuations. This can lead to hotspots that damage your components.
Using a dedicated electronics or reflow oven ensures controlled, even heating. If you don’t have access to one, consider using a toaster oven with a reliable thermostat.
Skipping Pre-baking Preparation
Failing to clean or properly arrange components on the baking tray can affect the outcome. Dust or residues may bake onto surfaces, and overcrowding causes uneven heat exposure.
Arrange components with space between them and wipe off any contaminants before baking. This simple step improves moisture removal and prevents damage.
Not Monitoring The Process
Leaving components unattended during baking increases the risk of overheating or fire hazards. Always keep an eye on the oven and use a timer to track baking duration.
Have you ever wondered what might happen if the oven temperature spikes unexpectedly? Monitoring helps you avoid costly mistakes and keeps your workspace safe.
Expert Tips For Optimal Results
Baking electronic components is a delicate task that requires precision and care to achieve the best outcomes. Expert tips can help you avoid common pitfalls and improve your process dramatically. Let’s dive into practical advice that enhances efficiency and ensures quality in your baking routine.
Enhancing Efficiency
Start by preheating your oven to the exact temperature recommended for your components. Skipping this step can lead to uneven baking and damage. You want the heat to be stable and consistent right from the beginning.
Use an oven thermometer to monitor the actual temperature inside. Many ovens display inaccurate readings, so relying on this tool will give you more control. Have you ever wondered why some components fail despite following instructions? Temperature inconsistencies are often the culprit.
Organize your components on a tray with space between each one. Crowding parts together blocks airflow and causes uneven heat distribution. Keep the layout simple and spaced; it makes a noticeable difference in results.
Ensuring Quality
Track the baking time precisely. Overbaking can cause irreversible damage, while underbaking might not solve the moisture issues. Use a timer and stick to the recommended duration without guessing.
Consider using a desiccant pack in the storage container after baking to maintain dryness. This helps keep your components in optimal condition, especially if you live in a humid environment. Have you checked if your storage setup supports long-term component health?
Inspect components visually and with a multimeter after baking. Sometimes, damage is not visible to the eye but impacts functionality. Testing immediately helps you catch problems early and avoid costly replacements later.
Frequently Asked Questions
What Is Baking Electronic Components Used For?
Baking electronic components removes moisture and prevents corrosion. It restores device functionality by drying out trapped water. This process is crucial for sensitive parts like PCBs and ICs. Proper baking increases reliability and prevents malfunction due to humidity.
How Long Should Electronic Components Be Baked?
Typically, electronic components are baked for 2 to 4 hours. The exact time depends on the component type and moisture level. Follow manufacturer guidelines for precise duration. Overbaking can damage parts, so timing must be accurate.
What Temperature Is Safe For Baking Electronics?
Safe baking temperatures usually range between 100°C to 125°C (212°F to 257°F). Higher temperatures risk damaging sensitive components. Always check component datasheets for recommended baking temperatures. Using a controlled oven ensures even heat distribution.
Can Baking Fix Water-damaged Electronics?
Yes, baking can help dry out water-damaged electronics. It removes moisture trapped inside components. However, baking does not repair corrosion or physical damage. Immediate baking after water exposure improves chances of recovery.
Conclusion
Baking electronic components can fix moisture and improve performance. Always follow temperature and time guidelines carefully. Avoid overheating to protect your devices. Use proper equipment for safe and effective results. This simple process saves time and money. Try it next time your electronics show issues.
Remember, patience and attention help prevent damage. Baking is a helpful skill for many electronics users.


