How to Make Diy Button for Electronic: Easy Steps to Create Yours
Imagine being able to create your own custom button for an electronic project right from the comfort of your home. Whether you’re a tech enthusiast, a hobbyist, or someone just looking to try something new, making a DIY button can be a fun and rewarding experience.
You don’t need to be an expert or have fancy tools to get started. In this guide, you’ll discover simple steps and tips to create a functional button that will bring your electronic projects to life. Not only will you learn a new skill, but you’ll also feel the thrill of using something you’ve created yourself.
Ready to dive in and get hands-on with your DIY button? Let’s get started and unleash your creativity!
Materials Needed
Creating a DIY button for electronics requires gathering a few essential materials. These materials ensure your button works well and lasts long. Collecting the right items makes the process simple and enjoyable.
Basic Electronic Components
- Push button switch or tactile switch
- Wires for connections
- Soldering wire (optional for strong joints)
- Resistors (if needed for your circuit)
- Breadboard or PCB (printed circuit board)
- Battery or power source
Tools And Equipment
- Soldering iron for joining parts
- Wire strippers and cutters
- Multimeter to test connections
- Screwdriver set for assembly
- Hot glue gun or electrical tape
Optional Decorative Items
- Colored buttons or caps
- Paint or markers for designs
- Stickers or labels
- Plastic or wooden casing
- LED lights for visual effect
Choosing The Button Type
Choosing the right button type is key for your DIY electronic project. The button controls how your device reacts when pressed. A wrong choice can make your project harder to use or even fail.
Consider how the button will work and how it fits your design. Think about the function you want from the button. This helps pick the best type for your needs.
Momentary Vs Latching Buttons
Momentary buttons work only while you press them. They send a signal only during the push. When you release, the button resets. These are good for short actions like resetting a device or making a temporary connection.
Latching buttons stay in the on or off position after pressing. They toggle between states with each push. Use these for turning things on or off, like a power switch. They keep the circuit active without holding the button.
Size And Shape Options
Buttons come in many sizes and shapes. Small buttons fit in compact spaces but are harder to press. Large buttons are easy to press but need more room.
Shapes affect comfort and style. Round buttons are common and simple. Square or rectangular buttons can fit better in certain designs.
- Small round buttons: good for tight spaces
- Large square buttons: easy to press and see
- Flat buttons: sleek look, less tactile feedback
- Raised buttons: better for quick pressing
Preparing The Circuit
Preparing the circuit is a key part of making a DIY button for electronics. It ensures the button works correctly and connects smoothly with other parts. This process involves setting up a breadboard, connecting wires, and testing the circuit carefully. Each step builds a strong foundation for your project. Follow these instructions to prepare your circuit effectively.
Breadboard Setup
A breadboard holds all electronic parts without soldering. Place the breadboard on a flat surface. Insert the button into the breadboard’s holes. Make sure the button’s legs fit snugly. Leave space around the button for wires and other components. This setup allows easy changes and repairs.
Connecting Wires
Use jumper wires to link the button to other parts. Connect one wire from a breadboard row with the button’s leg. Attach another wire from the opposite leg to a resistor or ground line. Use clear, short wires to avoid confusion. Double-check connections to prevent loose contacts.
Testing The Circuit
Testing helps verify the button works in your circuit. Use a multimeter to check for continuity. Press the button and watch if the multimeter signals a connection. If the test fails, check wiring and button placement. A working circuit responds instantly to button presses.
Assembling The Button
Assembling your DIY button is where your project starts to come alive. This phase brings together all the components into a functional piece, so it’s important to handle each part carefully. You’ll want to focus on how the switch fits, how secure the housing is, and how you can personalize your button.
Attaching The Switch
Begin by positioning the switch inside the button housing. Make sure the terminals are accessible for wiring but not exposed to avoid short circuits.
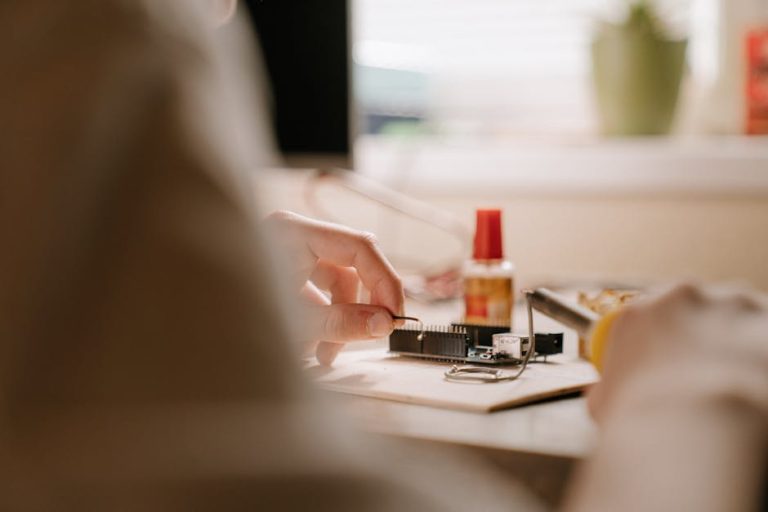
Use a soldering iron to connect wires firmly to the switch terminals. A loose connection can cause the button to fail at critical moments.
Have you tested your switch’s responsiveness before securing it? A quick press test ensures everything works before you move forward.
Securing The Button Housing
Once the switch is in place, focus on locking the housing parts together. Snap-fit designs often make this easy, but sometimes you may need small screws or adhesive.
Check for any gaps or loose areas that might let dust or moisture in. Your button’s longevity depends on a tight seal.
Consider how you will mount the button—will it sit on a panel or hang from wires? Secure the housing with that in mind to avoid stress on the components.
Adding Decorative Elements
Now that the button works and is secure, think about its look. You can add stickers, paint, or even custom labels to make it unique.
Use materials that won’t interfere with the button’s function or wear off easily. Transparent covers can protect your decorations without hiding them.
How do you want your button to feel? Smooth finishes can enhance user experience, while textured surfaces offer grip and style.
Wiring The Button
Wiring the button is a crucial part of creating your DIY electronic button. It connects the physical press to the circuit, allowing your device to respond. Getting this right ensures your button works reliably every time you press it.
Soldering Tips
Soldering is the most secure way to connect wires to your button terminals. Use a clean, well-heated soldering iron to avoid cold joints, which can cause intermittent connections.
Hold the iron on the joint just long enough to melt the solder, then remove it quickly to prevent heat damage. If you’re new to soldering, practice on spare wires first to build confidence.
Ensuring Proper Connections
Check that each wire is firmly attached to the correct terminal before soldering. Loose connections can lead to failure or erratic button behavior.
After soldering, gently tug on each wire to confirm it’s secure. Are you sure the wires won’t slip or short-circuit under pressure? Taking a moment here saves troubleshooting headaches later.
Insulating Exposed Wires
Exposed wires can cause short circuits, so it’s essential to insulate them properly. Use heat shrink tubing or electrical tape to cover any bare metal after soldering.
Slide the tubing over the wire before soldering, then shrink it with a heat source once the connection is cool. This simple step protects your circuit and extends the button’s lifespan.
Testing Your Diy Button
Testing your DIY button ensures it works correctly and safely with your electronic project. It confirms the button sends the right signals when pressed. Testing also helps find any wiring or connection problems early. Take your time to check the button thoroughly before final assembly.
Functionality Checks
Start by pressing the button to see if it triggers the device as expected. Use a multimeter to check the button’s continuity. The meter should show a closed circuit when pressed and open when released.
Test the button multiple times to ensure consistent performance. Verify the button fits well in your setup and does not stick or jam. Check the voltage and current ratings match your device requirements.
Troubleshooting Common Issues
If the button does not work, first check all wire connections. Loose or broken wires are common problems. Make sure solder joints are solid and clean.
Use the multimeter to test the button itself. If it never shows continuity, the button may be faulty. Replace it with a new one.
Check for short circuits by inspecting the wiring layout. Ensure no wires touch where they should not. Clean any dirt or debris around the button contacts.
Integrating With Devices
Integrating your DIY button with different devices expands its usefulness. You can add it to projects that need user input or control. Knowing how to connect buttons to common electronics and microcontrollers makes your projects interactive and fun.
Connecting To Microcontrollers
Microcontrollers like Arduino or Raspberry Pi read signals from buttons. Connect one wire of the button to a digital input pin. Connect the other wire to the ground (GND). Use a pull-up resistor inside the microcontroller or an external one.
When you press the button, the microcontroller detects a change in voltage. This change triggers an action in your code. For example, turning on an LED or sending a message.
Always test the button connection with simple code. This ensures the microcontroller reads the button press correctly.
Using With Simple Electronics
Buttons also work well with basic electronics like buzzers and motors. Connect one terminal of the button to the power source. Connect the other terminal to the device’s positive lead.
Complete the circuit by connecting the device’s negative lead to ground. Pressing the button closes the circuit and powers the device.
- Use buttons to control lights or alarms.
- Combine buttons with resistors to protect circuits.
- Test circuits on a breadboard before soldering.
This setup is easy and requires no programming. It suits beginners who want hands-on experience with electronics.
Customization Ideas
Customizing your DIY electronic button opens up a world of creative possibilities. It lets you tailor the button not just to fit your project’s needs, but also to reflect your personal style. Small tweaks can make a big difference in usability and aesthetics, making your project truly stand out.
Adding Leds
Adding LEDs to your button can greatly improve its functionality and visual appeal. Imagine a button that lights up when pressed, giving instant feedback. You can choose different LED colors to indicate various states like on/off or error alerts.
Wiring a simple LED with a resistor is easy and adds a professional touch. Have you tried using RGB LEDs? They allow you to change colors dynamically, making your button adaptable to different signals or moods.
Using Different Materials
The choice of materials can transform your button’s look and feel. Instead of plain plastic, try wood, metal, or even resin for a unique texture and durability. Each material affects how the button responds to touch and pressure.
Using transparent or translucent materials can also enhance the lighting effect if you add LEDs. Think about mixing materials—like a wooden button with a glass center—to create contrast and depth. What material would you pick to match your project’s theme?
Creating Unique Shapes
Buttons don’t have to be round or square. Experiment with shapes like stars, hearts, or even custom designs using 3D printing or molding techniques. Unusual shapes can make your button more intuitive or fun to use.
Consider how the shape affects your button’s placement and usability. A large, flat shape might be easier to press, while a small, textured shape could prevent accidental presses. Could a creative shape turn your button into a conversation piece?
Frequently Asked Questions
How Do I Make A Diy Button For Electronics?
You can make a DIY button using simple materials like conductive fabric or aluminum foil. Connect it to your circuit with wires. Pressing the button completes the circuit, sending a signal to your device.
What Materials Are Best For Diy Electronic Buttons?
Common materials include conductive fabric, aluminum foil, copper tape, and foam. These materials conduct electricity and are easy to shape. Choose materials based on your project’s flexibility and durability needs.
How To Connect A Diy Button To A Circuit?
Use jumper wires or solder wires to the conductive parts of your button. Connect one wire to the input pin and the other to ground on your microcontroller or circuit board.
Can I Customize Button Size And Shape Easily?
Yes, DIY buttons can be made in any size or shape. Use flexible materials like fabric or tape to fit your project’s design and space requirements.
Conclusion
Making a DIY button for electronics is simple and fun. You only need basic tools and parts. Follow each step carefully to get the best results. Testing your button helps ensure it works well every time. Creating your own button saves money and lets you customize your projects.
Keep practicing to improve your skills. Soon, you can build more electronic parts by yourself. Enjoy the process and learn with each project you try.