How to Make Electronic Speed Controller at Home: Easy DIY Guide
Are you fascinated by the inner workings of drones, RC cars, or other electronic devices? Have you ever wondered how these gadgets manage to control their speed so precisely?
The answer lies in a small but mighty component: the Electronic Speed Controller (ESC). Imagine being able to create your own ESC at home, using simple tools and materials. Not only would this give you a deeper understanding of how your favorite gadgets work, but it would also save you money and allow you to customize your devices to your liking.
In this guide, you’ll discover how to make an ESC yourself, step by step. Get ready to unlock the secrets of speed control, and bring your DIY projects to life with a personal touch. Keep reading to transform your curiosity into hands-on expertise.
Materials Needed
Gathering the right materials is crucial before you start building your Electronic Speed Controller (ESC) at home. Having everything ready saves time and keeps your workflow smooth. It also helps you avoid frustrating pauses during assembly.
Essential Components
- Microcontroller:This acts as the brain of your ESC, commonly an Arduino or STM32.
- Power MOSFETs:These handle the high current switching necessary for motor control.
- Gate Drivers:They boost the control signals to properly switch the MOSFETs on and off.
- Current Sensor:Allows you to monitor the motor’s current draw to prevent damage.
- Voltage Regulator:Keeps the voltage stable for the microcontroller and other components.
- Capacitors and Resistors:Essential for smoothing signals and protecting circuits.
- Connectors and Wiring:Ensure reliable connections between the ESC and the motor or battery.
While assembling these components, consider the power rating of each part based on your motor’s specifications. Have you checked whether your MOSFETs can handle the current your motor will draw?
Tools Required
- Soldering Iron and Solder:For making solid electrical connections between components.
- Multimeter:To measure voltage, current, and check circuit continuity.
- Wire Strippers and Cutters:Essential for preparing wires.
- Small Screwdrivers:Helpful for tightening connectors and assembling the housing.
- Heat Shrink Tubing and Electrical Tape:For insulation and protecting exposed wires.
- PCB or Breadboard:Depending on whether you want a permanent or prototype build.
Having the right tools is more than convenience; it influences the quality of your build. Do you have a workspace that’s well-lit and organized? It makes a noticeable difference in your assembly experience.
Basic Working Principle
The basic working principle of an Electronic Speed Controller (ESC) is to regulate the speed of an electric motor. It acts as a bridge between the power source and the motor. By adjusting the electric current flow, the ESC controls motor speed smoothly and efficiently. This control is crucial for devices like drones, RC cars, and electric bikes.
An ESC receives signals from the controller and converts them into pulses of power. These pulses vary in width, which changes the motor’s speed. The ESC also protects the motor from damage by managing power delivery carefully.
How Esc Controls Speed
ESC controls speed using a method called Pulse Width Modulation (PWM). PWM changes the length of the power pulses sent to the motor. Longer pulses mean more power, which makes the motor spin faster. Shorter pulses reduce power and slow the motor down.
The ESC continuously adjusts these pulses based on the input signal. This allows for precise speed control and smooth acceleration or deceleration. It also helps in reversing the motor’s direction by changing the pulse sequence.
Types Of Escs
There are mainly two types of ESCs:
- Brushed ESC:Designed for brushed motors, these are simpler and cheaper. They control speed by switching current on and off rapidly.
- Brushless ESC:Made for brushless motors, these are more complex. They manage three-phase power and provide better efficiency and power.
Choosing the right ESC depends on the motor type and the device’s requirements. Brushless ESCs are common in modern applications due to their performance benefits.
Circuit Design
Designing the circuit is the heart of making an electronic speed controller at home. A well-planned circuit ensures smooth motor control and long device life. Focus on choosing the right parts and arranging them correctly. Each section of the circuit must work together without issues.
Choosing The Right Microcontroller
The microcontroller controls the motor speed. Pick one with enough input/output pins and PWM support. Popular choices include Arduino and STM32. It should handle the motor’s power and speed ranges. Check for easy programming and community support. This helps solve problems faster.
Power Supply Setup
Provide stable power to the microcontroller and motor. Use a power source that matches your motor’s voltage and current needs. Add a voltage regulator to protect the microcontroller. Include capacitors to reduce voltage spikes and noise. Safety features like fuses prevent damage from overloads.
Motor Connection
Connect the motor properly to the circuit for efficient control. Use MOSFETs or transistors as switches to handle motor current. Arrange them in an H-bridge for direction and speed control. Add flyback diodes to protect components from voltage spikes. Secure all connections to avoid loose contacts.
Assembly Steps
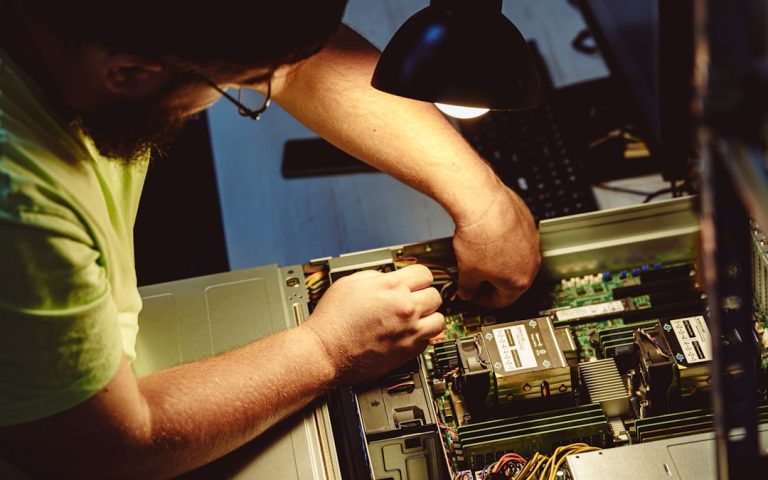
Building an Electronic Speed Controller (ESC) at home demands precision and patience. The assembly process is where your careful preparation comes to life. Each step contributes to the overall functionality, so focus on accuracy and double-check your work as you go.
Soldering Components
Soldering is the backbone of your ESC assembly. Use a clean, well-heated soldering iron to avoid cold joints that could cause failure. Secure each component firmly on the PCB before soldering to prevent movement and ensure solid connections.
Pay special attention to polarity and orientation of components like capacitors and diodes. Incorrect placement here can damage your circuit or reduce its efficiency. Take your time to inspect each solder joint—shiny and smooth joints are signs of good connections.
Wiring Connections
Proper wiring is critical for your ESC to function correctly. Use wires of appropriate gauge to handle the current without overheating. Label your wires or color-code them to avoid confusion during assembly and troubleshooting.
Keep wiring neat and organized; tangled wires can cause shorts or signal interference. Secure connections with heat shrink tubing or electrical tape to prevent accidental disconnections. Have you checked every connector twice? It saves hours of frustration later.
Testing The Circuit
Before finalizing the assembly, test the circuit carefully to catch any errors early. Use a multimeter to check for continuity and correct voltage levels at key points. Power up your ESC with a low-voltage supply first to observe its response without risking damage.
Listen for unusual noises and watch for overheating components. If your ESC doesn’t behave as expected, retrace your steps to find possible wiring or soldering mistakes. How confident are you that every connection is secure? Testing reveals the quality of your work.
Programming The Esc
Programming the Electronic Speed Controller (ESC) is a crucial step in building your own device at home. This process allows you to control the speed and direction of your motor precisely. Without proper programming, your ESC won’t respond correctly to input signals, which can lead to poor performance or even damage.
Writing The Code
Start by writing the code that will control the ESC’s functions. You’ll need to define how the ESC interprets signals from your microcontroller and translates them into motor speed adjustments.
Focus on creating simple, clear commands that manage throttle input, braking, and direction changes. Using Arduino IDE or similar platforms makes this easier, especially if you’re new to coding.
Think about adding safety features in your code, like automatic shutdown if the motor overheats or if the signal is lost. Have you considered what might happen if your ESC runs unchecked? Adding these protections can save your hardware.
Uploading To Microcontroller
Once your code is ready, it’s time to upload it to the microcontroller that will run your ESC. This step requires a USB connection between your computer and the microcontroller board.
Make sure your microcontroller drivers are installed and the correct board and port are selected in your programming software. A failed upload often happens due to incorrect settings, so double-check before proceeding.
After uploading, test the microcontroller’s response by sending simple commands. Does the motor respond as expected? If not, review your wiring and code for any mistakes.
Calibration Process
Calibration ensures your ESC understands the full range of throttle signals from your controller. This step aligns the ESC’s input with the actual motor speed output.
Usually, calibration involves setting the ESC to recognize the minimum and maximum throttle positions. You might do this by turning your throttle to full, then to zero, following the ESC’s specific instructions.
Calibration can be tricky but is essential for smooth operation. Have you ever noticed your motor hesitating or lagging? That’s often a sign you need to recalibrate your ESC.
Troubleshooting Tips
Troubleshooting is a key skill for building an electronic speed controller at home. Problems can arise from wiring mistakes or software issues. Identifying the cause quickly saves time and effort. This section covers common issues, wiring fixes, and software debugging tips.
Common Issues
- ESC does not power on.
- Motor runs erratically or not at all.
- Overheating components.
- Unstable speed or sudden stops.
- Unresponsive remote control signals.
Fixing Wiring Errors
Check all connections carefully. Loose wires cause power loss or signal failure.
- Ensure battery wires connect correctly to ESC.
- Match motor wires to ESC output terminals.
- Secure all solder joints and connectors.
- Use a multimeter to test for continuity.
- Correct any reversed polarity immediately.
Software Debugging
Software errors can prevent the ESC from working smoothly. Start by verifying the code.
- Check for syntax errors in the firmware.
- Confirm correct calibration values for sensors.
- Update ESC firmware to the latest version.
- Use debugging tools to monitor ESC signals.
- Test with simpler code to isolate the problem.
Safety Measures
Safety is key when making an Electronic Speed Controller at home. Working with electronics needs care to avoid accidents. This section covers important safety tips. Follow them closely to protect yourself and your project.
Handling Electrical Components
Always power off before touching any parts. Use insulated tools to avoid shocks. Keep your work area dry and clean. Avoid wearing metal jewelry that can cause shorts. Store components safely to prevent damage or injury. Double-check connections before powering up the device.
Preventing Overheating
Use heat sinks on power transistors to keep them cool. Ensure proper ventilation around the controller. Avoid running the ESC at maximum load for long periods. Monitor temperature during testing with a thermometer. Use thermal paste to improve heat transfer between parts. Overheating can damage components or cause burns.
Enhancements And Upgrades
Enhancing and upgrading your homemade Electronic Speed Controller (ESC) can significantly boost its performance and reliability. Small tweaks can lead to noticeable improvements in control precision and energy use. Let’s look at practical ways to add features and improve efficiency that you can try right away.
Adding Features
Adding new features to your ESC can make it more versatile and user-friendly. Consider including a throttle calibration option to ensure smoother acceleration and better response. You can also add temperature sensors to monitor the ESC’s heat levels and prevent overheating during long runs.
Another useful feature is regenerative braking, which helps recharge the battery by converting kinetic energy back into electrical energy. Adding LED indicators for status and error warnings can also give you quick feedback without needing extra tools. Have you thought about integrating Bluetooth connectivity? This lets you adjust settings wirelessly, making tuning easier and faster.
Improving Efficiency
Improving the efficiency of your ESC helps extend battery life and reduce heat generation. Use low-resistance MOSFETs to decrease power loss during switching. Upgrading your capacitors to low Equivalent Series Resistance (ESR) types can stabilize voltage and reduce electrical noise.
Optimizing the firmware by fine-tuning the PWM frequency and duty cycle can cut down unnecessary power consumption. Heat sinks or small fans can be added to keep components cool, preventing efficiency drops caused by overheating. What’s one upgrade you can make today to save more power in your ESC setup?
Frequently Asked Questions
What Materials Are Needed To Make An Esc At Home?
You need a microcontroller, MOSFETs, diodes, resistors, capacitors, and a PCB. Also, basic soldering tools are essential for assembly.
How Does An Esc Control Motor Speed?
An ESC adjusts motor speed by varying the voltage and current through pulse-width modulation (PWM). This changes the motor’s rotation speed smoothly.
Can Homemade Escs Handle High Power Motors?
Homemade ESCs can handle low to moderate power motors. High power requires advanced components and cooling systems for safety and efficiency.
Is Programming Required For Diy Escs?
Yes, programming the microcontroller is essential. It controls PWM signals and ensures smooth motor operation and responsiveness.
Conclusion
Building your own electronic speed controller is a practical and fun project. It helps you understand how devices control motor speed. With basic tools and parts, you can create a working ESC at home. Take your time to follow each step carefully.
Testing your ESC ensures it works safely and correctly. This DIY approach saves money and boosts your skills. Keep learning and experimenting to improve your designs. Making an ESC yourself brings both knowledge and satisfaction. Try it today and enjoy the experience of building technology with your own hands.