How to Setup a Home Studio for Electronic Music: Ultimate Guide
Setting up a home studio for electronic music can transform your creative process and elevate your sound to new heights. Imagine having the freedom to experiment with beats and melodies any time inspiration strikes.
Whether you’re an aspiring DJ or a seasoned producer, creating a personal studio is the first step to unlocking your full potential. You might wonder where to begin or worry about the costs involved. Don’t worry—setting up your own studio is more accessible than ever before.
With the right guidance, you can create a space that fuels your creativity without breaking the bank. Read on to discover how you can design a home studio that inspires you to make music that moves people.
Choosing The Right Space
Choosing the right space for your home studio is a crucial first step in producing great electronic music. The environment you work in affects not only the sound quality but also your creativity and comfort. Finding a spot that balances size, sound control, and acoustics can save you time and frustration down the line.
Room Size And Shape
The size of your room impacts how sound behaves inside it. Smaller rooms can cause sound reflections and bass build-up, while larger rooms might make monitoring tricky due to echoes. Ideally, pick a room that’s neither too small nor too large—something around 10×12 feet works well for most setups.
Shape matters too. Rectangular rooms are easier to treat acoustically compared to square or oddly shaped spaces. Avoid rooms with parallel walls if possible, since they can create standing waves that distort your sound. Have you noticed any weird echoes or boomy areas in your current space? That’s a sign to consider room shape carefully.
Soundproofing Basics
Soundproofing helps keep your music inside and external noise out. You don’t need to build a bunker, but some simple steps make a big difference. Use heavy curtains or door sweeps to block sound leaks around windows and doors.
Adding weather stripping and sealing gaps can reduce noise significantly. If you live in a noisy area, consider using mass-loaded vinyl or dense insulation materials on walls. How often do outside sounds interrupt your workflow? Tackling these interruptions early improves focus and recording quality.
Acoustic Treatment Tips
Acoustic treatment controls how sound moves inside your room. Start by adding foam panels or bass traps at first reflection points—these are spots where sound bounces directly to your ears. Placing treatments behind your monitors and on side walls can help reduce harsh reflections.
Don’t forget the ceiling and corners; bass tends to gather there and muddy your mixes. You can DIY acoustic panels with rock wool or buy affordable kits online. Test your room by clapping your hands—if you hear long echoes, you need more treatment.
Have you tried adjusting your listening position or adding a rug to your floor? Small changes can drastically improve clarity. Treating your room isn’t about perfection but creating a balanced space where your music sounds true.
Essential Equipment
Setting up a home studio for electronic music needs the right equipment. Choosing essential gear shapes the sound quality and workflow. Each piece plays a role in creating, recording, and mixing your tracks. Start with the basics to build a solid foundation. Here are the key tools to get started.
Computer And Software
The computer is the heart of your studio. It runs the software that produces your music. Choose a PC or Mac with a fast processor and enough RAM. This keeps your sessions smooth and stable.
Music software, or DAW (Digital Audio Workstation), lets you record and edit sounds. Popular DAWs include Ableton Live, FL Studio, and Logic Pro. Pick one that fits your style and budget.
Audio Interface Options
An audio interface connects your instruments and microphones to the computer. It improves sound quality and reduces delay. Look for interfaces with multiple inputs and outputs for flexibility.
Some good choices include Focusrite Scarlett, PreSonus AudioBox, and Universal Audio Apollo. These models offer clear sound and reliable performance.
Midi Controllers And Keyboards
MIDI controllers send signals to your computer to control virtual instruments. They come in many shapes and sizes, from keyboards to pad controllers.
A keyboard controller helps play melodies and chords. Pad controllers are great for beats and samples. Popular brands include Akai, Novation, and Arturia.
Studio Monitors And Headphones
Studio monitors are speakers made for accurate sound. They help you hear every detail in your mix. Choose monitors with a flat frequency response.
Headphones are useful for detailed listening and late-night sessions. Closed-back headphones block outside noise. Open-back headphones offer a natural sound.
Good options include Yamaha HS series, KRK Rokit monitors, Audio-Technica, and Sennheiser headphones.
Setting Up Your Gear
Setting up your gear is the foundation of a smooth workflow in your home studio. It’s about more than just plugging devices in—it’s about creating an environment where creativity flows without technical hiccups. Paying attention to how you connect, organize, and place your equipment can save you hours of frustration and help you focus on making music.
Connecting Audio Devices
Start by identifying all your audio devices: audio interface, MIDI controllers, synthesizers, headphones, and monitors. Connect your audio interface to your computer using USB or Thunderbolt, ensuring the connection is secure to avoid dropouts. Then link your monitors and headphones to the audio interface outputs for clear, direct sound.
Don’t forget to connect MIDI devices through USB or MIDI cables to your interface or computer. Labeling cables at both ends can help you keep track of which device is connected where. Have you checked if your interface needs specific drivers? Installing these early can prevent delays later.
Organizing Cables
Cable clutter can quickly turn a tidy space into a nightmare. Use cable ties or Velcro straps to bundle cables neatly. Group cables by type or destination to make troubleshooting easier.
Consider cable sleeves or channels to keep cables hidden and protected. This not only improves aesthetics but also prevents accidental unplugging or tripping. Have you tried labeling cables with simple tags? It’s a small step that makes reconnecting after a session much quicker.
Optimizing Monitor Placement
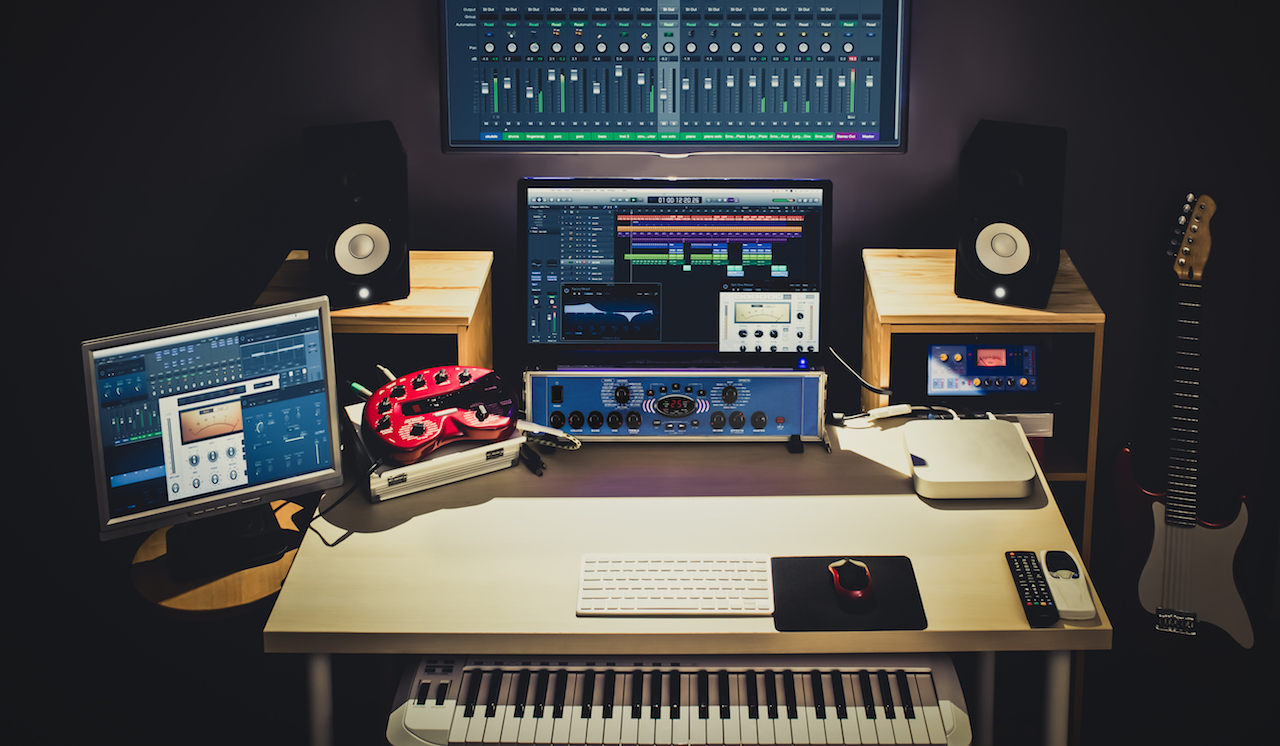
The position of your studio monitors directly affects how you hear your music. Place them at ear level and form an equilateral triangle with your listening position. This ensures balanced sound and accurate stereo imaging.
Avoid placing monitors directly against walls to reduce bass buildup. Instead, keep some distance or add acoustic panels to improve sound clarity. Could adjusting your chair or desk height help your ears align perfectly with the monitors? Small tweaks like these make a big difference.
Choosing The Right Software
Choosing the right software is key to building a home studio for electronic music. Software shapes your workflow and creativity. It controls how you compose, mix, and produce tracks. The right tools make music production easier and more fun.
Understanding popular digital audio workstations, VST plugins, and sample libraries helps you pick the best fit. These elements form the backbone of your studio setup. Each plays a different role in creating electronic music.
Popular Digital Audio Workstations
Digital Audio Workstations (DAWs) are software programs for recording and editing music. They offer various features for electronic music production. Some DAWs are easier for beginners, while others suit advanced users.
- Ableton Live: Great for live performances and beat-making.
- FL Studio: User-friendly with a strong focus on loops and patterns.
- Logic Pro X: Mac-only, known for powerful instruments and effects.
- Studio One: Offers a smooth workflow and solid mixing tools.
- Reaper: Affordable and highly customizable for any music style.
Choose a DAW that fits your style and skill level. Most offer free trials to test before buying.
Vst Plugins And Synths
VST plugins add sounds and effects to your DAW. Synthesizers create electronic tones and textures. Using the right plugins shapes your music’s character.
- Synth plugins: Produce classic and modern electronic sounds.
- Effect plugins: Add reverb, delay, distortion, and more.
- Drum machines: Provide electronic drum sounds and patterns.
- Utility plugins: Help with mixing, tuning, and sound design.
Start with a few essential plugins. Expand your collection as you grow.
Samples And Loops
Samples and loops are pre-recorded sounds you can use in tracks. They save time and add variety. Samples include drums, basslines, melodies, and effects.
- Drum loops: Provide rhythmic foundations for your beats.
- Melodic loops: Add bass, synth lines, or vocal chops.
- One-shots: Single sounds like kicks, snares, or synth hits.
- Sound effects: Create atmosphere and transitions.
Choose high-quality samples that fit your music style. Organize them for easy access during production.
Creating A Workflow
Creating a workflow in your home studio helps keep music production smooth and efficient. It saves time and reduces stress during sessions. A clear workflow lets you focus on making music instead of searching for files or settings. Organizing your work and setting up templates speeds up the creative process. Backing up your projects protects your hard work from loss or damage.
Session Organization
Organize your sessions by naming tracks clearly and grouping similar sounds. Use folders to keep drums, synths, and vocals separate. Label each track with its instrument or sound type. Color coding tracks helps find them quickly. Arrange your playlist or timeline logically to follow your song’s structure.
Template Creation
Create templates with your favorite instruments and effects ready to go. Save time by loading the same setup for every new project. Include essential tracks like drums, bass, and vocals in your template. Pre-set levels and routing to avoid repetitive work. Update templates regularly to match your evolving style.
Backup Strategies
Always back up your projects to avoid losing work. Use external drives or cloud storage for extra safety. Save versions of your project as you progress to track changes. Keep backups organized by date and project name. Regular backups give peace of mind and protect your music.

Credit: audiosilk.com
Mixing And Mastering Basics
Mixing and mastering are key to making electronic music sound clear and professional. Mixing balances all sounds, while mastering polishes the final track. Both need a good ear and simple tools to start.
Essential Mixing Tools
Good mixing tools help shape your music. A digital audio workstation (DAW) is the main software for mixing. Use EQ to adjust the bass, mids, and highs of each sound. Compressors control loudness and add punch. Reverb and delay add space and depth.
- Digital Audio Workstation (DAW)
- Equalizer (EQ)
- Compressor
- Reverb and Delay effects
- Good quality headphones or monitors
Start with simple settings. Listen carefully to how each tool changes the sound. Keep sounds clear and avoid clutter.
Mastering Tips For Electronic Music
Mastering gives your track final shine and volume. Use a limiter to avoid clipping and distortion. Apply gentle compression to glue the mix together. Use an equalizer to fix any frequency problems. Keep the dynamic range so the track feels alive.
Test your master on different speakers. Adjust settings for a balanced, loud, and clean sound. Take breaks to rest your ears during mastering.
Reference Tracks
Reference tracks help guide your mixing and mastering. Choose songs similar to your style and sound. Compare your track with these references often. Listen for balance, loudness, and clarity differences.
Use references to check your work. They help keep your track in the right direction. Always update your references as you improve.
Maintaining Your Studio
Keeping your home studio in good shape helps you create music without interruptions. Regular care protects your gear and software from damage and bugs. It also keeps your workspace neat and inspiring. Small efforts can save time and money later.
Regular Equipment Checks
Check cables, plugs, and connections often. Look for wear or loose ends that cause sound problems. Test microphones and speakers for clear audio. Inspect your MIDI controllers and keyboards for stuck keys or buttons. Fix or replace broken parts fast to avoid bigger issues.
Software Updates
Update your digital audio workstation and plugins regularly. New versions fix bugs and improve features. Back up your projects before updating to avoid data loss. Use official sites or app stores to download updates. Stay current to keep your system stable and secure.
Workspace Cleanliness
Clean your studio daily to remove dust and debris. Dust can damage sensitive equipment over time. Use a soft cloth for screens and surfaces. Keep cables organized with ties or clips. A tidy space helps you focus and work faster.

Credit: www.reddit.com

Credit: www.reddit.com
Frequently Asked Questions
What Essential Gear Is Needed For A Home Electronic Music Studio?
You need a computer, digital audio workstation (DAW), audio interface, MIDI controller, studio monitors, and headphones. These tools create, record, and mix electronic music effectively at home.
How Do I Choose The Right Daw For Electronic Music?
Pick a DAW with good MIDI support, user-friendly interface, and built-in synths. Popular options include Ableton Live, FL Studio, and Logic Pro.
What Is The Best Room Setup For A Home Studio?
Choose a quiet room with minimal echo. Use acoustic panels or foam to reduce sound reflections. Position monitors at ear level for accurate sound.
How Can I Improve Sound Quality In My Home Studio?
Use quality monitors and headphones. Apply acoustic treatment to walls. Keep cables organized to avoid interference. Regularly calibrate your audio equipment.
Conclusion
Setting up a home studio for electronic music takes time and patience. Start with basic gear and add more as you learn. Keep your space organized to stay focused and creative. Experiment with sounds and have fun making music. Remember, practice helps you improve every day.
Your studio is your personal place to create. Enjoy the process and keep exploring new ideas. Music is about expression, so let your creativity flow freely.