How to Make Electronic Drums at Home: Easy DIY Guide for Beginners
Ever thought about creating your own music with a personal touch? Imagine the thrill of playing electronic drums that you crafted yourself.
It’s not just about making music; it’s about experiencing the joy of building something unique. You don’t need to be a tech wizard or spend a fortune to make this happen. This guide will walk you through the steps to build electronic drums right at home.
You’ll not only save money but also gain bragging rights for your DIY skills. Ready to dive in and discover your hidden potential? Let’s get started!

Credit: www.youtube.com
Materials Needed
Gathering the right materials is the first step toward building your own electronic drums at home. Having a clear list of what you need saves time and avoids frustration during the build process. Let’s break down the essential components and helpful extras to get you started.
Basic Components
Start with the core parts that will turn your drum kit into an electronic setup. These include:
- Drum pads or surfaces– the areas you will hit to create sound.
- Piezo sensors– these detect the vibrations from your hits and convert them into electronic signals.
- Microcontroller or sound module– the brain of your kit, which processes signals and triggers drum sounds.
- Wiring and cables– to connect sensors to the sound module.
- Power supply– usually a USB or battery pack to keep everything running.
Without these, your electronic drum set won’t function properly. Do you already have some of these parts from old electronics?
Optional Tools
While not strictly necessary, these tools make the building process smoother and the final product more reliable:
- Soldering iron– for secure and lasting connections.
- Multimeter– to test your circuits and troubleshoot issues.
- Screwdrivers and pliers– handy for assembling and adjusting parts.
- Hot glue gun– to fix components in place without damaging them.
Having these tools ready will save you headaches later. What tools do you already have at home that could help you?
Choosing Drum Pads
The choice of drum pads affects both the feel and responsiveness of your electronic kit. You can use:
- Rubber pads– offer a realistic bounce and durability.
- Mesh heads– provide a natural drumstick rebound and quieter play.
- DIY pads from household items– such as old mouse pads or foam blocks for a budget-friendly option.
Think about how you want your kit to respond. Would you prefer a soft or firm surface? Your choice here shapes your playing experience.
Setting Up Drum Pads
Setting up drum pads is a crucial part of making electronic drums at home. It defines how responsive and realistic your kit will feel. Getting this right means you’ll enjoy playing more and can tweak the setup as you learn what works best for you.
Selecting Pad Types
Choosing the right type of drum pads affects both the sound and the playing experience. Rubber pads are affordable and durable but may feel less natural. Mesh pads, on the other hand, offer a more realistic bounce and quieter play, though they can be pricier.
Think about what you want to practice most—will you focus on snare hits, cymbals, or toms? Some pads respond better to certain drum sounds. For example, a dual-zone pad allows you to trigger different sounds with the rim and head, adding versatility.
Assembling Pads
Once you have your pads, you’ll need to mount them securely. Use a sturdy frame or rack to keep everything stable during intense playing. If you don’t have a commercial rack, consider building a simple frame from PVC pipes or wood.
Make sure the pads are positioned comfortably within your reach. Test the height and angle by sitting at your usual drum seat. Adjusting the setup now saves frustration later and helps maintain good playing posture.
Wiring Connections
Connecting your drum pads to the electronic drum module is straightforward but requires attention. Each pad usually connects via a standard 1/4 inch jack or a TRS cable. Label each cable to avoid confusion when you start troubleshooting or rearranging.
Keep your wiring neat by bundling cables and securing them with zip ties. This prevents accidental unplugging and reduces wear on connectors. Have you checked if your module supports all your pads before finalizing the wiring? Compatibility ensures every hit registers accurately.
Building The Trigger Module
Building the trigger module is a crucial step in making electronic drums at home. This module acts as the brain, detecting when and how hard you hit the drum pads and sending signals to produce sound. Getting this right means your electronic drum kit will respond accurately and feel natural to play.
Using Microcontrollers
Microcontrollers like the Arduino or Teensy are popular choices for trigger modules. They are small, affordable, and easy to program, making them perfect for hobbyists. You’ll use the microcontroller to read signals from your drum sensors and convert them into MIDI or audio triggers.
Choose a microcontroller with enough input pins for your drum pads. Some boards also have built-in USB MIDI support, which simplifies connecting to your computer or sound module. Have you checked if your microcontroller supports low-latency processing? That can make a huge difference in playability.
Sensor Integration
Integrating sensors means connecting drum pads with the microcontroller so it can detect hits. Piezo sensors are the most common because they generate a voltage when tapped, mimicking a drumstick hit. You’ll need to wire each piezo sensor to an analog input pin on your microcontroller.
Keep in mind, piezo signals can be noisy. Adding a simple resistor and capacitor circuit helps smooth out the signal. Also, consider how you mount sensors to avoid false triggers from vibrations. Have you tried testing sensor placement to find the sweet spot for reliable hits?
Programming Basics
Programming your microcontroller involves writing code to read sensor inputs and send trigger messages. Start by reading the analog value from each piezo sensor and setting a threshold to detect hits. You can adjust this threshold to ignore light taps or accidental bumps.
Once a hit is detected, send a MIDI note or trigger signal corresponding to that drum pad. Adding velocity sensitivity means the harder you hit, the louder the sound—this adds expressiveness to your playing. Don’t forget to implement a debounce delay to avoid double triggers from a single hit.
How comfortable are you with coding? Even if you’re new, many example codes are available online to get you started quickly. Experimenting with these basics can help you customize your electronic drums exactly how you want them.
Connecting To Sound Modules
Connecting your homemade electronic drums to sound modules brings your beats to life. Sound modules act as the heart of your setup, producing the sounds when you hit the pads. Understanding the connection options helps you get the best sound and control from your drums.
Midi Vs Audio Outputs
MIDI outputs send digital signals, not actual sound. These signals tell a sound module which drum sound to play. MIDI cables connect your drum pads to the module. This setup uses less space and offers more sound options.
Audio outputs carry real sound signals. You can plug these into speakers or headphones directly. Audio cables usually come in 1/4 inch or XLR formats. This method is simpler but limits sound variety to what the module offers.
Using Drum Software
Drum software lets you create and customize drum sounds on your computer. Connect your drum pads with a MIDI interface or USB. This setup allows you to use many drum kits and effects. Software can also record your playing for practice or performances.
Popular drum software works well with homemade kits. It gives access to many drum sounds and editing tools. This option is affordable and flexible for beginners and hobbyists.
Amplification Options
To hear your electronic drums clearly, you need proper amplification. Small practice amps are good for home use. They are affordable and easy to move around.
For louder sound, use PA systems or studio monitors. These give clearer and stronger audio. Amplifiers with built-in effects can add reverb or echo to your drumming.
Headphones are useful for quiet practice. They help you focus on timing without disturbing others.
Testing And Calibration
Testing and calibration are essential steps to ensure your homemade electronic drums work well. Proper calibration helps your drum pads respond accurately to your playing style. Testing allows you to spot issues early and fix them. This part of the process improves your overall drumming experience and satisfaction.
Adjusting Sensitivity
Sensitivity controls how the drum pad reacts to your hits. Too high sensitivity causes false triggers, while too low misses light hits. Adjust sensitivity by changing the sensor’s threshold settings. Test by hitting the pads softly and hard. Find a balance where all hits register clearly without extra noise.
Troubleshooting Common Issues
Common problems include unresponsive pads or double triggering. Check wiring connections first. Loose wires cause signal loss. Inspect sensor placement; improper alignment reduces accuracy. Clean sensor surfaces to remove dust or debris. Use a multimeter to test electrical continuity. Reset your electronic module if signals seem off. Keep testing after each fix to confirm improvement.
Improving Responsiveness
Responsiveness means how fast and accurately the drum reacts. Use quality sensors for better results. Adjust the padding thickness under the drum surface to improve feedback. Thinner padding can increase sensitivity but reduce comfort. Experiment with different materials to find the best response. Fine-tune the electronic module settings for velocity curves and note thresholds. Play simple rhythms to test and refine responsiveness.
Customization Tips
Customization is key to making your electronic drum kit truly yours. It lets you tailor the setup to fit your playing style and comfort. Small tweaks can make a big difference in your drumming experience.
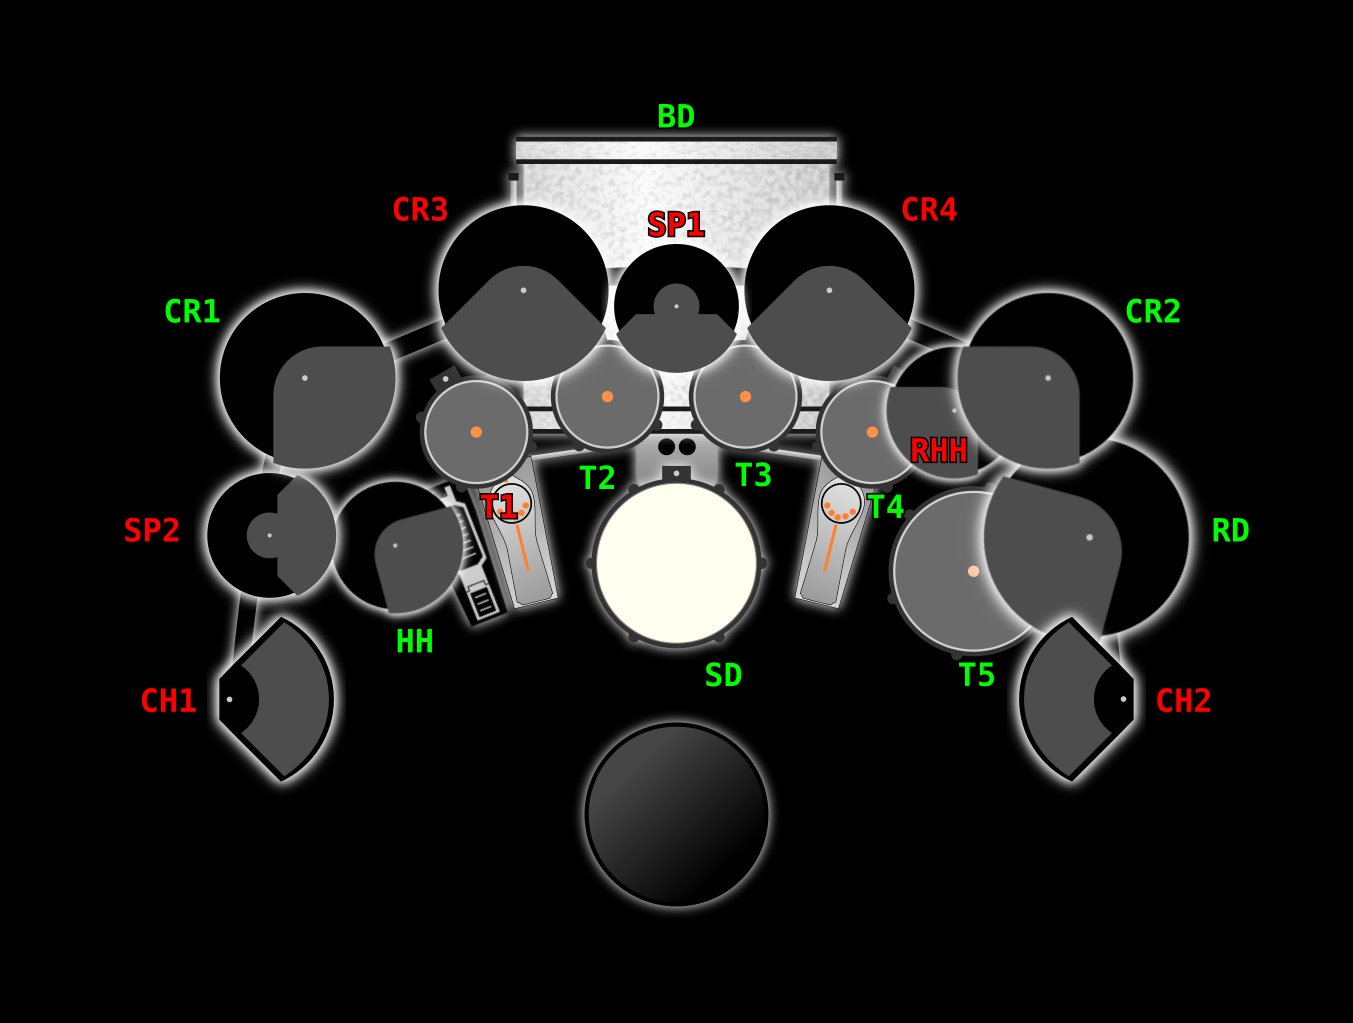
Adding Extra Pads
Think about what sounds you want to add to your kit. Extra pads give you more options to play varied beats and fills. You can use piezo sensors with foam or rubber pads to create additional triggers.
Attach these pads to surfaces like a wooden frame or even a practice pad. Make sure to connect them securely to your drum module or MIDI controller. This way, you expand your sound palette without buying a new kit.
Enhancing Pad Feel
How does your pad feel under your sticks? The right surface can improve your control and reduce fatigue. Adding a thin layer of rubber or foam can mimic the bounce of acoustic drums.
Experiment with different materials until you find one that suits your touch. Some drummers prefer a slightly harder surface for faster playing, while others like softer pads for quieter practice. What kind of feel helps you play better?
Visual Design Ideas
Customizing your kit visually can keep you motivated and proud of your setup. Use colorful tapes, stickers, or paint to decorate your pads and frame. This personal touch makes your kit stand out in any room.
Try labeling your pads with icons or colors to remember sounds easily. You can also add LED lights around the pads for a cool effect during practice or performance. How can you make your kit look as good as it sounds?
Maintenance And Upgrades
Maintaining and upgrading your homemade electronic drums is key to keeping them sounding great and performing well over time. Simple care routines can extend the life of your setup, while timely software updates and thoughtful enhancements ensure you stay ahead of any technical issues and improve your drumming experience. Let’s dive into how you can keep your electronic drums in top shape and prepare them for the future.
Routine Care
Regular cleaning prevents dust and grime from affecting your drum pads and sensors. Use a soft, dry cloth to wipe down all surfaces after playing, especially around trigger areas.
Check cables and connections frequently to catch any loose or worn-out parts early. Tighten screws and bolts to keep pads secure and avoid rattling sounds.
Have you noticed your drum pads losing sensitivity? Sometimes, just adjusting the tension or replacing worn rubber pads can restore their responsiveness instantly.
Software Updates
Your electronic drum’s brain often relies on software to interpret hits and produce sounds accurately. Manufacturers frequently release updates that fix bugs, improve latency, or add new features.
Make it a habit to check the official website or app for updates every few months. Installing these updates can make your drum kit feel brand new without spending a dime.
Consider backing up your custom settings before updating. This prevents loss of your personalized sound setups and saves you from reconfiguring everything after an update.
Future Enhancements
Adding new modules or upgrading existing ones can dramatically change your drumming experience. For instance, swapping out a basic sound module for one with more drum kit options can inspire creativity.
Think about integrating MIDI controllers or connecting your kit to software like Ableton Live for recording and mixing. These upgrades open doors to more complex performances and studio work.
How far do you want to take your homemade electronic drums? Planning ahead for upgrades can save you money and effort later, so consider modular parts and compatible accessories from the start.
Credit: medium.com

Credit: www.youtube.com
Frequently Asked Questions
How Can I Build Electronic Drums At Home?
You can build electronic drums using basic materials like piezo sensors, a microcontroller, and drum pads. Connect sensors to detect hits and program the microcontroller for sound output. This DIY method saves cost and allows customization for personal use or practice.
What Materials Are Needed For Homemade Electronic Drums?
Key materials include piezo sensors, rubber or silicone pads, wires, a microcontroller (like Arduino), and a speaker or headphones. Additional tools include a soldering kit, adhesive, and a power source. These components work together to detect hits and produce electronic drum sounds.
Can Beginners Make Electronic Drums Easily?
Yes, beginners can make electronic drums by following simple guides and tutorials. Start with basic components and learn wiring and programming step-by-step. Using online resources and ready-made kits can simplify the process and improve learning.
How Do Piezo Sensors Work In Electronic Drums?
Piezo sensors detect vibrations or hits on drum pads and convert them into electrical signals. These signals are sent to a microcontroller, which processes them to trigger drum sounds. They are essential for accurate hit detection in homemade electronic drum kits.
Conclusion
Building electronic drums at home is a fun and rewarding project. You control the sounds and design. It helps you learn about music and electronics. Start with simple parts and add more later. Take your time and enjoy the process.
Playing your own drums feels special. Try different ideas and make them your own. Keep practicing and improving your skills. Your homemade drums can bring joy for years. Give it a try and see what you create!