How to Connect Drawing Tablet & Monitor: Step-by-Step
Figuring out how to connect drawing tablet and monitor together comes down to one question: does your tablet have a screen? The answer splits every setup into two paths. A pen tablet without a screen connects with a single USB cable.
A pen display works like its own monitor, so it needs video, data, and sometimes power connections.
The ports on your computer decide the rest. As of 2026, most laptops include USB-C and HDMI, but not every USB-C port carries video. That one detail causes more confusion than anything else in this process.
Let's identify what you have and get it wired correctly.
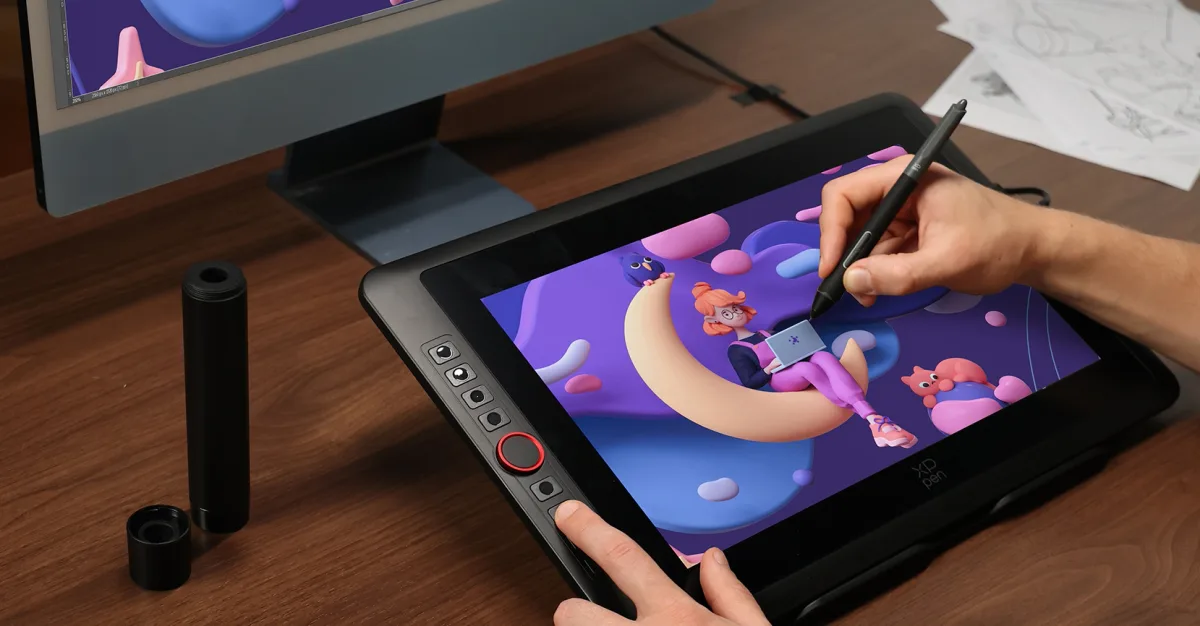
Image source: Bing (Web (fair-use with source credit))
Figure Out What You're Connecting First: Pen Tablet, Pen Display, or Standalone Tablet
Before touching a single cable, identify your device type. The connection process changes completely based on this.
A pen tablet is an input device with no built-in screen. You draw on it while watching your computer monitor. The tablet sends pen position data through a USB cable.
Popular examples include the Wacom Intuos, Huion Inspiroy, and XP-Pen Deco series. Setup is simple because there's no video signal to route.
A pen display combines a drawing surface with a monitor. It has a built-in LCD screen that shows your artwork in real time. Wacom Cintiq, Huion Kamvas, and XP-Pen Artist models fall into this category.
Because the screen needs a video feed, you'll connect it like an external monitor, with extra data and power cables thrown in.
A standalone tablet runs its own operating system. The iPad, Microsoft Surface, and Samsung Galaxy Tab are the most common examples. You can use them as a secondary drawing display for a computer through built-in or third-party software like Sidecar, SuperDisplay, or Parsec.
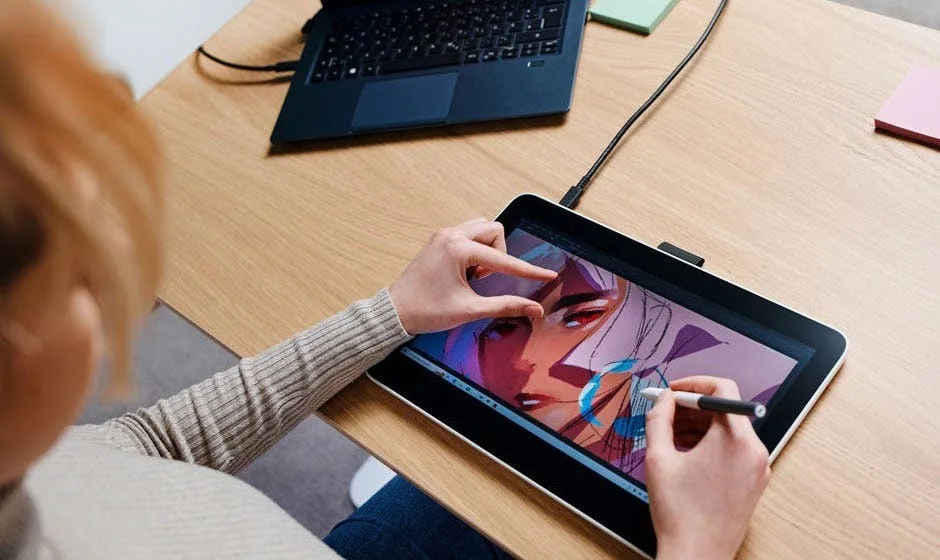
Image source: Bing (Web (fair-use with source credit))
Here's a quick comparison to help you classify your gear:
| Device type | Built-in screen | Video cable needed | Data cable needed | Typical brand examples |
|---|---|---|---|---|
| Pen tablet | No | No | Yes | Wacom Intuos, Huion Inspiroy, XP-Pen Deco |
| Pen display | Yes | Yes | Usually | Wacom Cintiq, Huion Kamvas, XP-Pen Artist |
| Standalone tablet | Yes | Optional | Optional | iPad, Surface, Galaxy Tab |
If you're shopping for a separate screen to pair with a pen tablet, our guide to portable display options covers compact monitors that hold up well on a studio desk.
Ports and Cables: USB-C, HDMI, DisplayPort, and Which One You Actually Need
Your computer's ports determine which cables you'll use. Let's run through the four that matter most.
USB-C is the connector that changed everything. A single USB-C cable can carry video, data, and power at the same time, but only when the port supports DisplayPort Alt Mode. Alt Mode is a standard that lets a USB-C port output video signals.
Without it, the same port handles data only, which means your pen display won't turn on.
USB-A is the older rectangular port. It carries data and power but never video. Plugging a pen display into a USB-A port alone will not give you a picture.
It's only useful for pen tablet data or as the secondary connection on a pen display.
HDMI is the most common video port on monitors and TVs. It carries video and audio, no data. Most pen displays ship with HDMI inputs, so this is usually your safe fallback.
DisplayPort does the same job as HDMI and is common on desktop graphics cards. The physical connector is larger and locks into place. Adapters exist to convert between HDMI and DisplayPort, but they need to be the right direction for your signal to flow.
Here's what each port actually handles:
| Port | Carries video | Carries data | Carries power | Most common on |
|---|---|---|---|---|
| USB-C with DisplayPort Alt Mode | Yes | Yes | Yes | Modern laptops, tablets, phones |
| USB-C without Alt Mode | No | Yes | Yes | Older and budget laptops |
| USB-A | No | Yes | Yes | Desktop and laptop USB ports |
| HDMI | Yes | No | No | TVs, monitors, pen displays |
| DisplayPort | Yes | No | No | Desktop graphics cards |
| Mini HDMI / Mini DisplayPort | Yes | No | No | Portable pen displays |
The Video Electronics Standards Association (VESA) maintains the DisplayPort standard and publishes compatibility details on their official site. That's a reliable resource when you're unsure whether two devices will handshake properly. The USB Implementers Forum (USB-IF) does the same for USB-C spec questions via usb.org.
If you're working from a laptop with limited ports, our guide to home office machines explains which models include the video-out options artists actually need.
Step-by-Step: Connect a Pen Tablet (No Screen) to Your Computer and Monitor
A pen tablet is the easiest device to connect. There's no video cable to route and no display to power on.
- Install the driver software first. Download the latest driver from the manufacturer's official support page. Wacom, Huion, and XP-Pen each maintain their own drivers, so match the software to your exact model.
- Restart your computer. This ensures the driver loads cleanly and no old settings conflict with the new one.
- Plug the tablet into the computer. Use the included USB cable. A USB-C to USB-C connection is ideal if both ends support it. A USB-A port works fine too, since data only travels one way.
- Open the driver panel. It's usually accessible from the system tray or taskbar. Confirm that your tablet model shows as connected.
- Map the tablet to your display. In the driver's pen display settings, select the monitor you want the pen to control. This matters if you have multiple screens.
- Test pen pressure in your drawing app. Open a brush preset and make a slow stroke. The line should thin or thicken based on applied pressure.
Most connection failures on pen tablets come from driver conflicts, not cables. If the device isn't recognized, uninstall the driver, restart, and reinstall the latest version from the manufacturer's site. That fixes the problem in the vast majority of cases.
For artists using a pen tablet alongside a desktop setup, pairing it with one of the budget-friendly large screens can create an affordable dual-screen workspace without spending pen display money.
Step-by-Step: Connect a Pen Display as Your Main or Second Monitor
Pen displays need more cables because they have a screen to feed. The exact number depends on your computer's ports and the display model itself.
- Install the device driver before connecting the hardware. This step prevents Windows or macOS from installing a generic HID driver that ignores pen input.
- Connect the video cable. Run HDMI, DisplayPort, or USB-C from the computer to the pen display. This cable carries the picture.
- Connect the data cable. Many pen displays need a separate USB-A or USB-C cable for pen data. Without it, the screen will show your desktop but the stylus won't control the cursor.
- Connect power. Larger pen displays like the Wacom Cintiq 22 or Huion Kamvas 24 have a separate power adapter. Portable models often draw power through the USB-C cable and skip this step.
- Turn on the pen display. Press the power button and wait for the LED indicator to light up.
- Select the correct input source. Use the physical buttons or on-screen menu (OSD) on the display. Choose the input that matches your video cable, like HDMI1 or DisplayPort.
- Set the display mode on your computer. Press Windows key + P on Windows or use Mission Control settings on macOS. Choose Extend to use the pen display as a second screen. Choose Duplicate to mirror your main monitor.
- Map and calibrate the pen. Open the driver panel, select the pen display, and run the calibration tool. Tap the crosshairs at the marked points to align the pen tip with the cursor.
The most common mistake here is skipping the input source step. Even with everything plugged in correctly, a pen display stays blank if it's not set to the right input.
If you're using a laptop that doubles as a workstation, our roundup of hybrid work-and-play machines highlights models with the video outputs and graphics power that handle high-resolution pen displays smoothly.
Single USB-C vs. Multi-Cable Hookup: How to Tell What Your Setup Supports
This decision comes down to one thing: whether your computer's USB-C port supports DisplayPort Alt Mode. The USB Implementers Forum (USB-IF) defines this standard. When a USB-C port supports Alt Mode, it can transmit video alongside data on the same physical cable.
You can check your computer's specifications online or in the manual. Look for terms like "USB-C with DisplayPort" or "DP over USB-C."
If your setup supports it, a single USB-C cable can handle everything. The pen display receives video, pen data, and often power through one connection. This is the cleanest possible desk setup, with one cable running from the computer to the display.
If not, you'll need the multi-cable approach. A video cable like HDMI or DisplayPort carries the picture, while a separate USB cable carries pen data. Power may require a third connection for larger displays.
Here's how the two approaches stack up:
| Setup | Cables required | Works on most hardware | Desk clutter | Best for |
|---|---|---|---|---|
| Single USB-C | 1 cable | Only with DisplayPort Alt Mode | Minimal | Modern laptops, clean setups |
| Multi-cable | 2 to 3 cables | Yes, nearly everything | More noticeable | Desktops and older laptops |
The tradeoff is straightforward. Single cable saves desk space but demands compatible hardware. Multi-cable works almost anywhere but adds pieces to manage.
A quick way to test your port: plug the pen display in with USB-C only. If the screen turns on, you have Alt Mode. If it stays dark but the computer chimes, you've got data-only USB-C and you'll need the video cable as well.
This is also worth checking before you buy. Many artists discover their port limitations only after unboxing a new pen display. Knowing what your laptop supports ahead of time makes the whole setup far smoother.
And if you're running several connected devices at home, our article on home electronics energy use shows what dedicated displays and tablets actually add to your monthly bill.
How to Use an iPad, Surface, or Android Tablet as a Second Drawing Display
Standalone tablets work great as secondary drawing displays, but the connection method varies by operating system. The easiest route is usually wireless, though a wired connection gives you lower latency and a longer battery life.
- iPad with a Mac: Use Sidecar, built into macOS Catalina and later. Connect wirelessly or over USB-C, then your Mac sees the iPad as a second display with full Apple Pencil support.
- iPad or Android tablet with Windows: Third-party apps like SuperDisplay or Duet Display handle the video and pen data over USB-C or Wi-Fi. SuperDisplay supports pressure sensitivity over a wired USB connection.
- Surface tablet as a second monitor: Windows lets you use a Surface as a wireless display via the "Project to this PC" feature, but pen support over that connection is spotty. A USB-C cable connection avoids the lag.
Most artists report better pen accuracy on a wired connection than over Wi-Fi, especially when lines need to stay smooth at speed.
Set Up Display Modes: Extend, Duplicate, or Second Screen Only
Once the pen display is connected, decide how it behaves relative to your main monitor. The display mode controls whether you get extra desktop space or a clone of your current screen.
- Extend: The most useful for artists. Your desktop spreads across both monitors, so you can keep the canvas on the pen display and your tools on the main screen.
- Duplicate: Shows the same image on both monitors. Useful for presentations or teaching, not for drawing.
- Second screen only: Turns off your laptop's built-in display. Great when working at a desk with an external pen display.
On Windows, press the Windows key + P and pick a mode. On macOS, open System Settings, go to Displays, and arrange the screens. Drag the menu bar to your preferred primary display.
Map and Calibrate Your Pen to the Correct Monitor
After choosing a display mode, tell your driver which screen the pen should control. This matters whenever you have two or more displays active.
- Open the pen tablet driver from your system tray.
- Find the "Mapping" or "Pen Display" tab.
- Select the pen display from the list of monitors.
- Run the calibration tool if the pen tip doesn't line up with the cursor.
Calibration usually involves tapping a series of crosshairs on the display. Do this slowly and use the center of each crosshair. A properly mapped pen feels natural, with no offset or drifting.
If you draw on an extended desktop and the pen still controls the wrong screen, you skipped this step.
Install Drivers and Software: What to Install, When, and Why
Driver installation is the single most common reason a drawing tablet works as a mouse but not as a pen device. Without the right driver, pressure sensitivity, tilt, and screen mapping simply don't exist.
- Install the driver before connecting your tablet the first time. This stops the operating system from overwriting it with a generic HID driver.
- Download drivers only from the manufacturer's official site, whether that's Wacom, Huion, XP-Pen, or others.
- Restart your computer after installing. This loads the driver cleanly.
- Update the driver after major OS updates. Windows and macOS updates can break pen input until the manufacturer catches up.
As of 2026, most driver installers include a firmware update check. Run that once during setup, because firmware handles the communication between the screen and the pen.
Troubleshoot Common Issues: No Signal, Flickering, and Unresponsive Pen
When a pen display shows a black screen, the problem is almost always a cable, a port, or the input source setting. Work through those before touching the driver.
No signal: Check the input source. Press the physical button or use the on-screen menu to select the port that matches your video cable. Then swap the cable and try a different port on the computer.
Flickering or intermittent signal: Try a shorter cable. Long cables lose quality, especially at 4K resolution. Also lower the refresh rate in display settings from 120Hz to 60Hz.
If you're using an adapter, remove it and connect directly.
Pen not working: Open the driver and confirm the tablet is detected. If not, uninstall the driver, restart, and reinstall the latest version. For battery-powered pens, check the battery level first.
A low battery causes erratic jumps before the pen fails entirely.
Most connection problems follow a simple pattern: the screen works without the pen, or the pen works without the screen. That split tells you exactly which cable to inspect.
Mistakes to Avoid When Connecting a Drawing Tablet and Monitor
The most expensive cable won't fix a port that can't carry video. Always check for DisplayPort Alt Mode on your USB-C port before you plan a single-cable setup.
Skipping the driver install is a close second. Windows and macOS load generic input drivers that ignore pressure and tilt. Install the manufacturer driver first, then restart.
Don't forget the input source on the pen display. The screen stays dark if it's set to HDMI2 while your cable is in HDMI1. One button press fixes it.
Avoid passive adapters for video signals. A USB-C to HDMI adapter only works one way. Match the adapter direction to your cable, or the screen flickers or stays blank.
Pen Tablet + Monitor vs. Pen Display vs. Standalone Tablet: Which Setup Should You Choose?
Your budget and workspace decide this. A pen tablet plus a separate monitor is the cheapest route. It gives you a large display for less than half the cost of a comparable pen display.
| Setup | Typical cost range (2026) | Screen included | Best for |
|---|---|---|---|
| Pen tablet + monitor | $150–$600 total | Yes, separate | Budget setups, flexible layouts |
| Pen display | $250–$2,500 | Yes, built-in | Direct drawing feel, simpler desk |
| Standalone tablet | $300–$1,200 | Yes, built-in | Mobility, no computer required |
A pen display wins when hand-eye coordination matters most. Drawing directly on the screen feels natural, like working on paper. A standalone tablet suits artists who need portability and want to skip the computer entirely.
Aggregate user reviews show one consistent pattern: most artists pick based on budget first, then decide between a pen display and a standalone tablet once the money question is settled.
Still Lost? Quick Answers to Common Connection Questions
Why won't my pen display turn on?
Check the power cable first. Then verify the video cable is connected to a port that actually outputs video. If you're using an adapter, confirm it supports the right direction.
Finally, switch the input source on the display itself.
Does the USB-C cable matter for drawing tablets?
Yes. A cheap USB-C cable without proper shielding can cause flickering at 4K. Use the cable that shipped with your device when possible.
If you need a replacement, pick one certified for USB4 or Thunderbolt.
Can I connect a drawing tablet without a computer?
A pen tablet needs a computer. A pen display needs a computer. A standalone tablet works without one.
If you want to draw without a PC, buy a standalone model.
Should I extend or duplicate my screen for drawing?
Extend. Duplicating forces both displays to share the same signal and wastes the pen display's full resolution. Extending lets you keep your tool panels on one screen and the canvas on the other.
Final Setup Checklist: Get Everything Working Confidently
- Install the latest driver from the manufacturer's official site
- Restart your computer after installing
- Connect the video cable or USB-C cable to the correct port
- Connect the data cable if your device needs one
- Plug in the power adapter
- Select the correct input source on the pen display
- Choose Extend mode in Windows (Win + P) or macOS System Settings
- Map the pen to the correct monitor in the driver
- Calibrate the pen tip
- Test pressure and tilt in your drawing app
If every box is checked and something still isn't working, go back to the input source. That single setting causes more failed setups than any cable or driver issue combined.