How to Make Electronic Home Designs: Easy Steps for Stunning Results
Ever looked at your living room and thought, “I wish I could see how this sofa looks in a different corner without moving it”? Or maybe you’ve daydreamed about designing your dream kitchen from the comfort of your couch.
With electronic home designs, you can turn those ideas into a virtual reality without lifting a finger. This guide will show you how to create stunning home designs using easy, accessible technology. Imagine impressing your friends with designs that look like they came straight out of a top interior design magazine.
Ready to unleash your inner designer and transform your home? Let’s dive in and explore the exciting world of electronic home designs together!
Choosing Design Software
Choosing the right design software is a crucial step in creating electronic home designs. The software you pick can either simplify your work or make the process frustrating. Understanding the options available and what features matter most will help you make smarter decisions and save time.
Free Vs Paid Options
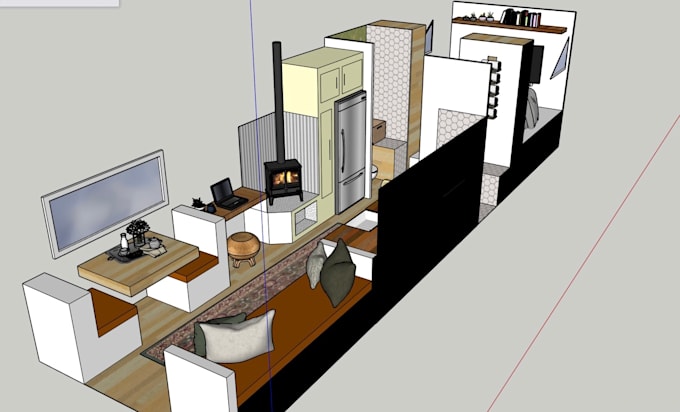
Free design software can be a great starting point, especially if you’re new to home design. Tools like SketchUp Free or Sweet Home 3D offer essential features without any cost. However, they might lack advanced tools or have limitations on file exports.
Paid software often provides more powerful features, better customer support, and frequent updates. Programs like AutoCAD or Chief Architect come with a price but offer precision and professional-grade tools. Ask yourself: do you need advanced options now, or will a free tool cover your current needs?
Key Features To Look For
Look for software that supports 3D modeling and allows easy customization of layouts and materials. Features like drag-and-drop furniture placement and lighting simulation can bring your designs closer to reality. Don’t forget the ability to export files in formats compatible with other tools or contractors.
Another important feature is real-time collaboration, especially if you plan to work with designers or family members. Some software offers cloud storage and sharing options, which can keep everyone on the same page. Would collaboration enhance your design process?
User-friendly Interfaces
Even the most powerful software becomes useless if it’s hard to navigate. Choose programs with clean, intuitive interfaces that reduce your learning curve. Many software providers offer free trials—test them to see which feels more natural to you.
Look for helpful tutorials, tips, and community forums included with the software. These resources can save you hours when you get stuck. How much time are you willing to spend learning the tool versus designing your dream home?
Credit: www.fiverr.com
Planning Your Home Layout
Planning your home layout is the foundation of creating a comfortable and efficient living space. It shapes how you move through your home and how each room serves your daily needs. Taking the time to carefully plan can save you from costly changes later and ensure your design truly fits your lifestyle.
Measuring Your Space
Start by measuring every corner of your home accurately. Use a tape measure to note the length, width, and height of each room, including windows and doorways. This data helps you avoid buying furniture that doesn’t fit or placing items in awkward spots.
Don’t forget to measure fixed features like radiators or built-in shelves. These details affect where you can place your electronics and furniture. A simple sketch with these dimensions can make it easier to visualize your layout.
Setting Functional Zones
Divide your home into zones based on activities, such as cooking, relaxing, working, and entertaining. This helps keep your space organized and ensures each area has the right electronic setup.
Think about how you use each zone throughout the day. For example, placing your workspace near a power outlet and good lighting is crucial. You might also want a charging station in the living room where devices gather naturally.
Incorporating Natural Light
Natural light affects both the mood and functionality of your home. Position electronic devices and furniture to take advantage of sunlight during the day.
Consider how sunlight moves through your rooms at different times. Avoid placing screens where glare will cause frustration, but don’t block windows with bulky electronics. Using light-colored walls and reflective surfaces can also brighten up your space without extra energy use.
Creating Floor Plans
Creating floor plans is a crucial part of electronic home design. It sets the foundation for how your space will function and feel. You want your floor plan to be clear, accurate, and easy to adjust as your ideas develop.
Drawing Walls And Rooms
Start by outlining the walls to define each room’s shape and size. Use straight lines to draw exterior and interior walls, paying attention to the thickness for realism.
Think about the flow between rooms. Does the layout support how you live daily? You can easily adjust walls on digital plans, so experiment until the space feels right.
Adding Doors And Windows
Doors and windows bring light and access to your rooms. Place them thoughtfully to optimize natural lighting and movement paths.
Consider how door swings affect furniture placement. Adding windows at the right spots can improve ventilation and mood in your home.
Using Layers Effectively
Layers help you organize different elements like walls, furniture, and electrical wiring separately. This keeps your design clear and editable without clutter.
Try toggling layers on and off while you work. It helps you focus on specific details and prevents accidental changes to other parts of your plan.
Selecting Materials And Textures
Selecting materials and textures is a crucial part of making electronic home designs feel authentic and inviting. The choices you make here affect both the look and the feel of the space. Think about how different surfaces interact with light, sound, and even the emotions you want to evoke in each room.
Choosing Flooring Types
Flooring sets the foundation for your entire design. Hardwood offers warmth and elegance but can be costly and requires maintenance. Laminate flooring mimics wood at a lower price and is easier to clean, perfect for busy households.
Consider tile for areas prone to moisture, like kitchens or bathrooms. It’s durable and comes in endless patterns and textures. Have you thought about how the floor’s texture might affect the comfort and safety of your family?
Wall Finishes And Colors
Walls are your largest visible surfaces, so their finish and color impact the room’s vibe immediately. Matte paint absorbs light and hides imperfections, while gloss paints reflect light and add brightness.
Textures like stucco or wallpaper add dimension and can break the monotony of flat walls. Ask yourself if a bold color or a subtle texture would better highlight your electronic features without overwhelming the space.
Furniture And Fixtures
Your furniture choices should complement the materials and textures around them. Soft fabrics like velvet or cotton add comfort and contrast nicely with harder surfaces like metal or glass.
Fixtures, from light switches to cabinet handles, are small details that tie the design together. Selecting finishes like brushed nickel or matte black can create a modern or classic look depending on your style.
Think about how these elements feel to the touch and how they function in your daily life. Does the texture invite you to sit and relax, or does it enhance the sleekness of your electronic design?
Adding Electrical And Plumbing Details
Adding electrical and plumbing details to your home design is crucial for creating a functional living space. These elements affect daily comfort and safety, so planning them carefully can save you headaches later. Let’s break down how to mark outlets, plan lighting, and include plumbing fixtures effectively in your electronic home design.
Marking Outlets And Switches
Start by deciding where you need power access in each room. Think about the placement of furniture and appliances to avoid inconvenient outlet locations.
Mark outlets at a comfortable height, typically 12-18 inches from the floor. Place switches near doorways for easy access when entering or leaving rooms.
- Consider extra outlets in kitchens and home offices where devices multiply.
- Don’t forget outdoor outlets for garden tools or holiday lights.
- Label each outlet and switch clearly on your design plan to avoid confusion during installation.
Planning Lighting Layouts
Lighting sets the mood and functionality of your home. Identify areas that need bright light, like kitchens and workspaces, and those that benefit from softer, ambient lighting.
Use a mix of ceiling lights, wall sconces, and task lighting to cover all needs. Think about dimmer switches to control brightness levels easily.
- Place lights near seating areas for reading or hobbies.
- Consider natural light sources and how your artificial lighting will complement them.
- Plan wiring routes carefully to avoid clutter and maintain safety.
Including Plumbing Fixtures
Plumbing layout impacts both comfort and efficiency. Start by marking key fixtures like sinks, toilets, and showers on your design.
Keep plumbing lines as straight and short as possible to reduce costs and potential leaks. Group wet areas together, such as bathrooms and kitchens, to simplify pipework.
- Think about water pressure and drainage slopes for proper function.
- Include access points for maintenance to avoid costly repairs.
- Plan for future upgrades, like adding a water softener or smart irrigation system.
Have you ever faced a frustrating search for an outlet or a light switch in your home? Carefully planning these details in your design ensures your space works for you, not against you.
Visualizing In 3d
Visualizing your electronic home designs in 3D takes your project from a simple sketch to an immersive experience. It lets you see every detail clearly and understand how your ideas will work in real life. This step helps you catch design flaws early and make confident decisions.
Rendering Realistic Views
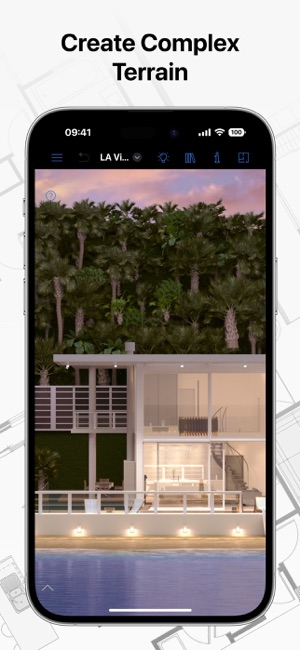
Rendering realistic views means transforming your 3D model into lifelike images. These views show textures, colors, and materials as they would appear in the finished space. When you render your design, you get a true sense of how your choices affect the overall look.
Imagine seeing your kitchen counters with the exact marble pattern you want or the wall paint color under natural daylight. Realistic rendering highlights imperfections you might have missed in a flat drawing, saving you costly changes later.
Exploring Virtual Walkthroughs
Virtual walkthroughs let you move through your design as if you were inside it. You can check the flow of rooms, the placement of furniture, and the ease of navigation. This interactive experience helps you feel the space and make adjustments based on how it feels to live there.
Have you ever walked into a room and felt it was too cramped or awkward? Virtual walkthroughs prevent that by showing you exactly what your home will feel like before construction begins. It’s like taking a test drive for your future home.
Adjusting Lighting Effects
Lighting can change the entire mood of your home design. In 3D visualization, you can test different lighting setups — natural light from windows, warm indoor lamps, or focused task lighting. This helps you see how shadows and highlights play across surfaces.
Try adjusting lighting at different times of day to understand how sunlight moves through your space. This insight guides you in placing windows, fixtures, and even choosing the right paint colors that look good in all lighting conditions.
Making Revisions
Making revisions is an essential part of creating electronic home designs. It helps improve the layout, functionality, and overall look. Revisions allow you to refine your ideas and fix any mistakes early on. This process leads to a better, more polished design that matches your vision.
Gathering Feedback
Feedback provides new insights and points out problems you might miss. Share your design with others, like friends or professionals. Ask specific questions about usability, style, and features. Use their opinions to understand what works and what does not. Keep an open mind and note all suggestions carefully.
Implementing Changes
Start making changes based on the feedback received. Prioritize fixes that improve function and user experience. Adjust colors, layout, or components as needed. Test the design after each change to see its impact. Avoid overcomplicating the design during revisions to keep it clear and simple.
Finalizing The Design
Review the entire design once revisions are complete. Check for consistency, errors, and any missed details. Ensure the design meets your goals and looks balanced. Save your final version in the correct format for easy sharing or production. A well-finalized design helps create an efficient electronic home system.
Credit: apps.apple.com
Exporting And Sharing Designs
Exporting and sharing your electronic home designs is the bridge between your creative process and real-world application. It ensures that your vision is communicated clearly to clients, builders, and collaborators. How you choose to export and share can affect the clarity and usability of your designs, so it’s important to get it right.
Choosing Export Formats
Different projects and audiences require different file formats. Common options include PDF, DWG, and JPEG, each serving a unique purpose.
- PDF:Ideal for sharing with clients who need an easy-to-view, print-ready version.
- DWG:Preferred by builders and architects for detailed editing and CAD software compatibility.
- JPEG/PNG:Useful for quick previews or sharing on social media and presentations.
Think about what your recipient needs to do with the file. Should they just view it, or edit it? Choosing the right format saves time and avoids confusion.
Sharing With Clients Or Builders
Clients usually appreciate clear, easy-to-understand files, while builders need precision and detail. Sending a PDF with annotations can help clients grasp your design without getting overwhelmed.
For builders, providing DWG files or other CAD formats allows them to work directly with your plans. Cloud storage services like Google Drive or Dropbox make sharing large files simple and secure.
Have you ever sent a file that your client couldn’t open? Double-check compatibility before sending to avoid back-and-forth delays.
Printing Blueprints
Even in a digital age, printed blueprints remain essential on job sites. Ensure your files are set to the correct scale before printing to avoid costly mistakes.
Use high-quality printers or professional printing services to produce clear, legible plans. Include a title block and revision history on your blueprints to keep everyone on the same page.
Would you trust a contractor with a blurry or poorly scaled blueprint? Clear prints can make or break a project’s success.
Credit: easy-peasy.ai
Frequently Asked Questions
What Tools Are Essential For Electronic Home Designs?
Essential tools include a computer, design software, circuit simulators, and prototyping kits. These help create accurate and functional electronic home designs efficiently.
How To Start Designing Electronic Home Systems?
Begin by researching your home’s needs, sketching layouts, and selecting components. Use software for detailed circuit design and simulate before building.
Which Software Is Best For Electronic Home Design?
Popular software includes AutoCAD, Fritzing, and Eagle. They offer user-friendly interfaces, precise schematics, and simulation features tailored for home electronic projects.
How To Ensure Safety In Electronic Home Designs?
Use proper insulation, circuit breakers, and follow electrical codes. Always double-check connections and avoid overloading circuits to prevent hazards.
Conclusion
Designing electronic home systems can be simple and fun. Start with a clear plan and basic tools. Choose parts that fit your needs and budget. Test each step to avoid mistakes later. Keep learning and trying new ideas often. This way, you build a home that works well and feels smart.
Remember, small steps lead to great results. Enjoy creating your perfect electronic home design.