How to Make Electronic Mosquito Killer at Home: Easy DIY Guide
Tired of pesky mosquitoes ruining your peaceful evenings? Imagine being able to enjoy your time outdoors without constant buzzing and biting.
The solution lies in your hands, quite literally! Discover how you can make your own electronic mosquito killer at home. Not only will this save you money, but you’ll also have the satisfaction of crafting a device that keeps your space mosquito-free.
With just a few simple materials and steps, you can create an effective mosquito trap that works wonders. Dive into this guide to learn how to reclaim your comfort and say goodbye to mosquitoes for good. Ready to get started? Let’s dive in!

Credit: www.walmart.com
Materials Needed
Gathering the right materials is the first step to building your own electronic mosquito killer at home. Having everything ready makes the process smoother and more enjoyable. You don’t need complicated or expensive parts—just a few simple components and tools that you might already have around.
Essential Components
- High-voltage transformer:This raises the voltage to a level that can zap mosquitoes on contact. A small neon sign transformer or a flyback transformer from an old CRT monitor works well.
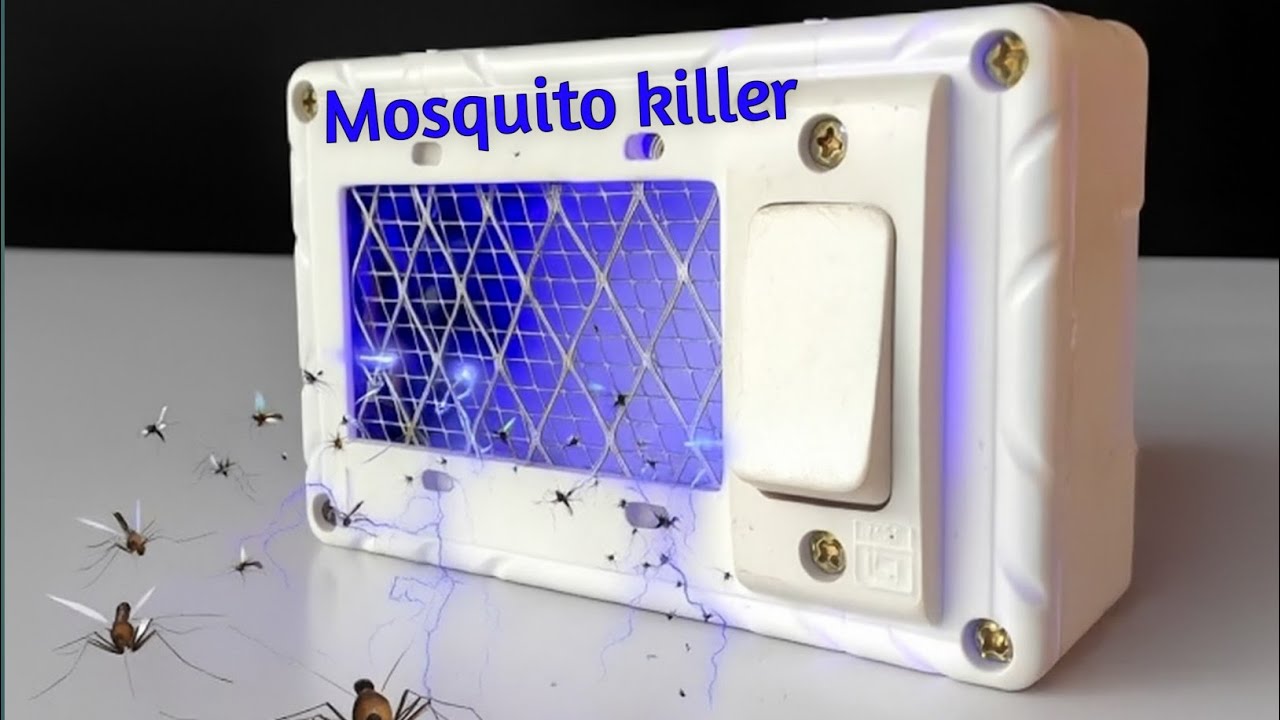
- Metal grids or wire mesh:These act as the electrified surface where mosquitoes get zapped. Use thin metal wires spaced closely but not touching.
- Insulating frame:To hold the metal grids safely apart without short-circuiting. Plastic or wood pieces work great here.
- Power source:Typically a 12V DC adapter or batteries, depending on your transformer requirements.
- Protective casing:To cover the device and prevent accidental contact with the high-voltage parts.
Choosing the right transformer is crucial. I once tried a low-voltage transformer, and the device barely affected the mosquitoes. Using the proper high-voltage component made all the difference.
Tools Required
- Soldering iron and solder:For securing electrical connections firmly.
- Wire cutters and strippers:To prepare the wires and mesh to the right lengths.
- Screwdrivers:Useful for assembling the frame and casing.
- Multimeter:To check voltage levels and ensure safety before powering up.
- Protective gloves:Always a good idea when working with electricity.
Having these tools on hand will save you frustration. I learned this the hard way by trying to assemble parts without a soldering iron—connections kept failing, and mosquitoes kept surviving.
Do you have all these materials ready? If not, which one do you think might be the hardest to find or replace?
Basic Working Principle
Understanding the basic working principle of an electronic mosquito killer helps in making one at home. The device uses simple science to attract and eliminate mosquitoes quickly. It combines light and electric power to work efficiently without harmful chemicals.
How It Attracts Mosquitoes
Mosquitoes are drawn to light, especially ultraviolet (UV) light. The device uses a UV bulb or LED that emits a specific wavelength. This light mimics natural sources that mosquitoes find appealing.
Warmth and carbon dioxide release also attract mosquitoes in some designs. The light lures mosquitoes close enough to reach the electric grid. This attraction is key to trapping and killing mosquitoes effectively.
Electric Shock Mechanism
Once mosquitoes touch the charged grid, they receive a high-voltage electric shock. This shock is strong enough to kill mosquitoes instantly but safe for humans.
The grid is powered by a small transformer or battery, creating a voltage difference. When a mosquito bridges the gap between wires, it completes the circuit, causing the shock.
This method avoids chemicals and poisons, making it eco-friendly and safe for indoor use. The instant shock prevents mosquitoes from escaping or spreading diseases.
Step-by-step Assembly
Assembling your electronic mosquito killer at home involves clear, manageable steps that anyone can follow. You’ll build a practical device piece by piece, starting with the frame and moving through wiring and power setup. This process not only saves money but also gives you a deeper understanding of how the device works.
Preparing The Frame
Choose a sturdy material for the frame, like wood or plastic, that can safely hold the electrical parts. Cut the frame to a size that fits your space but leaves enough room for airflow. Don’t forget to sand any rough edges to avoid injury while handling your device.
Think about ventilation—mosquitoes need to be attracted to the electric grid, so a frame that allows easy access without gaps is ideal. You might want to add hooks or stands to keep the device elevated. Have you considered how placement will affect its effectiveness?
Wiring The Circuit
Start by gathering all necessary electrical components: wires, resistors, a transformer, and the electric grid mesh. Use insulated wires to prevent accidental shocks and keep your workspace organized to avoid confusion. Connect the transformer to the electric grid carefully, ensuring solid, secure joins.
Test each connection with a multimeter before finalizing the assembly. This simple check can save you time troubleshooting later. Remember, safety first—always disconnect power while adjusting the wiring.
Installing The Power Source
Select a power source that matches your circuit’s voltage requirements—batteries or an adapter both work well. Secure the power source in a spot that’s easy to reach for replacement or charging. Use a switch to control the device without unplugging it every time.
Check the power connections twice to avoid shorts or loose contacts. Once powered, you should see a faint glow or feel a slight charge on the grid. Does your setup feel stable and safe enough to run continuously?

Credit: www.youtube.com
Safety Tips
Building an electronic mosquito killer at home is a fun and useful project, but safety should always come first. Handling electrical components requires care and attention to avoid harm. Understanding key safety tips helps you protect yourself and your home while creating an effective device.
Handling Electrical Parts
Always unplug your power source before touching any electrical parts. This simple step can prevent serious shocks or short circuits. Use insulated tools to handle wires and components, and avoid wearing metal jewelry that could accidentally create a connection.
Check all wires and connections for any damage before starting. Damaged insulation or loose wires increase the risk of electric shock or fire. Use electrical tape or heat shrink tubing to cover exposed wires securely.
Preventing Accidents
Keep your work area clean and dry at all times. Water and electricity don’t mix, and even a small spill can cause accidents. Place your device on a stable surface away from pets and children to avoid unintended contact.
Test your device in a controlled environment before regular use. Observe for any unusual heat, sparks, or smells that might indicate a fault. Have a fire extinguisher nearby just in case, and never leave the device unattended while powered on.
Testing The Device
Testing your homemade electronic mosquito killer ensures it works safely and effectively. This step confirms all parts function well and attract mosquitoes properly. Testing helps spot problems early, saving time and effort.
Ensuring Proper Function
First, check the power source. The device should light up or show an indicator. Listen for a faint buzzing sound, which means the electric grid is active. Next, test the UV light or attractant bulb in a dark room. It should glow steadily without flickering.
Place the device in an area with mosquitoes. Watch if insects fly toward the light and get zapped. This confirms the killing grid is working. Also, check for any smoke or unusual smells. These signs may mean electrical issues.
Troubleshooting Common Issues
If the device does not turn on, verify the battery or plug connection. Clean any dust or debris on the grid that can block current flow. Replace faulty bulbs if the light is weak or off. Make sure wires connect firmly without loose ends.
Sometimes, mosquitoes avoid the device. Try moving it to a darker or less windy spot. Check if the electric grid is too far from the attractant light. Adjust the gap to improve contact. If buzzing stops, inspect the wiring for breaks or shorts.

Credit: www.youtube.com
Maintenance And Care
Keeping your electronic mosquito killer clean and well-maintained helps it work better and last longer. Dirt and dead insects can block the device, reducing its effectiveness. Simple care routines keep the device safe and efficient for daily use.
Cleaning The Device
Unplug the device before cleaning to avoid electric shock. Use a soft brush or cloth to remove dead mosquitoes and dust. Clean the grid carefully to prevent damage. Avoid using water directly on the device. Wipe the outer surface with a damp cloth. Clean the device regularly to maintain strong performance.
Replacing Components
Check the device parts often for wear and tear. Replace damaged electric grids to keep the device safe. Change the light bulb if it stops glowing or dims. Use parts that match the original specifications. Follow the user manual for safe replacement steps. Regular component checks ensure the device works properly all season.
Enhancing Efficiency
Enhancing the efficiency of your homemade electronic mosquito killer is key for better results. Small changes can make a big difference. Focus on what attracts mosquitoes and where you place your device. This way, you increase the chance of catching more mosquitoes effectively.
Using Attractants
Mosquitoes are drawn to certain smells and lights. Adding attractants can boost your device’s power.
- Use a small UV light to lure mosquitoes.
- Place a bowl with sugar water nearby for added scent.
- Carbon dioxide sources, like dry ice, can attract mosquitoes from far away.
- Essential oils like citronella or eucalyptus may help draw mosquitoes closer.
Test different attractants to see what works best in your area.
Optimizing Placement
Where you put your mosquito killer affects its success. Choose spots where mosquitoes gather or pass by.
- Place near standing water or plants where mosquitoes breed.
- Keep it away from strong winds or open spaces that scatter mosquitoes.
- Put the device at a low height, around 1 to 3 feet from the ground.
- Use shaded or dim areas since mosquitoes avoid bright light.
Try different spots and observe where mosquitoes are most active.
Frequently Asked Questions
How Does An Electronic Mosquito Killer Work?
An electronic mosquito killer uses UV light to attract mosquitoes. When insects touch the electric grid, they get zapped instantly. This method is chemical-free and safe for indoor use. It effectively reduces mosquito populations without harmful fumes.
What Materials Are Needed To Make A Mosquito Killer?
You need a small electric fan, UV LED lights, a metal mesh grid, a power source, and a container. These parts work together to attract and trap mosquitoes. Most materials are affordable and easily available at hardware stores.
Is Homemade Mosquito Killer Safe For Children And Pets?
Yes, a homemade electronic mosquito killer is generally safe if well-constructed. Keep it out of children’s and pets’ reach. Avoid exposed wires and ensure the electric grid is enclosed. This prevents accidental shocks and ensures safe operation indoors.
How Effective Is A Diy Electronic Mosquito Killer?
A DIY mosquito killer can be quite effective if designed properly. It attracts mosquitoes using UV light and kills them with electric shock. However, its efficiency depends on design quality and placement. Regular maintenance ensures optimal mosquito control.
Conclusion
Making an electronic mosquito killer at home is simple and cost-effective. You can protect your space without buying expensive devices. Use basic materials and follow easy steps to build your own. This project saves money and reduces mosquito problems safely.
Try it today and enjoy a mosquito-free environment. Clean air and fewer bites make your home more comfortable. Small effort, big benefit.