Can Ultrawide Monitors Be Wall Mounted? Yes, and Here’s How
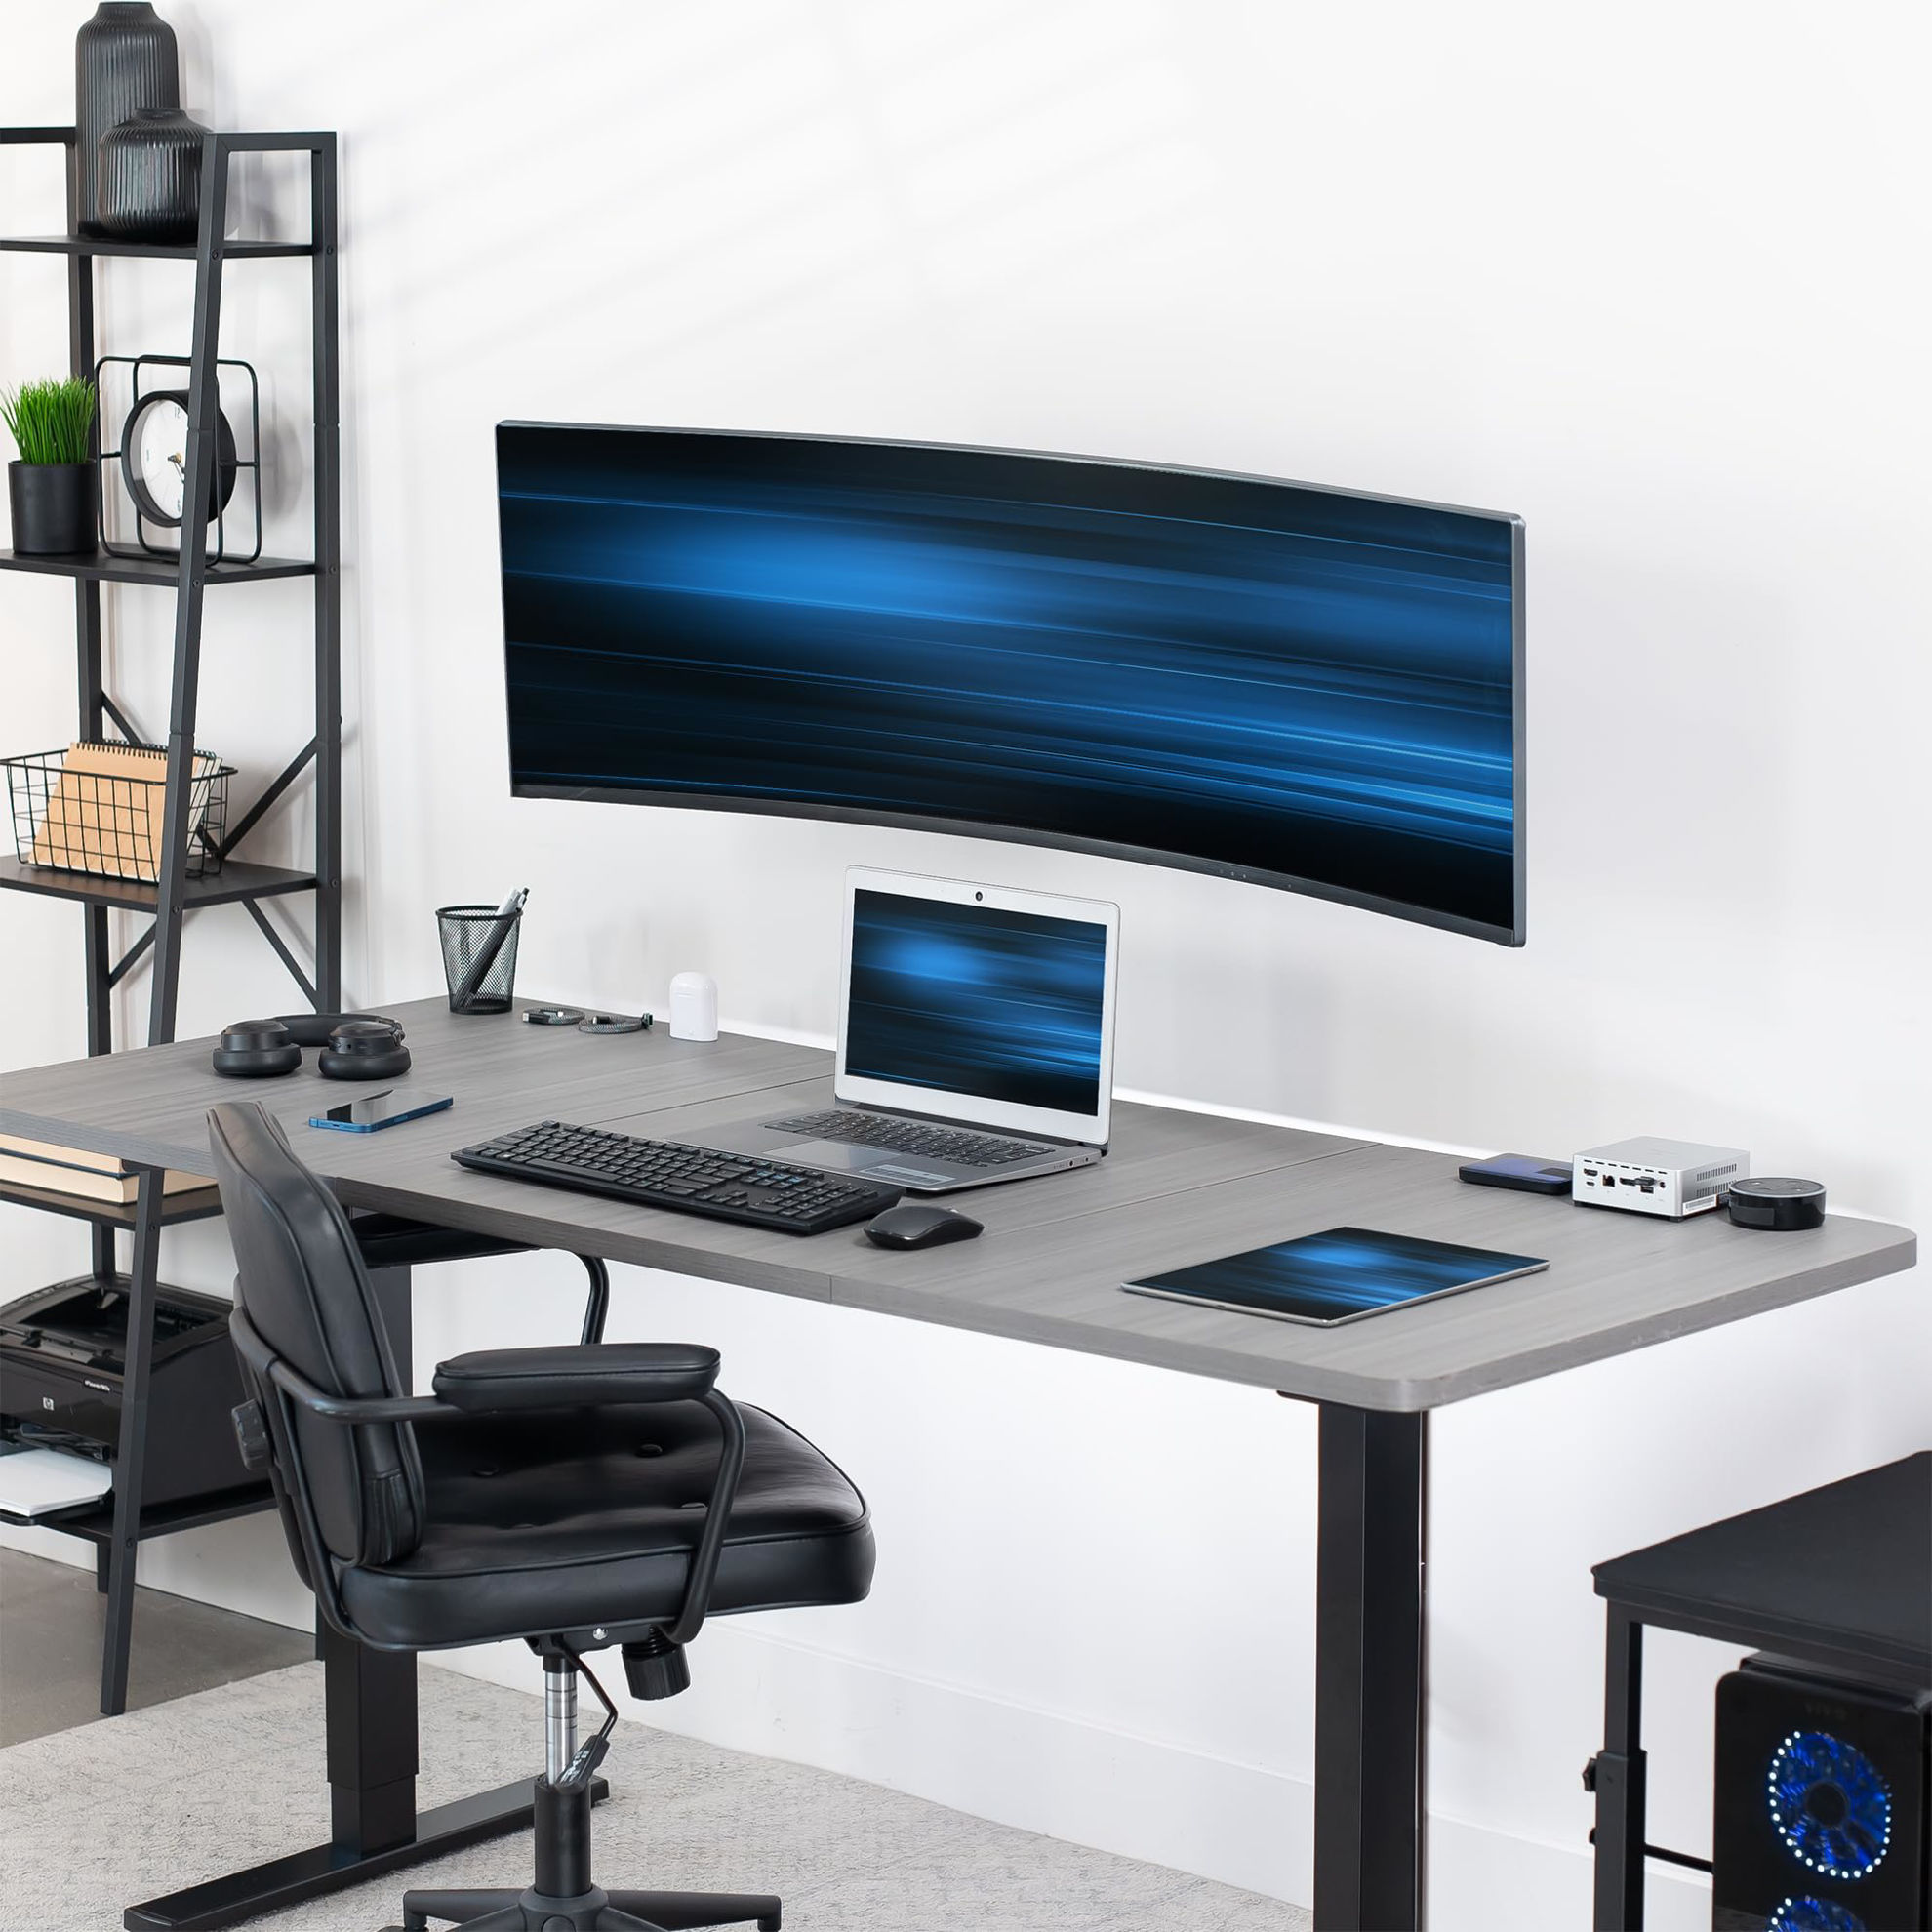
You’ve got an ultrawide monitor and a cramped desk. The first question that pops up is simple: can ultrawide monitors be wall mounted? The answer is usually yes, but only if you check a few critical details first.
A heavy 34-inch panel isn’t like a small office screen. It puts serious leverage on any mount, and a wrong choice can end with cracked drywall and a shattered display.
The numbers matter. A typical 34-inch ultrawide weighs around 15 pounds without its stand. The VESA bolt pattern on the back is often 100×100 mm or 200×200 mm.
Those two specs dictate whether a mount will even attach. Getting them wrong means a costly return and a wobbly setup. Let’s break down the exact conditions that make wall mounting safe.
Why Wall Mounting an Ultrawide Is Trickier Than You Think
An ultrawide isn’t just a bigger 16:9 screen. Its length and weight create a lever arm that standard mounts aren’t designed to handle. A 34-inch panel sticks out farther from the wall than a typical 27-inch display.
That extra reach multiplies the force on the mount’s joints.
A curved panel adds another layer. The curve pushes the center of gravity away from the wall. This stresses the arm and can cause sag over time.
Many ultrawides also have recessed VESA holes that standard plates can’t reach without an adapter. If you need a second screen without the hassle, a portable display might be simpler.
That’s why you need a decision path, not a one-size-fits-all answer. The right move depends on your monitor’s exact specs and what your wall is made of.
The Quick Answer
Yes, ultrawide monitors can be wall mounted if three conditions are met. The VESA pattern must match the mount’s bolt layout. The mount must support the panel’s weight without its stand.
Curved screens need extra depth so they don’t hit the wall. Always check all three before buying.
Let’s unpack those three points in detail.
The Three Compatibility Points That Matter (VESA, Weight, Curvature)
VESA pattern
VESA stands for Video Electronics Standards Association. They define the bolt-hole patterns used by nearly every flat-panel display. For ultrawides, the most common patterns are 100×100 mm and 200×200 mm.
Super-ultrawides (49-inch and larger) often use a 600×400 mm layout. You can verify the standard on the official VESA website.
Bare weight
Every mount lists a maximum weight capacity. That rating must exceed your monitor’s bare weight. The bare weight is the panel alone, without the factory stand.
A mount rated for 20 pounds might sag if the arm is short and the panel is long. A good safety margin is 1.5 times the monitor’s weight.
Curvature
Curvature is measured in “R” for radius. A 1000R curve means a very tight bend. The more aggressive the curve, the more the panel extends behind its VESA plane.
This needs a mount with greater depth clearance. A flat-panel mount will push a curved screen away from the wall at an angle.
| Common VESA Pattern | Typical Screen Size | Weight Capacity Needed (bare weight + safety margin) |
|---|---|---|
| 100 x 100 mm | 34-inch flat | 9–13 kg (20–29 lb) |
| 200 x 200 mm | 34-inch curved | 9–13 kg |
| 600 x 400 mm | 49-inch super ultrawide | 15–20 kg (33–44 lb) |
If you’re driving this display with a laptop, a solid work machine makes a difference.
Step 1: Find Your Monitor’s Real VESA Pattern and Bare Weight
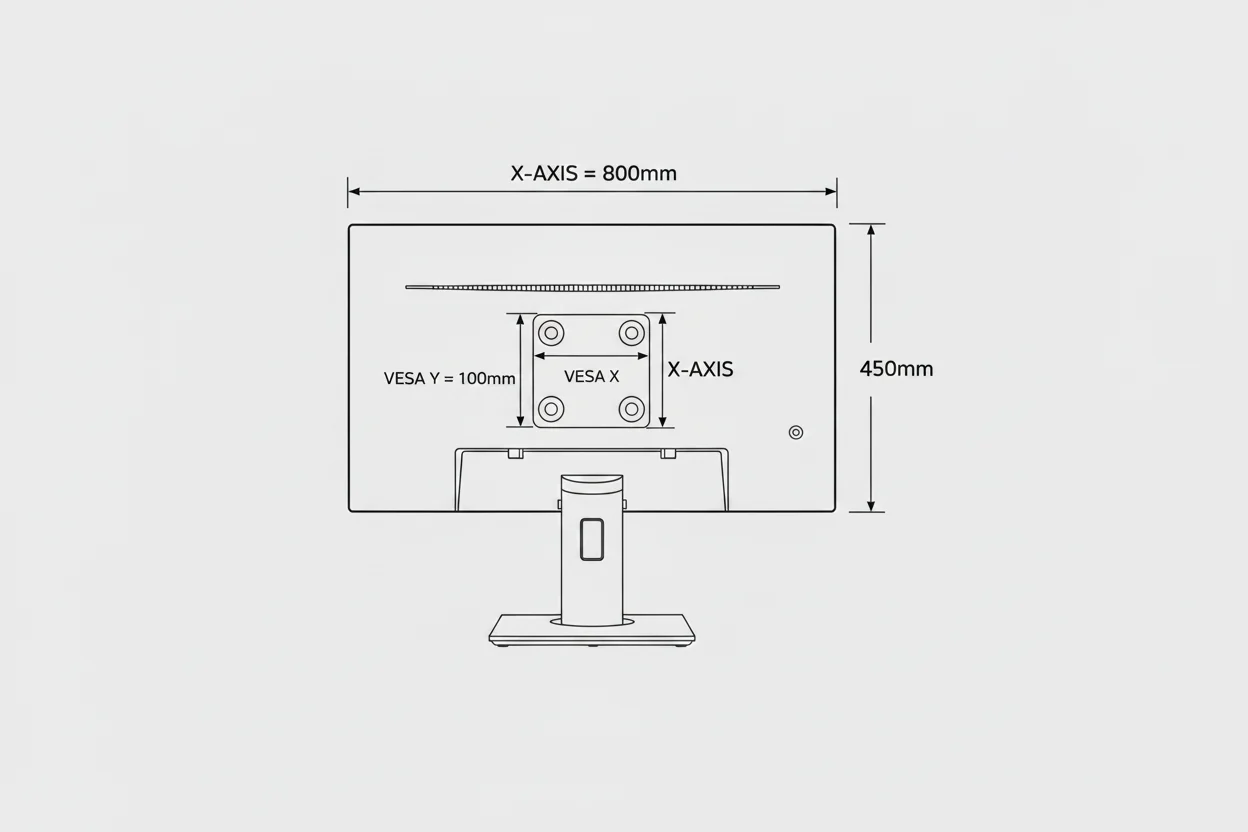
Start by removing the factory stand. Look for a sticker on the back panel. It lists the VESA pattern and the bare weight in kilograms or pounds.
Some monitors hide the label near the bottom edge.
If the sticker is missing, measure the horizontal and vertical distance between the mounting holes. Use a ruler or caliper. Check the depth of the recessed holes.
A standard VESA plate might not sit flush if the holes are more than 10 mm deep.
Some high-end models use a proprietary bracket. In that case, you’ll need a manufacturer-specific adapter. A work-and-gaming laptop can push high resolutions across that screen.
Step 2: Figure Out What Your Wall Is Actually Made Of
Most US homes have interior walls made of drywall attached to 2×4 wood studs. The studs are spaced 16 inches on center. You must anchor the mount into the studs.
Drywall alone cannot hold a heavy ultrawide.
Use a stud finder to locate the center of each stud. Mark the edges carefully. If you can’t hit two studs with the mount’s bolt holes, use a plywood backer board.
Screw the board into the studs, then attach the mount to the board.
For masonry walls, you’ll need a hammer drill and sleeve anchors. The Consumer Product Safety Commission recommends anchoring heavy furniture and displays to prevent tip-over injuries.
If you’re mounting above a desk, the monthly energy cost of your setup might rise slightly. With your monitor off the desk, you’ve got room for a business phone.
Step 3: Choosing the Right Mount Type for Your Setup
Now you know your monitor’s specs and your wall’s construction. The final decision is mount type. There are three main categories: fixed, tilting, and full-motion (articulating).
A fixed mount holds the panel flush against the wall. It’s the cheapest option, but you can’t adjust the angle later. This works if you only ever sit in one spot.
A tilting mount lets you adjust the screen up or down. That’s useful for glare or if you switch between sitting and standing. Most tilting mounts add 2 to 6 inches of clearance.
A full-motion mount uses a gas-spring or mechanical arm. It gives you tilt, swivel, and extension. That’s the most versatile option, but it needs more clearance behind the screen.
The arm also has to handle the panel’s weight at full extension.
If you’re running a dual-screen setup, the center of gravity shifts when you pull the monitor away from the wall. A full-motion arm rated for double the weight handles that better.
Fixed Wall Mounts vs. Full-Motion Arms for Curved Screens
Curved panels create a specific problem. The curve extends behind the VESA plane. On a fixed mount, this doesn’t matter.
The screen sits flat against the wall and the curve faces outward as designed.
On a full-motion arm, the curve can hit the wall when you swivel the screen. The closer the arm pivot is to the wall, the worse this gets. You need an arm with enough depth clearance to keep the curved back from scraping.
Gas-spring arms are better for heavy ultrawides. They counterbalance the weight and make repositioning easier. Mechanical arms rely on friction.
Over time, friction joints loosen and the screen droops.
For a curved ultrawide, a tilting mount is often the sweet spot. You get enough adjustment to find a comfortable angle without the risk of hitting the wall.
If you need to share your screen with someone across the room, a full-motion arm is worth the extra depth. Just verify the arm’s extension distance and clearance specs before buying.
Who Benefits Most from a Wall-Mounted Ultrawide
Not everyone needs a wall mount. But certain setups benefit enormously from reclaiming desk space.
Home offices with small desks gain the most. Removing the factory stand frees up a huge footprint. That space can fit a keyboard tray, a desktop PC, or just a clean workspace.
Console gamers often prefer a low-mounted ultrawide on the wall. It mimics a big-screen TV feel without taking up floor space with a TV stand.
Video editors and colorists need precise eye-level positioning. A wall mount lets them dial in the exact height and distance for their viewing position. That’s harder to achieve with a desk stand.
Multi-monitor traders and programmers sometimes wall-mount their main ultrawide and keep secondary screens on desk arms. This creates a clean, organized layout without competing for desk real estate.
If your setup never changes and you have a large desk, a wall mount is still optional. But if you’re tight on space or need flexible positioning, it’s a solid upgrade.
The 5 Most Common Mistakes That Lead to Screens Hitting the Floor
Even with the right mount, installation errors cause failures. These are the most frequent ones.
First, mounting into drywall without hitting a studs. Drywall anchors have static weight limits. They can hold a panel for days or weeks.
Then vibration or temperature changes loosen them. The screen drops.
Second, using a mount rated below the monitor’s weight. A mount rated for 20 pounds might hold a 18-pound panel. But when you extend the arm, the leverage multiplies the force.
The joint fails over time.
Third, ignoring the curve clearance. A curved panel on a short-arm mount hits the wall when you tilt it. Users force the tilt, stripping the VESA bolts or cracking the panel.
Fourth, lifting a heavy ultrawide alone. A 34-inch panel is awkward to hold. A 49-inch panel is dangerous.
One slip and the screen cracks or injures you. Always have a helper.
Fifth, skipping the test hang. Don’t route all the cables first. Hang the panel, then let it sit for 15 minutes.
Check for sag or movement. If it holds, finish the cable management.
Why Mounting Heavy Panels into Drywall Alone Is a Serious Risk
Drywall is not a structural material. It’s a surface finish. Even high-end toggle bolts have limits.
A toggle bolt might be rated for 25 pounds in shear. That’s the straight-down pull. But a monitor mount creates a lever.
The weight at the end of the arm multiplies the force on the wall anchors. A 15-pound ultrawide on a 20-inch arm can exert over 30 pounds of pull on the top anchor.
Over time, the drywall compresses around the anchor. Humidity and temperature changes make it worse. The anchor loosens.
Eventually, it pulls out.
The Consumer Product Safety Commission tracks furniture and television tip-over injuries. While their data focuses on TVs, the physics are the same. A heavy panel falling from height is a genuine hazard.
If you can’t hit two studs, use a plywood backer board. Screw the board into at least two studs with lag bolts. Then attach the mount to the board.
This distributes the load across a wider area of the drywall.
For masonry walls, use sleeve anchors rated for the combined static and dynamic load. Drill to the correct depth and blow out the dust before inserting the anchor.
How to Handle Recovered VESA Holes and Adapter Plates
Some ultrawides have recessed VESA holes. The bolt holes sit inside a shallow well. A standard VESA plate won’t sit flush against the panel.
This creates a gap and reduces thread engagement.
The fix is a spacer kit or adapter plate. These kits include longer bolts and cylindrical spacers. The spacers fill the recessed well.
The longer bolts pass through the mount plate and thread into the monitor.
Check the depth of the recess before buying spacers. Most recesses are 8 to 12 mm deep. Spacers come in standard lengths.
Using a spacer that’s too long prevents the mount from seating. One that’s too short leaves a gap.
Some manufacturers sell proprietary adapter brackets. These brackets clip into the monitor’s recess and provide a flat mounting surface. They’re model-specific, so verify compatibility before ordering.
If you’re using a third-party adapter, confirm the bolt thread pitch. Most VESA mounts use M4 or M6 bolts. Using the wrong pitch strips the threads in the monitor’s inserts.
That’s a permanent damage risk.
Frequently Asked Questions
Can I wall mount a curved ultrawide monitor?
Yes, but you need a mount with enough depth clearance. The curve extends behind the VESA plane. A fixed mount works fine.
A full-motion arm needs extra space so the curved back doesn’t hit the wall when you swivel or tilt.
What size mount do I need for a 34-inch ultrawide?
Look for a mount rated for at least 9 to 13 kg (20 to 29 lb). The VESA pattern is usually 100×100 mm or 200×200 mm. Always verify the pattern on your specific model.
A mount rated for 15 kg gives you a safer margin.
Do I need to hit a stud to mount an ultrawide?
Yes, hitting at least one stud is strongly recommended. Drywall anchors alone can fail under the leverage of a heavy panel. If you can’t hit a stud, use a plywood backer board screwed into multiple studs.
Can I use a regular TV mount for my ultrawide?
You can, if the VESA pattern and weight capacity match. TV mounts often have wider bolt patterns. Check that the mount supports the ultrawide’s aspect ratio and weight.
A mount rated for a 40-inch TV usually works for a 34-inch ultrawide.
How high should I mount an ultrawide on the wall?
Position the center of the screen at or slightly below your eye level. For most seated setups, that’s about 42 to 48 inches from the floor to the screen center. Adjust based on your chair height and viewing distance.
Will wall mounting void my monitor’s warranty?
Usually not, as long as you use a standard VESA mount. Some manufacturers exclude damage from improper mounting. Check your warranty terms.
Using a non-VESA-compatible mount or modifying the panel can void coverage.
The Final Decision Checklist
Before you buy anything, run through this checklist. It saves you from returns and installation headaches.
- Confirm your monitor’s VESA pattern and bare weight. Remove the stand and check the sticker on the back.
- Measure the depth of the VESA holes. If they’re recessed, order spacers or an adapter plate.
- Identify your wall construction. Locate studs with a stud finder. Plan for a backer board if studs don’t align.
- Choose a mount type based on your needs. Fixed for permanent setups, tilting for basic adjustment, full-motion for flexibility.
- Verify the mount’s weight capacity exceeds your monitor’s bare weight by at least 50 percent.
- Check the mount’s depth clearance if your panel is curved. The spec sheet lists minimum distance from the wall.
- Gather the right tools. You’ll need a drill, level, socket set, and a helper for lifting.
- Test the mount before routing cables. Hang the panel and let it sit for 15 minutes. Watch for sag or movement.
If every item checks out, you’re ready to install. If one item doesn’t match, pause and address it. A $20 adapter plate is cheaper than a cracked screen.
A sturdy backer board is cheaper than a wall repair.
Wall mounting an ultrawide is absolutely doable. It just requires matching the right hardware to your specific panel and wall. Take the time to verify the specs, and you’ll end up with a clean, professional setup that lasts.