
How to Make Electronic Voting Machine at Home: Easy DIY Guide
Are you curious about how electronic voting machines work and want to try building one at home? You’re not alone.
Many tech enthusiasts and DIY hobbyists are diving into the fascinating world of electronic gadgets, and creating your own voting machine is an exciting project. Not only does it challenge your skills, but it also gives you a deeper understanding of technology that influences our world.
Imagine impressing your friends with a fully functional electronic voting machine that you built yourself! It sounds intriguing, right? Stick around, because we’re about to guide you through the steps to make this complex-sounding project simple and fun. Get ready to unleash your inner tech wizard and create something truly remarkable!

Credit: penncapital-star.com
Materials Needed
Gathering the right materials is the first step to build a simple electronic voting machine at home. The list includes basic electronic parts, tools for assembly, and some optional items to improve your project. Choose components that are easy to handle and affordable.
Having everything ready makes the building process smooth and enjoyable. Below are the key materials needed.
Basic Electronic Components
- Microcontroller (e.g., Arduino Uno)
- Push buttons (for voting options)
- Resistors (220 ohms and 10k ohms)
- LEDs (to show vote status)
- Breadboard (for circuit assembly)
- Jumper wires (for connections)
- Power supply (battery or USB cable)
- LCD display (optional, to show results)
Tools Required
- Soldering iron (for permanent connections)
- Wire stripper and cutter
- Multimeter (to test circuits)
- Screwdriver set
- Hot glue gun (to fix components)
- Computer with USB port (for programming)
Optional Extras
- Enclosure box (to protect the circuit)
- Push button caps (for better grip)
- Reset switch
- Battery holder
- Speaker or buzzer (for sound feedback)
Circuit Design
The circuit design forms the core of your electronic voting machine. It controls input from voters and displays results clearly. A well-planned circuit ensures accuracy and reliability.
Each component has a specific role. Buttons register votes. LEDs show selections. The microcontroller processes data. A stable power supply keeps everything running smoothly.
Button And Led Setup
Use push buttons for each candidate or option. Connect each button to a digital input pin on the microcontroller. This setup registers each vote precisely.
Pair each button with an LED. When a button is pressed, the corresponding LED lights up. This confirms the voter’s choice instantly.
- Use debounce circuits or software to avoid multiple counts.
- Place LEDs close to buttons for easy visibility.
- Choose bright LEDs for clear indication.
Microcontroller Selection
Pick a microcontroller that handles multiple inputs and outputs. It should have enough pins for buttons and LEDs. Popular choices include Arduino Uno and PIC microcontrollers.
Consider the following:
- Simple programming and wide support.
- Low power consumption.
- Built-in features like timers and interrupts.
The microcontroller stores votes and controls LEDs. It also manages vote tallying and displays results.
Power Supply Options
Choose a power supply that provides stable voltage. A 5V regulated adapter suits most microcontrollers. Batteries can be used for portability.
- Use voltage regulators to prevent damage.
- Check current ratings to support all components.
- Include a switch for easy power control.
Ensure power supply noise does not affect the circuit. Clean power helps avoid errors during voting.
Programming The Microcontroller
Programming the microcontroller is the heart of your electronic voting machine project. This is where you define how the machine reads votes, processes inputs, and displays results. Writing clear and efficient code ensures your device works smoothly and accurately.
Writing The Code
Start by choosing a programming language compatible with your microcontroller, like C or Arduino’s simplified C++. Focus on basic functions such as capturing button presses, storing votes, and showing results on a display.
Think about the user experience: how will voters interact with the machine? Include debounce logic to avoid multiple counts from a single press. Adding comments to your code helps you or others understand it later.
Uploading The Program
Once your code is ready, connect the microcontroller to your computer using a USB or serial cable. Use a programming environment such as Arduino IDE or MPLAB X to upload your program.
Check for any upload errors and make sure the microcontroller resets after programming. Have you ever faced an upload failure and realized it was just a loose connection? Always double-check your hardware setup.
Testing The Logic
After uploading, test your voting machine by simulating actual voting scenarios. Press buttons in various sequences and verify if votes are recorded and displayed correctly.
Use serial output or LEDs to debug the process step-by-step. Testing early and often saves you from big problems later. Could your code handle unexpected inputs or multiple voters pressing buttons at the same time?

Credit: globalnews.ca
Assembly Steps
Assembling your electronic voting machine requires careful steps to ensure all parts work together smoothly. This process involves connecting components, fixing them on a stable surface, and protecting the device with a proper enclosure. Follow these steps for a neat and functional setup.
Wiring The Components
Start by connecting the main parts using jumper wires or cables. Attach buttons, sensors, and the microcontroller correctly. Make sure every wire fits firmly into the right pin. Double-check connections to avoid errors during operation. Use a breadboard for easy adjustments before finalizing the setup.
Mounting On A Board
Choose a sturdy board like wood or acrylic to mount your parts. Secure the microcontroller and buttons using screws or glue. Arrange components so wires do not overlap or tangle. This organization helps in troubleshooting and improves durability. Keep space for future upgrades or repairs.
Enclosure And Finishing Touches
Protect your machine inside a box or case to prevent damage. Use plastic or wood for a light and strong enclosure. Cut holes for buttons and display screens carefully. Label buttons clearly for easy use. Finish with smooth edges and secure all parts firmly inside.
Testing The Machine
Testing the electronic voting machine is crucial to ensure it works correctly. This phase checks if the machine can record and count votes accurately. Testing helps find any errors before real use. It also builds trust in the machine’s reliability.
Simulating Voting
Start by simulating a voting session. Use sample ballots with different choices. Press buttons or select options as a voter would. Watch the machine record each vote clearly. Check if the machine counts votes correctly at the end.
Try various voting patterns. For example:
- All votes for one candidate
- Split votes among candidates
- No votes cast (blank ballot)
Simulating helps see how the machine behaves in real conditions.
Troubleshooting Common Issues
Some issues may appear during testing. The machine might not count votes right. Buttons may stick or not respond. The display could show wrong information.
Check wiring and connections carefully. Loose wires often cause problems. Restart the machine if it freezes. Test each button separately to find faults. Replace any damaged parts immediately.
Keep a checklist of common problems and fixes. This speeds up troubleshooting and improves machine reliability.
Ensuring Accuracy
Accuracy is the top priority in voting machines. After testing, compare results with expected outcomes. The vote count should match exactly every time.
Run multiple tests to confirm consistent results. Use a variety of test ballots. Document each test and result for reference.
Use calibration tools if available. Verify sensors and counters work within set limits. Accuracy ensures voter confidence and smooth elections.
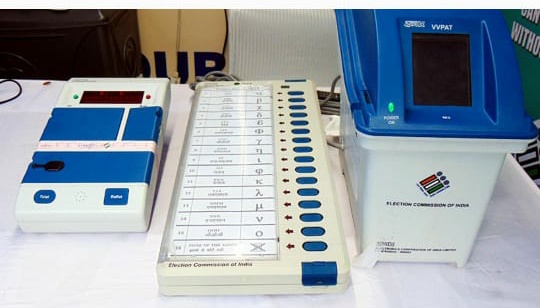
Credit: en.themooknayak.com
Enhancements And Customization
Enhancing and customizing your electronic voting machine at home can improve its usability and security. Small upgrades make a big difference in user experience and trust. Custom features help the machine fit your specific needs and environment.
Adding Display Screens
Display screens show clear voting options to users. They help voters confirm their choices before submitting. You can use LCD or LED screens for this purpose. Screens with touch capability allow direct input from voters. Choose screens with good brightness for easy reading in any light.
Integrating Sound Feedback
Sound feedback guides voters through the voting process. Simple beeps or tones confirm button presses. Audio messages can explain each step clearly. This helps people with limited vision or reading skills. Use a small speaker or buzzer connected to the machine’s control board.
Improving Security Features
Security is critical in electronic voting machines. Add password protection for machine access. Use encryption to protect vote data. Include a physical lock for the machine’s casing. Log every vote cast to prevent tampering. Consider backup power to avoid data loss during outages.
Frequently Asked Questions
What Materials Are Needed To Make An Electronic Voting Machine?
You need basic electronic components like a microcontroller, push buttons, LCD display, resistors, wires, and a power source. These parts form the core for building a simple, functional electronic voting machine at home.
How Does An Electronic Voting Machine Work?
It registers votes via button presses linked to candidates. The microcontroller counts votes and displays results on the LCD screen instantly. This ensures quick and accurate vote tallying without manual counting.
Is Building An Electronic Voting Machine Safe At Home?
Yes, if you follow proper electrical safety guidelines and use low-voltage components. Avoid short circuits and handle tools carefully to prevent accidents during assembly and testing.
Can I Customize The Voting Options On My Machine?
Absolutely. You can program the microcontroller to include any number of candidates or choices. This flexibility makes it easy to adapt the machine for different voting scenarios.
Conclusion
Building an electronic voting machine at home is a fun and educational project. It helps you learn about electronics and programming. You can see how votes are counted quickly and safely. Always test your machine carefully before using it. This project shows how technology can make voting easier.
Keep practicing to improve your skills. Try different ideas to make your machine better. This simple guide can start your journey in electronics. Enjoy creating and learning step by step!