How Do You Troubleshoot Electronic Components: Expert Tips Revealed
Have you ever faced a stubborn electronic device that just won’t work? Knowing how to troubleshoot electronic components can save you time, money, and frustration.
Imagine quickly pinpointing the problem and fixing it yourself instead of waiting for help or buying a new part. You’ll discover simple steps and tips that make troubleshooting easy—even if you’re not an expert. Ready to take control of your gadgets and bring them back to life?
Let’s dive in and unlock the secrets to effective electronic troubleshooting.

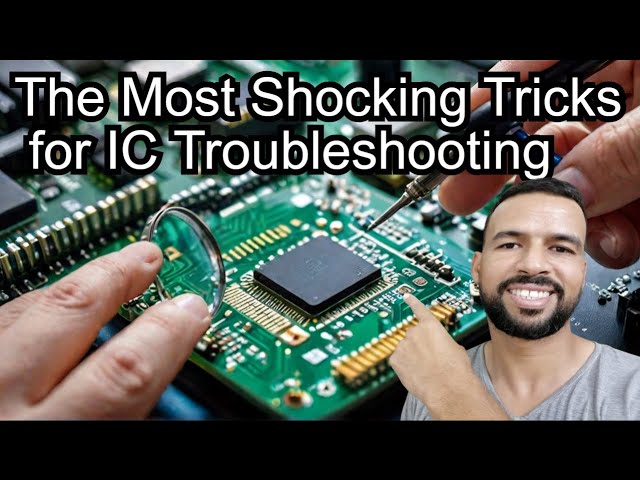
Credit: m.youtube.com
Common Electronic Component Issues
Electronic components can fail or underperform for a variety of reasons, and recognizing these common issues is your first step toward effective troubleshooting. Faulty parts can cause everything from minor glitches to complete device failure. Understanding what to look for helps you save time and avoid unnecessary replacements.
Identifying Faulty Components
Faulty components often reveal themselves through unusual device behavior. You might notice inconsistent performance, unexpected resets, or complete non-responsiveness. Sometimes, a simple visual inspection uncovers the problem—look for burnt marks, bulging capacitors, or broken pins.
Using a multimeter can quickly confirm your suspicions by testing resistance, voltage, and continuity. If a resistor reads open or a capacitor shows a short circuit, you’ve likely found the culprit. Have you ever spent hours chasing a software issue only to discover a tiny cracked solder joint was the real problem?
Signs Of Wear And Tear
Wear and tear on electronic parts is more common than many realize. Heat buildup causes solder joints to crack and components to degrade over time. Dust and moisture also accelerate corrosion, leading to poor electrical connections.
Check connectors for looseness and look for discoloration or corrosion on pins. Capacitors can bulge or leak electrolyte, which is a clear sign they need replacement. Recognizing these signs early can prevent further damage and keep your device running smoothly.

Credit: www.allpcb.com
Essential Tools For Troubleshooting
Troubleshooting electronic components requires the right set of tools. These tools help identify problems and measure electrical signals accurately. Using proper equipment saves time and prevents damage.
Essential tools range from simple meters to advanced devices. Each tool serves a specific purpose during the diagnosis process. Learning to use them correctly improves repair success.
Multimeters And Their Uses
Multimeters measure voltage, current, and resistance. They help check if a component is working. Digital multimeters show readings clearly on a screen. Some models also test continuity and diode function.
They are portable and easy to use. Multimeters detect open circuits and short circuits quickly. Testing batteries and power supplies is simple with them.
Oscilloscopes For Signal Analysis
Oscilloscopes display electrical signals as waveforms on a screen. They show signal shape, frequency, and amplitude in real-time. This helps find noise, distortion, or missing signals.
Engineers use oscilloscopes to analyze complex circuits. They reveal problems that multimeters cannot detect. Using an oscilloscope requires basic knowledge of waveforms.
Soldering Tools And Techniques
Soldering irons join electronic parts with melted metal. Good soldering ensures strong electrical connections. Using the right temperature prevents damage to components.
Tools include soldering irons, solder wire, and desoldering pumps. Proper techniques avoid cold joints and shorts. Practicing steady hand movements improves solder quality.
Step-by-step Troubleshooting Process
Troubleshooting electronic components requires a clear and organized approach. A step-by-step process helps identify problems quickly and accurately. Following simple checks and tests can save time and prevent damage.
Start by observing the component and its surroundings carefully. Then, use basic tools to measure electrical properties. Finally, compare results with expected values to find faults.
Initial Visual Inspection
Begin by examining the component closely. Look for signs of damage such as burn marks, cracks, or corrosion. Check if any parts are loose or missing.
Inspect solder joints for cracks or cold joints. Make sure connectors and wires are firmly attached. A visual check often reveals obvious issues quickly.
Testing For Continuity And Resistance
Use a multimeter to test continuity. This confirms if electrical paths are complete. Place the probes on each end of a circuit or component.
Measure resistance to check for proper values. Compare readings to the component’s specifications. High or infinite resistance indicates a broken connection.
Analyzing Voltage Levels
Power the circuit and measure voltage across points. This helps verify if components receive correct voltage. Use the multimeter set to the correct voltage range.
Check supply voltages and signal levels. Low or missing voltage points to power issues or faulty parts. Record measurements for further analysis.
Advanced Troubleshooting Techniques
Troubleshooting electronic components can often feel like solving a complex puzzle. Advanced techniques help you go beyond simple checks and bring clarity to hidden faults. They give you the tools to pinpoint issues quickly and with precision.
Using Circuit Diagrams
Circuit diagrams are your map through the maze of electronic components. They show you how parts connect and interact, making it easier to identify where a problem might lie.
When you study a diagram closely, you can trace the flow of electricity and spot inconsistencies. Have you ever found a faulty resistor just by following the circuit path visually? It’s a powerful way to focus your testing and save time.
Signal Tracing Methods
Signal tracing helps you follow the actual electrical signals through a circuit. Using tools like oscilloscopes or logic analyzers, you observe signal behavior at various points.
This technique reveals if a signal is missing, distorted, or delayed. You might discover a bad connection or a damaged chip that otherwise looks fine. Do you pay attention to signal timing? It can tell you a lot about component health.
Thermal Imaging For Component Diagnosis
Thermal imaging lets you see heat patterns on a circuit board without touching it. Overheated parts often indicate failure or stress.
Using a thermal camera, you can quickly spot hotspots that escape the naked eye. This method helped me catch a tiny short circuit once, simply by noticing unusual warmth. Could your next troubleshooting session benefit from seeing the heat your components emit?
Preventive Measures And Maintenance
Preventive measures and maintenance play a key role in keeping electronic components working well. Regular care reduces the chance of failure and extends the life of devices. Simple habits can prevent many common problems that cause downtime and costly repairs.
Taking time to maintain and protect components helps avoid troubleshooting issues later. This section highlights important practices for handling, cleaning, and cooling electronics effectively.
Proper Component Handling
Handle electronic parts with care to avoid damage. Static electricity can harm sensitive components. Use anti-static wrist straps or mats when working with circuit boards. Always hold parts by the edges, not the pins or soldered areas. Avoid dropping or bending components as this can break tiny connections inside.
Routine Cleaning And Inspection
Dust and dirt buildup can cause overheating and shorts. Clean devices regularly using soft brushes or compressed air. Check for loose connections, burnt marks, or corrosion during inspections. Replace any damaged parts immediately to maintain reliability. Keep the workspace clean to reduce contamination risks.
Ensuring Adequate Ventilation
Electronics generate heat during operation. Proper airflow prevents overheating and extends component life. Avoid blocking vents or fans on devices. Use cooling fans or heat sinks if necessary to improve air circulation. Position devices in open areas away from heat sources for best results.
Expert Tips For Efficient Troubleshooting
Troubleshooting electronic components can quickly become overwhelming without the right approach. Expert technicians know that efficiency is key—not just speed. You want to identify issues accurately and fix them with minimal guesswork.
Here are some practical tips to sharpen your troubleshooting skills and save time during your next project.
Keeping A Troubleshooting Log
Have you ever fixed a tricky circuit only to forget exactly what you did? A troubleshooting log helps you track each step, the symptoms observed, tests performed, and results obtained. This record becomes invaluable for future reference.
Use a simple notebook or digital tool to jot down:
- The component or section tested
- Tools and methods used
- Any changes made
- Outcome of each test
This habit reduces repeated work and helps you spot patterns. I once solved a recurring fault by reviewing my logs and noticing a subtle voltage drop I had missed initially.
Organizing Your Workstation
Clutter can slow you down and increase errors. Keep your workstation tidy with components sorted by type and function. Label storage bins clearly and arrange tools within easy reach.
Consider these organization tips:
- Use anti-static mats to protect sensitive parts
- Keep frequently used tools like multimeters and soldering irons nearby
- Set aside a dedicated area for testing circuits
A well-organized space not only saves time but also reduces frustration. You’ll spend less time hunting for parts and more time fixing problems.
Continuous Learning And Skill Enhancement
Technology evolves fast, and so should your skills. Stay curious and take time to learn new testing techniques, read datasheets, and understand component behaviors better. This knowledge will make your troubleshooting sharper.
Ask yourself regularly: What new tools or methods could help me diagnose faster? Watching tutorials, attending workshops, or joining electronics forums can expose you to fresh ideas.
One simple change I made was learning to use an oscilloscope more effectively, which helped me catch intermittent faults that a multimeter missed. What could you learn today to improve your next troubleshooting session?

Credit: www.youtube.com
Frequently Asked Questions
How Do I Identify Faulty Electronic Components?
Use a multimeter to test voltage, current, and resistance. Check for physical damage like burns or cracks. Compare readings with component specifications to find faults quickly.
What Tools Are Essential For Troubleshooting Electronics?
A multimeter, oscilloscope, soldering iron, and screwdriver set are essential. These tools help measure signals, repair connections, and inspect components efficiently.
How Can I Test A Resistor Accurately?
Set your multimeter to the resistance mode. Disconnect the resistor from the circuit. Measure resistance and compare it with its color code or datasheet value.
Why Won’t My Circuit Power On?
Check power supply connections and voltage levels. Inspect fuses, switches, and batteries. Faulty connections or dead power sources often cause power issues.
Conclusion
Troubleshooting electronic components takes patience and practice. Start by checking simple parts first. Use the right tools for accurate tests. Always follow safety steps to avoid damage. Understanding basic circuit functions helps a lot. Step-by-step checks make problems easier to find.
Keep notes to track what you tested. With time, you will gain more confidence. Stay calm and work carefully through each step. Troubleshooting becomes easier with each attempt. Keep learning and improving your skills every day.