How to Make Electronics Components at Home: Easy DIY Guide
Have you ever wondered if you could create your own electronic components right at home? Imagine the satisfaction of building parts with your own hands, saving money, and understanding how things really work.
Whether you’re a hobbyist, a student, or just curious, this guide will show you simple steps to make basic electronic components without needing expensive tools or a lab. By the end, you’ll feel confident to start your own projects and bring your ideas to life.
Ready to unlock the secrets of electronics? Let’s dive in!
Essential Tools And Materials
Creating electronic components at home requires specific tools and materials. These essentials help you build circuits safely and accurately. Having the right equipment makes the process easier and more enjoyable.
Basic Tools For Diy Electronics
- Soldering iron – for joining wires and components
- Wire cutters – to trim wires to the right length
- Needle-nose pliers – to bend and hold small parts
- Multimeter – to measure voltage, current, and resistance
- Screwdrivers – for assembling and adjusting parts
- Helping hands – to hold components steady while working
- Desoldering pump – to remove solder if needed
Commonly Used Materials
- Resistors – to control electrical current
- Capacitors – to store and release electrical energy
- Diodes – to allow current in one direction only
- Transistors – to switch or amplify signals
- Printed circuit boards (PCBs) – as the base for circuits
- Wires – to connect components
- Solder – to join metal parts together

Credit: www.homemade-circuits.com
Safety Precautions
Working with electronic components at home requires careful attention to safety. Small mistakes can cause electric shocks, burns, or damage to parts. Taking proper safety measures protects both you and your equipment. Always prepare your workspace and tools before starting any project.
Handling Electrical Components
Always turn off power before touching any component. Avoid working with wet hands or in damp areas. Use tools with insulated handles to prevent shocks. Never force parts into place; check for correct fit and orientation. Store components in anti-static bags to avoid damage. Keep your workspace clean and organized to reduce accidents.
Protective Gear Recommendations
- Wear safety glasses to protect your eyes from sparks or debris.
- Use gloves made for electrical work to avoid shocks and cuts.
- Wear a mask if soldering to avoid inhaling fumes.
- Use an anti-static wrist strap to prevent static damage to components.
- Wear closed-toe shoes to protect your feet from dropped tools or parts.
Creating Resistors
Creating resistors at home allows you to understand basic electronics deeply. Resistors control electric current and protect sensitive parts. Making your own helps learn how resistance works and customize values.
With simple materials and careful steps, you can build small resistors. This process is rewarding and educational for beginners and hobbyists. Below are the materials needed and the step-by-step guide to assemble resistors.
Materials Needed For Resistors
- Carbon film or graphite pencil lead
- Ceramic or plastic base (small board or strip)
- Thin copper wire
- Soldering iron and solder
- Multimeter to measure resistance
- Sandpaper for surface preparation
- Insulating tape or varnish
- Scissors or cutting tool
Step-by-step Assembly
- Prepare the base by cleaning it with sandpaper.
- Draw a thin, uniform line using the graphite pencil on the base.
- Measure the resistance of the graphite line with a multimeter.
- Adjust the length or thickness of the line to get desired resistance.
- Attach copper wires at both ends of the graphite line using solder.
- Check connections for firmness and measure resistance again.
- Cover the resistor with insulating tape or varnish to protect it.
- Let the protective layer dry completely before use.
Building Capacitors
Building capacitors at home is a fascinating way to deepen your understanding of electronics and save money on small projects. Capacitors store electrical energy, and making them yourself can be surprisingly simple with everyday materials. This hands-on process also allows you to customize capacitance values for your specific needs.
Types Of Diy Capacitors
There are several types of capacitors you can build at home, each suited for different applications.
- Parallel Plate Capacitors:These use two conductive plates separated by an insulating material, known as the dielectric. You can use aluminum foil for plates and paper or plastic as the dielectric.
- Roll Capacitors:By rolling up layers of foil and dielectric, you increase the surface area, boosting capacitance without increasing size. This design is compact and often used in homemade radios.
- Water Capacitors:Using water as the dielectric between two metal plates creates a unique capacitor. It’s a fun experiment but less stable for practical circuits.
Which type fits your project depends on how much capacitance you need and the space you have available.
Assembly Instructions
Gather materials like aluminum foil, wax paper, or plastic sheets, scissors, and electrical tape before you start.
- Cut two equal-sized pieces of aluminum foil to serve as your capacitor plates.
- Place a piece of wax paper or plastic sheet between the two foil pieces. This acts as the dielectric layer.
- Carefully stack the layers so that the foil pieces do not touch each other, then press them together firmly.
- Roll the layered stack tightly if you want to create a roll capacitor. Secure it with tape to keep it from unrolling.
- Attach wires to each foil plate using conductive tape or soldering, ensuring a good connection.
- Test the capacitor with a multimeter set to measure capacitance, adjusting your design if necessary.
Have you ever tried adjusting the thickness of the dielectric or the size of the plates? You’ll notice how these changes directly affect the capacitor’s performance. Experimenting with these variables can teach you a lot about how capacitors really work.
Constructing Inductors
Constructing inductors at home is a simple and rewarding project. Inductors store energy in a magnetic field when electricity flows through them. They are key parts in radios, filters, and power supplies. Making your own inductors lets you customize size and strength.
Materials And Tools
- Copper wire (enameled or insulated)
- Core material (ferrite rod or air core)
- Wire cutters and strippers
- Soldering iron and solder
- Multimeter or LCR meter for testing
- Measuring tape or ruler
- Adhesive tape or glue
Winding And Testing Process
Start by choosing the core. Ferrite rods increase inductance; air cores suit high frequencies.
Wrap the copper wire tightly around the core. Count each turn carefully. More turns mean higher inductance.
Keep the coils neat and close together. Secure the ends with tape or glue to avoid unraveling.
Strip the wire ends to expose metal. Connect the ends to your circuit or testing tool.
Use a multimeter or LCR meter to check inductance. Adjust the number of turns to reach desired value.
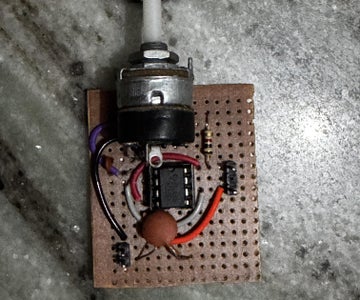
Credit: www.instructables.com
Making Diodes
Making diodes at home might sound complex, but it’s surprisingly doable with the right materials and approach. Diodes are essential components that allow current to flow in only one direction, and crafting your own helps you understand their function deeply. Have you ever wondered how a simple piece of silicon can control electrical flow? Let’s break down the process so you can try it yourself.
Materials For Diy Diodes
Start by gathering these basic items:
- Silicon wafer or a small piece of silicon– the core semiconductor material.
- Copper wire– to make electrical connections.
- Graphite pencil– for applying dopants like carbon.
- Light source– sometimes needed to activate the diode.
- Multimeter– to test your diode’s behavior.
- Heat source– such as a lighter or soldering iron for annealing.
These materials are simple and easy to find, even if you don’t have a fully equipped electronics lab. Using a graphite pencil as a dopant may surprise you, but it introduces impurities to the silicon, creating the p-n junction vital for diode function.
Fabrication Steps
Start by cleaning your silicon piece thoroughly to remove any dirt or oils. Cleanliness affects how well your diode will work.
Use the graphite pencil to draw a thick line on one side of the silicon. This step adds impurities, turning that area into the p-type semiconductor.
Next, connect the copper wire carefully to both the graphite-coated and the bare sides of the silicon. Make sure these connections are secure but gentle to avoid breaking the wafer.
Apply heat gently to the silicon piece for a few minutes. This process helps the impurities settle properly, forming a stable junction.
Once cooled, test your diode with the multimeter by checking resistance in both directions. You should see low resistance in one direction and high resistance in the other, confirming your diode is working.
Have you tried testing the diode under different light conditions? Some homemade diodes respond better in the presence of light, which can be an interesting experiment to expand your understanding.
Assembling Transistors
Assembling transistors at home is a rewarding project that brings you closer to understanding how your electronic devices work. By putting together these tiny components, you gain hands-on experience that can boost your confidence in electronics. Plus, it’s a practical skill that can help you repair or create your own gadgets.
Components Required
- Semiconductor material:Typically silicon or germanium wafers, which form the base of the transistor.
- Metal contacts:Thin strips of metal like aluminum or gold for creating electrical connections.
- Insulating layer:Materials such as silicon dioxide to separate different layers.
- Soldering tools:Solder wire and a fine-tipped soldering iron for assembling parts.
- Fine tweezers and magnifier:To handle tiny components with precision.
- Multimeter:For testing the assembled transistor’s electrical properties.
Gathering these components can be straightforward if you have access to basic electronics stores or online suppliers. Make sure your soldering iron is well-calibrated to avoid damaging delicate parts.
Assembly Process
Start by preparing your semiconductor wafer. Clean it thoroughly to remove any dust or oils that could interfere with the assembly.
Next, carefully apply the metal contacts. Use tweezers to place them precisely where the transistor’s base, collector, and emitter will be. This step requires steady hands and patience.
Once the contacts are in place, add the insulating layer between sections that must not touch. This prevents unwanted electrical shorts and ensures proper transistor function.
After assembling these layers, solder the metal contacts to external wires or circuit boards. Check your work frequently with a multimeter to ensure continuity and correct resistance values.
Have you noticed how small errors in positioning can change the transistor’s behavior? This teaches you the value of precision in electronics. Don’t rush—take time to verify each connection before moving on.

Credit: www.youtube.com
Tips For Testing And Troubleshooting
Testing and troubleshooting electronic components made at home ensures they work correctly. Careful checks help find faults early. Fixing issues saves time and materials. Understanding how to test and solve problems improves your skills and results.
Common Issues And Fixes
Many problems happen with homemade electronics. Loose connections cause devices to stop working. Cold solder joints create poor electrical contact. Wrong component values lead to wrong outputs. Shorts and open circuits prevent current flow.
- Check all solder joints for cracks or gaps.
- Make sure wires connect tightly and correctly.
- Use correct resistor, capacitor, or transistor values.
- Look for short circuits by inspecting board traces.
- Replace damaged or faulty parts quickly.
Using Multimeters Effectively
A multimeter is a key tool for testing electronics. It measures voltage, current, and resistance. Use it to check if parts work properly. Set the dial to the right mode before testing. Touch probes carefully to the test points.
- Measure voltage across components to verify power supply.
- Check resistance to find broken or shorted parts.
- Test continuity to confirm connections are solid.
- Use diode mode to test LEDs and diodes.
- Always turn off power before measuring resistance or continuity.
Advanced Diy Electronics Projects
Advanced DIY electronics projects push your skills beyond basic circuits and simple soldering. They challenge you to combine multiple components, design custom PCBs, or even program microcontrollers to achieve complex tasks. Tackling these projects not only deepens your understanding but also results in practical devices you can proudly say you built yourself.
Project Ideas For Enthusiasts
- Custom Synthesizer:Build a small analog or digital synthesizer using op-amps, resistors, and a microcontroller. You’ll learn about sound waves, signal processing, and basic programming.
- Home Automation System:Create a system to control lights and appliances via Wi-Fi using ESP8266 or Raspberry Pi. This project combines hardware wiring, software coding, and network setup.
- Wearable Heart Rate Monitor:Use sensors like a pulse sensor with an Arduino to track heart rate. It teaches you about sensors, data collection, and real-time display.
- Mini Robot Car:Assemble a small robot car controlled by Bluetooth or IR remote. This involves motor control, battery management, and wireless communication.
Trying any of these can make you realize how components interact in real life. Have you considered how combining simple parts can create something truly functional?
Resources For Further Learning
- Adafruit Learning System– Tutorials and guides for various electronics projects with clear instructions and parts lists.
- SparkFun Tutorials– Step-by-step lessons focused on sensors, microcontrollers, and circuit design.
- Instructables Electronics– Community-submitted projects with detailed photos and user feedback.
- Electronics Tutorials– Comprehensive site explaining theory and practical circuit building.
Choosing the right resource can speed up your learning and help avoid common mistakes. Which resource aligns best with your current skill level and project goals?
Frequently Asked Questions
What Basic Tools Are Needed To Make Electronics Components?
You need a soldering iron, multimeter, wire cutters, and a breadboard. These tools help you build and test circuits effectively at home.
How Can I Safely Handle Electronic Components At Home?
Always work on an anti-static mat, wear safety goggles, and unplug devices before handling. Proper safety prevents damage and injury.
Which Materials Are Best For Homemade Electronic Components?
Copper wire, resistors, capacitors, and PCB boards are commonly used. Quality materials ensure reliable and functional electronic parts.
Can Beginners Make Functional Electronic Components At Home?
Yes, beginners can start with simple circuits using kits and tutorials. Practice builds skills and confidence in electronics assembly.
Conclusion
Making electronic components at home is both fun and useful. It saves money and helps you understand how devices work. Start with simple parts and tools. Practice often to improve your skills. Stay safe and follow instructions carefully. Enjoy creating your own electronics projects step by step.
This hobby can grow with your knowledge and creativity. Keep learning and experimenting every day. Soon, you will build more complex devices easily. Home-made electronics can open many new opportunities for you. Why not begin today?